Introduction to No Knead Bread
When you think about making bread at home, the idea of kneading dough for what feels like an eternity can be a bit daunting. Enter no knead bread, a game changer for anyone who has ever felt overwhelmed by the process. With just a few simple ingredients and minimal effort, you can create a crusty, flavorful loaf that will make your kitchen smell heavenly.
Why No Knead Bread is a Game Changer
Imagine this: you come home after a long day at work, and all you want is the comforting aroma of freshly baked bread. The best part? You don’t have to spend hours preparing it. The beauty of no knead bread lies in its simplicity. All you have to do is mix flour, water, yeast, and salt—a no-brainer for busy professionals like you and me. This method relies on a long fermentation process to develop the gluten, which means you can achieve that beautiful, airy texture without any heavy lifting.
If you’re curious about the science behind it, here’s a fun fact: this technique was popularized by New York Times food columnist Jim Lahey back in 2006. Lahey’s recipe emphasized that time, not technique, is your best friend. The long resting period allows for incredible flavor development. You can read more about it in articles on Serious Eats and The Kitchn. What’s more, experimenting with your favorite add-ins, like herbs, garlic, or even turkey bacon bits, can take your bread to the next level.
- Minimal Effort: You don’t need to knead; just mix and wait!
- Flexibility: Let the dough rest overnight or even up to 18 hours.
- Endless Customization: Add ingredients to cater to your taste.
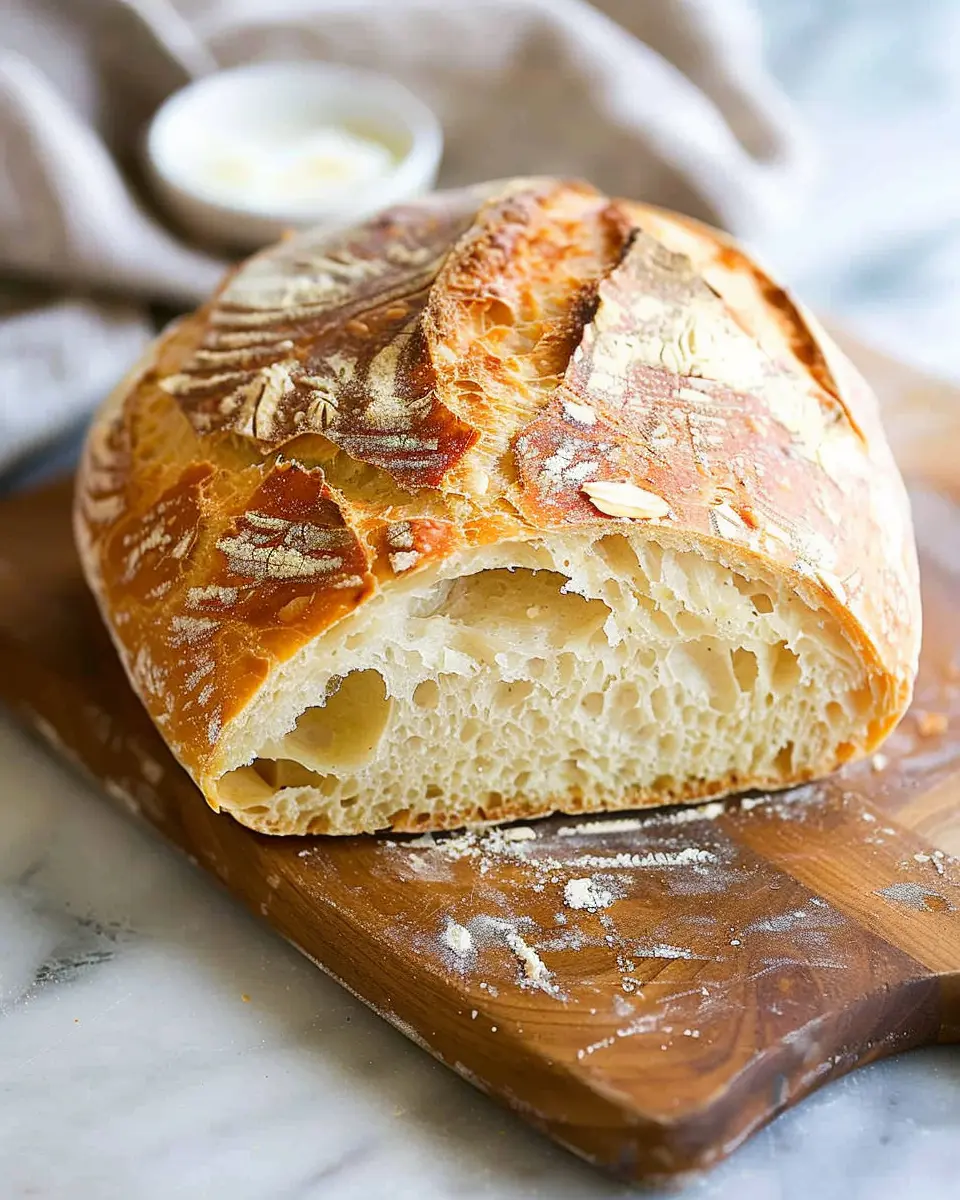
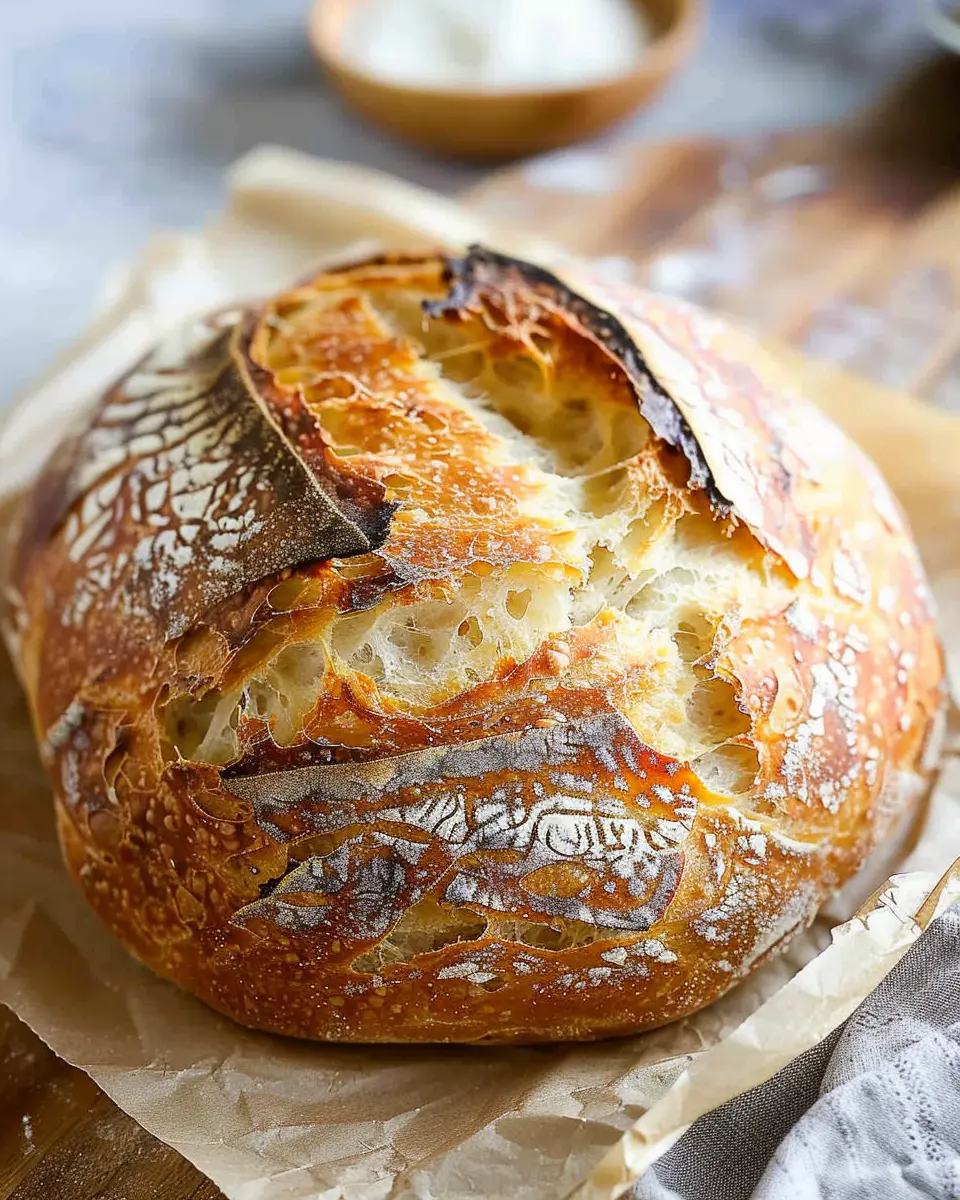
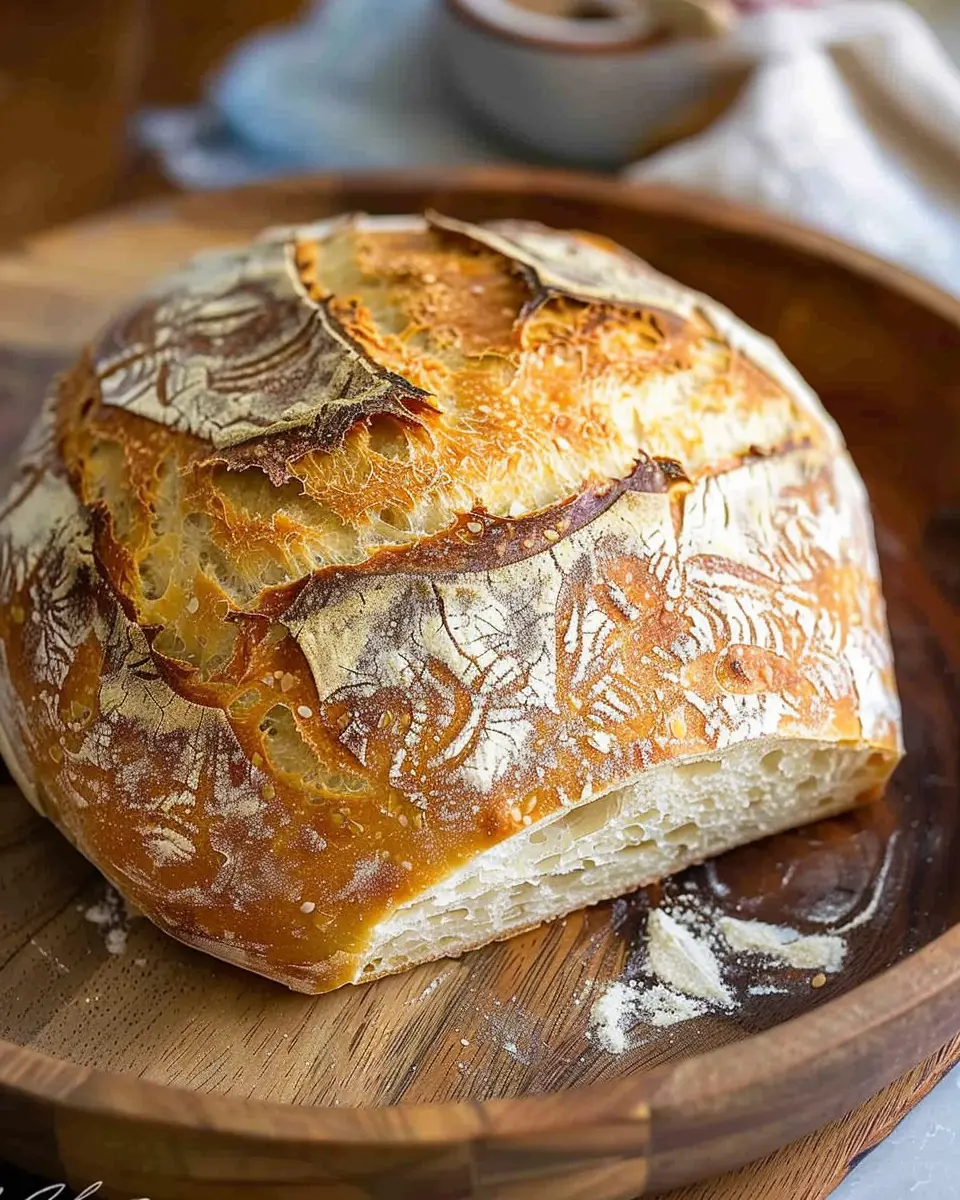
But what truly sets no knead bread apart is its satisfying crunch. The exterior of these loaves turns golden brown while remaining pillowy on the inside. Imagine slicing into that crusty outer layer—how tempting does that sound? It pairs beautifully with soups and salads or even serves as the star of a brunch table with some chicken ham or tasty spreads.
So, if you’re ready to unlock the secret to effortlessly impressive homemade bread, let’s dive into the recipe and make your kitchen the heart of delicious aromas!
Ingredients for No Knead Bread
Creating the perfect no knead bread is all about the right ingredients. Let’s dive into what you need to bake a loaf that’s crusty on the outside and soft on the inside, without any fancy techniques!
Essential ingredients for perfect bread
-
All-purpose flour: A cornerstone of any bread recipe, this provides the structure. For a chewier texture, consider using bread flour, which has a higher protein content.
-
Water: Ideally, use room temperature water. It hydrates the flour and activates the yeast for that lovely rise. Aim for about 1¾ cups to start.
-
Yeast: Instant or active dry yeast works well. Just a little—around ¼ teaspoon—will do to create those delightful bubbles.
-
Salt: Enhances flavor and controls the yeast’s growth. About 1 teaspoon is perfect.
-
Optional additives: Don’t shy away from adding herbs, garlic powder, or even cheese to give it a personal twist!
With these simple ingredients, you’re well on your way to baking a delicious loaf of no knead bread! For more tips on choosing high-quality flour, check out this helpful guide from King Arthur Baking.
Preparing No Knead Bread
Making no knead bread is a rewarding experience that yields a delicious, crusty loaf without the fuss of traditional bread-making techniques. This method focuses on simplicity, allowing anyone to create artisanal bread at home with minimal effort. Let’s walk through the steps to prepare your very own no knead bread—it’s easier than you might think!
Mixing the Dry Ingredients
Start by gathering your ingredients. You’ll need:
- 3 cups all-purpose flour
- 1 teaspoon salt
- 1/4 teaspoon instant yeast
In a large mixing bowl, whisk together the flour, salt, and yeast until evenly combined. The key here is ensuring that the salt and yeast are well mixed, as this helps the dough rise uniformly. Using a whisk also aerates the flour, which is crucial for achieving that light, airy texture that we all love in bread. For more tips on mixing, check out this resource from the King Arthur Baking Company.
Combining with Warm Water
Once your dry ingredients are well-mixed, it’s time to introduce water. Measure out 1 1/2 cups of warm water (ideally around 100°F to 110°F) and pour it into the bowl with your dry mixture.
- Use a wooden spoon or spatula to stir the mixture until it forms a shaggy, sticky dough. Don’t worry about any lumps; they’re perfectly normal.
- The hydration level of your dough is what gives it that great texture, so don’t hold back, even if it seems a bit too wet.
Cover the bowl with plastic wrap or a clean kitchen towel and let it rest for about 12 to 18 hours at room temperature.
The Magic of Rising
During this resting period, a beautiful transformation occurs. The yeast works its magic, causing the dough to bubble and rise. You’ll notice it doubling in size with those alluring air pockets forming throughout, which is what will give your no knead bread its delightful crumb structure.
Once your dough has risen, don’t be alarmed at its sticky consistency—it’s all part of the process! If you’re keen to learn more about the science of yeast and fermentation, I recommend exploring the detailed explanations on Serious Eats.
Shaping the Dough
After a rewarding rise, it’s time to shape your dough. Grab a generous amount of flour and dust your work surface. Turn the dough out onto the floured surface, and sprinkle the top lightly with flour too.
- With floured hands, gently stretch and fold the dough into a rough ball. The goal here is to handle the dough as little as possible while still forming it into a cohesive shape.
- Let your newly shaped dough rest on the floured surface for about 15-30 minutes. This allows the gluten to relax, which makes it easier to transfer to the Dutch oven later.
Preheating the Dutch Oven
Before you bake, it’s essential to preheat your Dutch oven. Place it (with the lid on) in your oven and set it to 450°F. Allow it to heat for at least 30 minutes. This ensures the pot is hot enough to create that perfect crust on your no knead bread.
Baking to Golden Perfection
Carefully remove the heated Dutch oven from the oven (don’t forget your oven mitts!). Gently transfer your dough into the pot. Cover it with the lid and place it back in the oven for 30 minutes.
After 30 minutes, remove the lid to reveal your almost complete loaf. Bake it for an additional 15–20 minutes until the crust is a deep golden brown and your kitchen is filled with that irresistible aroma of freshly baked bread.
If you’ve followed these steps, you’ll end up with a beautiful loaf that looks—and tastes—like it was made by a professional baker. Enjoy your creation with some avocado toast, or alongside a hearty soup. Happy baking!
Variations on No Knead Bread
No knead bread is a canvas for creativity in the kitchen. With just a few tweaks, you can elevate your loaf and impress your friends. Let’s explore some delightful variations you can easily whip up!
Herbed and Garlic-Infused Bread
Imagine the aroma of herbs and garlic wafting through your kitchen. To create this delicious variation, simply mix in your favorite dried herbs—like rosemary or thyme—along with minced garlic (or even garlic powder) into your dough. The combination adds a savory twist that pairs perfectly with soups or as a side for a casual dinner.
For a quick guide, consider browsing through American Thyme for some herb inspiration and techniques!
Cheese and Jalapeño Twist
If you’re in the mood for something a little bolder, why not spice things up with a cheese and jalapeño twist? Incorporate shredded cheese—like sharp cheddar or pepper jack—into your dough, along with finely chopped jalapeños. This variation turns your no knead bread into a delicious snack or appetizer, perfect for sharing during game nights.
Whole Wheat Variation
For a heartier option, switch up your flour to whole wheat. This variation not only adds a nutty flavor but enhances the nutritional profile as well. Whole grains are packed with fiber and can be beneficial for digestion, making this a smart choice for health-conscious bakers.
Final Thoughts
Each of these variations on your no knead bread can help you showcase your culinary flair while keeping it simple. So next time you’re whipping up a batch, consider trying one of these delicious ideas! Whether you’re hosting friends or just treating yourself, these recipes are sure to impress.
Cooking Tips and Notes for No Knead Bread
Importance of Hydration
For perfect no knead bread, hydration is crucial. Using a higher water content helps create steam in the oven, resulting in a beautiful, crusty loaf. Aim for a dough that feels sticky and wet; don’t worry, this is intentional! The flour will absorb moisture as it rests, making it easier to handle once risen. If you’re unsure, take a look at hydration tips from resources like King Arthur Flour for greater insight.
Ensuring the Right Rising Temperature
Temperature plays a big role in how well your dough rises. Ideally, your dough should be placed in a warm spot, around 70-75°F (21-24°C). This encourages yeast activity, leading to a fluffy texture. If your kitchen feels chilly, try placing the bowl in the oven with the light turned on, or near a radiator.
Troubleshooting Sticky Dough
Stuck with a sticky mess? Don’t fret! If your dough feels too wet after the first rise, sprinkle a bit of flour on your work surface to help manage it. Remember, a little extra flour can make a difference, but too much may lead to denser bread. If you need more guidance, check out community tips on no knead bread forums where bakers share their experiences.
With these tips, you’ll be well on your way to mastering the art of no knead bread! Happy baking!

Serving Suggestions for No Knead Bread
Pairing with Soups and Salads
Nothing beats the comforting combination of no knead bread with a warm bowl of soup or a fresh salad. The crusty exterior and soft interior make it an ideal accompaniment, soaking up flavors without falling apart. If you’re enjoying a hearty chili or a creamy tomato soup, tear off a piece to dip and savor the moment. For salads, try a light vinaigrette or citrus-based dressing to complement the bread’s texture.
Spreading Some Homemade Butter
Imagine slathering a warm slice of no knead bread with homemade butter. It’s a simple pleasure that elevates your bread experience tenfold. Consider adding a sprinkle of sea salt or fresh herbs to your butter for an extra burst of flavor. This delightful treat pairs well with breakfast or as a snack in the afternoon.
Perfect for a Sandwich Base
The versatility of no knead bread shines through when used as a sandwich base. Whether you’re loading it with turkey bacon, chicken ham, or fresh veggies, the sturdy slices hold everything together beautifully. With some creativity, you can turn simple ingredients into a gourmet meal.
If you’re looking for more sandwich ideas, check out this guide on building the perfect sandwich. Enjoy exploring the many ways to savor your no knead bread!
Time Breakdown for No Knead Bread
Preparation time
Making no knead bread is a breeze! You’ll spend about 10-15 minutes gathering your ingredients and mixing them together. It’s perfect for those busy days when you want fresh bread without the fuss.
Rising time
The magic of this recipe lies in its long rising time. Just let the dough sit for 12-18 hours at room temperature. This allows the flavors to develop beautifully and gives you that rustic texture we all love. If you’re interested in the science behind bread fermentation, check out resources from the Bread Lab.
Baking time
When it comes time to bake your no knead bread, you’ll dedicate around 30-40 minutes in the oven. Keep an eye on the crust; it should be golden brown!
Total time
In total, prepare for about 12-18 hours plus 30-40 minutes for baking. While the wait might seem long, the result is a delicious, homemade loaf that’s perfect for sandwiches or simply slathered with butter. Have you ever made your own bread before? The satisfaction is unbeatable!
Nutritional Facts for No Knead Bread
Calories per slice
When making no knead bread, each slice typically contains about 80-100 calories. This makes it a satisfying option without overwhelming your daily intake. Keep in mind that toppings and spreads will impact the total calorie count, so consider options like avocado or turkey bacon for a nutritious pairing.
Key nutrients
This homemade bread is not just about calories; it’s packed with essential nutrients. You’ll find significant amounts of:
- Carbohydrates: for energy
- Protein: vital for muscle repair and growth
- Fiber: which aids digestion
For an in-depth look at the benefits of whole grains, check out resources from the Whole Grains Council.
Health benefits of homemade bread
Making your own no knead bread offers more than just great taste. Homemade bread allows you to control ingredients, including reducing preservatives and opting for whole grain flour, enhancing nutritional value. Plus, the thrill of fresh bread can boost your mood! Experiencing the aroma wafting through your kitchen? That’s pure joy.
For more insights on the health advantages of cooking at home, explore this article from the Harvard T.H. Chan School of Public Health. It’s time to enjoy those simple yet profound benefits of homemade goodness!
FAQs about No Knead Bread
Can I use different types of flour?
Absolutely! One of the wonderful aspects of no knead bread is its versatility. While all-purpose flour is a great choice, you can experiment with other flours like whole wheat, rye, or even gluten-free alternatives. Just keep in mind that different flours may absorb moisture differently, so you might need to adjust the water content to achieve the right dough consistency. For a deeper dive, check out King Arthur Baking’s Flour Guide for some expert tips.
How do I store leftover bread?
Storing your no knead bread properly is key to keeping it fresh. If you have leftovers (though let’s be honest, it’s often hard to resist!), here’s how to do it right:
- Room Temperature: Wrap the bread in a clean kitchen towel and place it in a bread box or a paper bag. This helps maintain a bit of moisture without making it soggy.
- Longer Storage: For longer shelf life, slice the bread and freeze it in an airtight bag or container. This way, you can toast slices directly from the freezer, enjoying that freshly baked taste anytime!
What if I don’t have a Dutch oven?
No worries! While a Dutch oven is fantastic for baking no knead bread, it’s not your only option. You can use any oven-safe pot with a lid or even a baking sheet. If using a baking sheet, create steam in your oven by placing a pan of hot water on the bottom rack, which helps develop a lovely crust. There are plenty of resources available to guide you through these techniques, like this helpful tutorial on The Kitchn.
With these FAQs, you’re now even better equipped to whip up the perfect loaf of no knead bread! Happy baking!
Conclusion on No Knead Bread
Embracing the Joy of Homemade Bread
In a world where convenience often trumps tradition, making your own no knead bread can be a refreshing experience. Picture this: waking up to the aroma of freshly baked bread wafting through your kitchen. It’s not just about the flavor; it’s about the joy of creating something with your own hands. Plus, with this simple method, you can impress your friends and family without dedicating hours to kneading.
Once you master this technique, the possibilities are endless—try adding herbs, garlic, or even a sprinkle of cheese. Share your creations, and don’t forget to check out resources like The Bread Baker’s Guild for more tips. What delightful twist will you put on your next loaf?
PrintNo Knead Bread: The Easiest Recipe for Homemade Freshness
Discover the simplicity of making fresh bread at home with this no knead recipe. Perfect for beginners!
- Prep Time: 15 minutes
- Cook Time: 45 minutes
- Total Time: 12-18 hours (including resting time)
- Yield: 1 loaf 1x
- Category: Bread
- Method: Baking
- Cuisine: American
- Diet: Vegetarian
Ingredients
- 3 cups all-purpose flour
- 1 teaspoon salt
- 1/4 teaspoon instant yeast
- 1 1/2 cups lukewarm water
Instructions
- In a large bowl, mix together the flour, salt, and yeast.
- Add the lukewarm water and stir until a shaggy dough forms.
- Cover the bowl with plastic wrap and let it rest for 12 to 18 hours at room temperature.
- Once the dough has risen, flour a work surface and turn the dough onto it.
- Fold the dough over onto itself a couple of times and let it rest for 15 minutes.
- Preheat the oven to 450°F (232°C) with a Dutch oven inside it.
- Place the dough in the hot Dutch oven, cover it, and bake for 30 minutes.
- Remove the lid and bake for an additional 15 minutes until the bread is golden brown.
- Let the bread cool on a wire rack before slicing.
Notes
- For a crunchier crust, let the bread sit in the oven for a few extra minutes.
- Experiment with adding herbs or spices to the dough for additional flavor.
Nutrition
- Serving Size: 1 slice
- Calories: 150
- Sugar: 0g
- Sodium: 300mg
- Fat: 0.5g
- Saturated Fat: 0g
- Unsaturated Fat: 0.5g
- Trans Fat: 0g
- Carbohydrates: 32g
- Fiber: 1g
- Protein: 5g
- Cholesterol: 0mg
Keywords: No Knead Bread