Introduction to Marbled Sugar Cookies
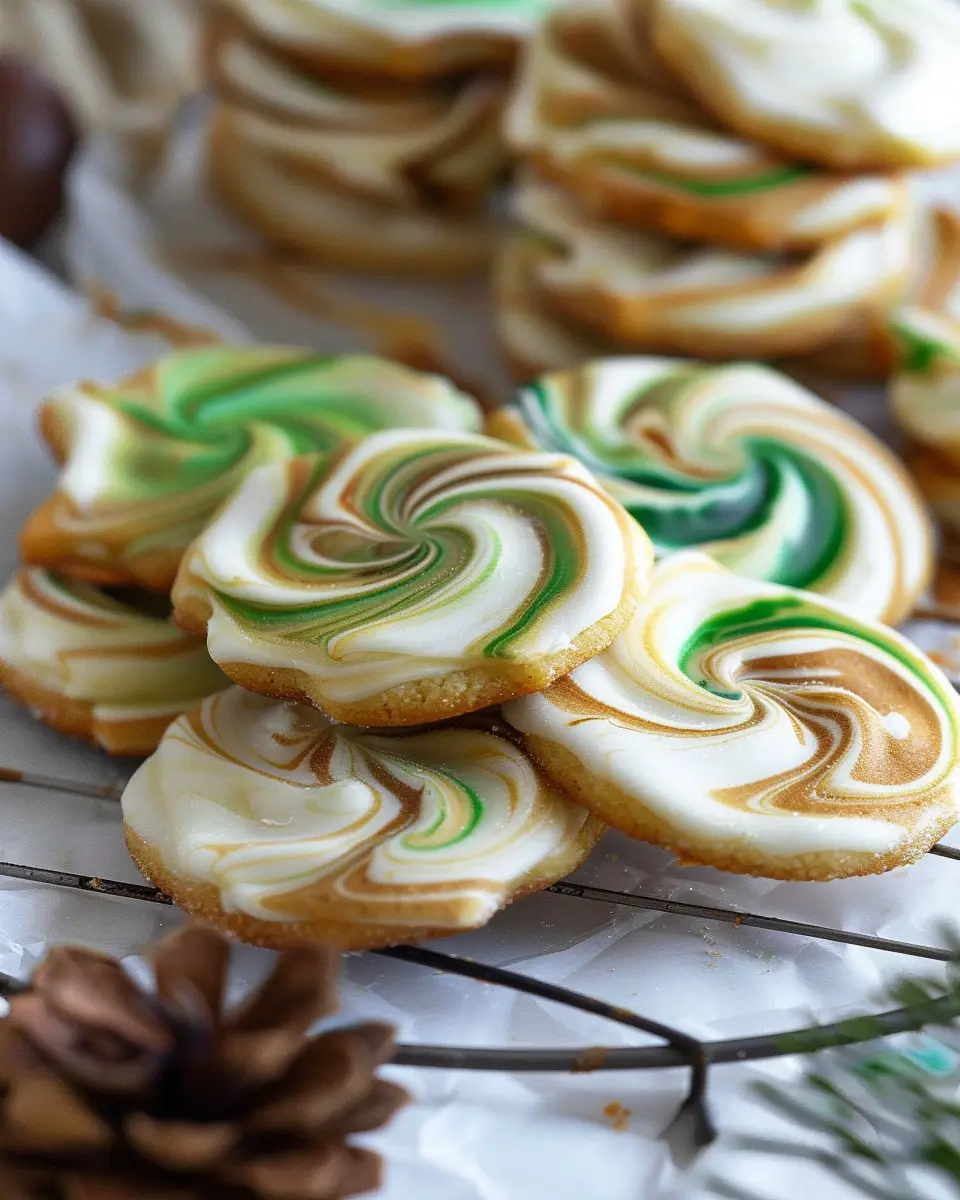
Marbled sugar cookies are not only a delightful treat but also a fun and creative outlet for young professionals. Whether you’re looking to impress your coworkers at the next office potluck or simply want to unwind after a long week, these cookies bring a splash of color—and a whole lot of joy—to your baking adventures. The blend of flavors and the visual appeal of marbling turn a classic cookie into a work of art!
Why Are Marbled Sugar Cookies a Fun Choice for Young Professionals?
Marbled sugar cookies are the perfect choice for anyone juggling a busy lifestyle. They’re simple enough to whip up during a weekend, yet sophisticated enough to impress when shared with friends or colleagues. Here are a few reasons why they stand out:
-
Creative Expression: The marbling technique allows you to unleash your inner artist. You can experiment with colors and flavor combinations to reflect your personality. Use food coloring to create vibrant designs and mix flavors like almond, lemon, or even matcha!
-
Quick and Simple: With a basic sugar cookie recipe, the marbling process adds just a little extra time without turning it into a labor-intensive project. Plus, you typically have most of the ingredients already in your pantry.
-
Great for Sharing: Whether you’re creating a batch for a holiday party or a casual get-together, marbled sugar cookies always catch the eye. Their aesthetics create a talking point, inviting compliments from friends and coworkers alike.
-
Stress Reliever: Baking can be therapeutic. The rhythmic process of mixing and decorating can help alleviate stress, making marbled sugar cookies a perfect pick-me-up after a hectic week.
If you’re unfamiliar with the technique of marbling, don’t worry! There are plenty of tutorials available online that can guide you through the process, turning what may seem like an advanced skill into a fun and achievable goal. Check out resources like Food Network or BBC Good Food for visual aids that will inspire your inner baker.
In essence, marbled sugar cookies offer an enjoyable way to blend fun with functionality—perfect for young professionals seeking a balance in their busy lives while adding a touch of sweetness to everyday moments.
Ingredients for Marbled Sugar Cookies
Creating delightful marbled sugar cookies is easier than you might think! Let’s break down the essential ingredients you’ll need to whip up a batch that’s as visually striking as it is delicious.
Essential ingredients for the cookie dough
For the base of your marbled sugar cookies, gather these components:
- 2 ¾ cups all-purpose flour: This forms the structure of your cookies.
- 1 teaspoon baking powder: To ensure your cookies rise beautifully.
- ½ teaspoon salt: Just a pinch to enhance the flavors.
- 1 cup unsalted butter, softened: The creaminess you crave.
- 1 ½ cups granulated sugar: The sweet foundation of your dough.
- 1 large egg: This adds richness and binds everything together.
- 1 teaspoon vanilla extract: For that lovely aroma and taste.
These ingredients combine to create a soft and tender cookie that serves as the perfect canvas for your marbled design!
Ingredients for the marbled royal icing
Now, let’s talk frosting! To take your marbled sugar cookies to the next level, you’ll need these items for a standout royal icing:
- 2 egg whites or 4 tablespoons meringue powder: The base for your icing.
- 4 cups powdered sugar: This provides sweetness and a fine texture.
- 1 teaspoon extract of your choice (like almond or vanilla): To enhance the taste.
- Food coloring: Get ready to swirl! Opt for your favorite shades that complement your cookies.
With these ingredients at hand, you’re set to create gorgeous marbled patterns that will impress anyone lucky enough to get a taste. Ready to start baking? Check out more about royal icing techniques on Craftsy.
Step-by-step Preparation of Marbled Sugar Cookies
Creating the perfect batch of marbled sugar cookies is not just about following a recipe; it’s about experiencing the joy of baking! Today, I’m going to guide you through each step of the process, ensuring you have a delightful cookie experience from start to finish. Let’s dive in!
Cream the butter and cream cheese
Start by bringing your butter and cream cheese to room temperature. Trust me; this makes a world of difference! Once they’re soft, combine them in a mixing bowl. Using a hand mixer or a stand mixer, beat them together until the mixture is creamy and fluffy. This usually takes about 2-3 minutes, and you’ll know it’s ready when it looks light and pale in color. The cream cheese adds a subtle tanginess that truly elevates these marbled sugar cookies.
Incorporate sugar and egg
Once your butter and cream cheese are ready, it’s time to add the sugar. Pour in granulated sugar and mix until combined. This will help to create that beautiful texture we’re after. Then, crack an egg into the mixture, beating well after each addition. Incorporating these ingredients thoroughly ensures that your cookies will hold their shape while baking. It’s all about that balance!
Combine dry and wet ingredients
Meanwhile, in a separate bowl, mix your dry ingredients: flour, baking powder, and a pinch of salt. Whisk to aerate the flour and combine well. Slowly add these dry ingredients to the creamy mixture. Mix gently, either with a spatula or on low speed using your mixer, until just combined. Be careful not to overmix; we want a tender cookie here!
Chill the dough
This step is crucial. Wrap your dough in plastic wrap and let it chill in the refrigerator for at least an hour. Chilling allows the flour to absorb moisture, making your cookies easier to shape and firmer when baked. If you’re wondering why chilling matters, it’s also essential for flavor development! Go ahead and use this time to prepare your favorite hot drink or blast your favorite tunes to get that kitchen energy going.
Roll out and cut cookie shapes
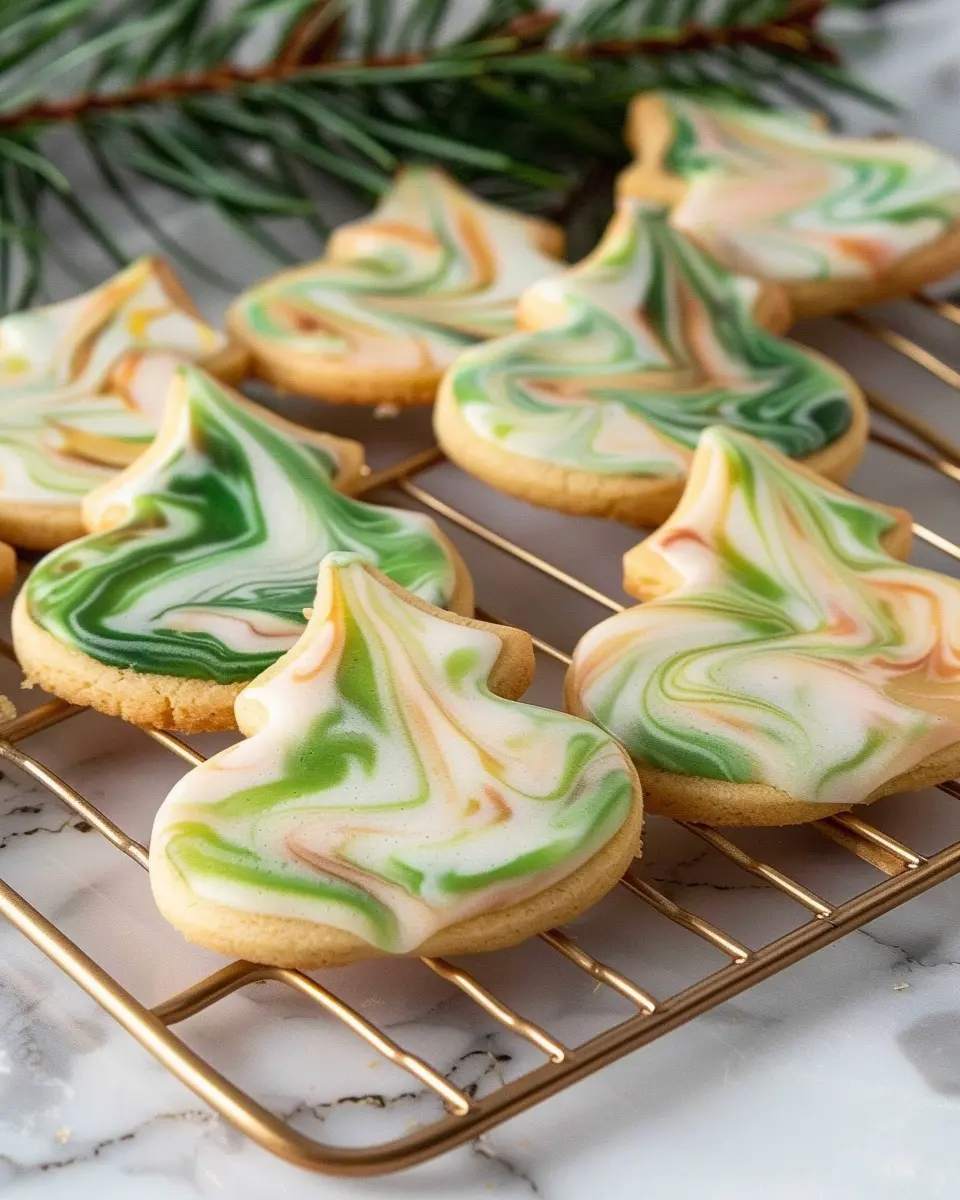
Once chilled, it’s time for the fun part! Dust your work surface and rolling pin with flour to prevent sticking. Take a portion of the dough and roll it out to about 1/4 inch thick. You can use cookie cutters to create fun shapes or simply slice them into squares. The marbled effect will come later, so keep these shapes simple for now!
Bake the cookies
Preheat your oven to 350°F (175°C). Line a baking sheet with parchment paper. Place your cut-out cookies on the sheet, leaving enough space between them for expansion. Bake for 8-10 minutes or until the edges are lightly golden. Keep an eye on them; nothing is worse than burnt cookies! Once done, allow them to cool completely on a wire rack.
Make the marbled royal icing
While the cookies cool, prepare your marbled royal icing. In a bowl, mix powdered sugar with egg whites, whisking until smooth and glossy. To create your marbled effect, divide the icing into two bowls and color them with food coloring of your choice. Using a toothpick, swirl the colors together without fully mixing them—this will give that beautiful marbled appearance when you pipe it onto your cookies. If you want a detailed royal icing recipe, check out this resource from the American Egg Board.
Decorate the cookies
Once your icing is ready, it’s time to decorate! Dip the cookies into icing, or use a piping bag to create patterns. The marbling should be evident as the colors blend beautifully on each cookie. Let the icing set for a few hours before serving—trust me, the wait is worth it!
With these steps, you’ll have a batch of delightful marbled sugar cookies that not only look stunning but taste incredible as well. Enjoy your baking adventure and get ready to impress your friends and family with these unique treats!

Variations on Marbled Sugar Cookies
Using Different Extracts for Flavor Twists
Marbled sugar cookies are not just visually stunning; they can also pack a flavorful punch! By incorporating various extracts, you can easily transform your cookie experience. Here are some intriguing options:
- Almond Extract: A drop or two can lend a warm nutty flavor that beautifully complements the sweetness.
- Lemon Extract: For a fresh, zesty twist, lemon extract can enliven your cookies, making them perfect for a summer gathering.
- Peppermint Extract: This is a fantastic choice during the winter months, giving your marbled sugar cookies a festive kick.
Experimenting with these extracts can open up a world of flavor possibilities, so don’t be shy!
Experimenting with Food Coloring Combinations
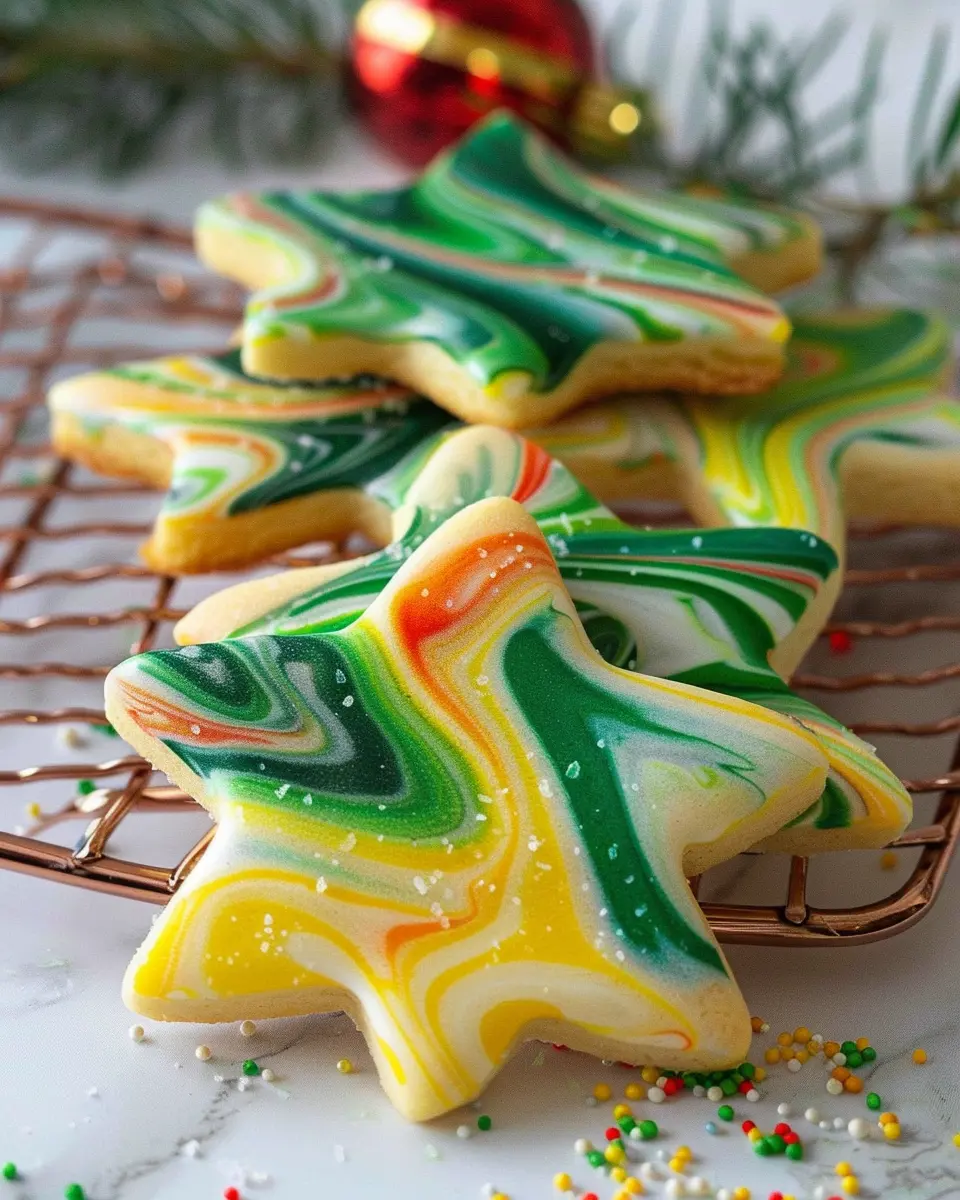
The visual appeal of marbled sugar cookies is just as important as the taste! While classic pastel shades are lovely, why not get creative with your food coloring? Consider these fun ideas:
- Bold and Bright: Go for vibrant colors like electric blue or hot pink for a playful take on your cookies.
- Earthy Tones: Mix brown and green to create a more rustic, nature-inspired look, great for fall gatherings.
- Metallics: Adding a touch of gold or silver can elevate your cookies for more elegant occasions.
Combining colors can lead to unique marbled effects. For tips on techniques, check out this guide to food coloring that provides insight on achieving your desired hues.
As you experiment, remember the key to beautiful marbled sugar cookies is to blend colors gently—not too much, or you’ll lose that signature swirl. Happy baking!
Cooking Tips and Notes for Marbled Sugar Cookies
How to Achieve the Perfect Cookie Texture
Getting that ideal texture for your marbled sugar cookies is all about balance. Start by using softened butter; this helps create a tender, melt-in-your-mouth cookie. When mixing your dough, avoid overworking it—mix just until combined. A quick chilling phase is essential too; it prevents spreading and allows for intricate marbling. Aim for about 30 minutes in the fridge before rolling out your dough.
Important Tips for Royal Icing Consistency
When it comes to decorating your marbled sugar cookies with royal icing, consistency is key. You’ll want your icing to have a flowable but not watery texture. To test this, use the “10-second rule”: it should take about 10 seconds for a line drawn in the icing to disappear. If it’s too thick, gradually add a few drops of water until you achieve that perfect consistency. For a curated guide, check out this expert on royal icing for more tips.
With these tips in hand, you’re well on your way to baking beautiful, delicious marbled sugar cookies!
Serving Suggestions for Marbled Sugar Cookies
Pairing Cookies with Hot Beverages
One of the best ways to enjoy your marbled sugar cookies is by pairing them with a steaming cup of your favorite hot beverage. Consider classic combinations like:
- Coffee: A rich, robust brew balances the sweetness of the cookies beautifully.
- Tea: Try a fragrant chai or a calming herbal tea for a delightful afternoon treat.
- Hot Chocolate: Indulge in a creamy hot chocolate for the ultimate comfort pairing.
These beverages not only enhance the cookie experience but can also spark conversations among friends, making your snack time a cozy gathering.
Creative Ways to Present Cookies at Gatherings
When it comes to hosting, presentation can elevate even the simplest treats. Here are a few ideas for showcasing your marbled sugar cookies:
- Cookie Platter: Arrange cookies on a cute platter, mixing in complimentary toppings like fresh fruit or nuts for color.
- Gift Jars: Layer cookies in glass jars for a charming edible gift option. They make for great conversation starters!
- Decorative Stands: Use cake stands to create a sweet centerpiece that catches the eye.
These simple ideas not only make the cookies look appealing but also add a personal touch to your gatherings, encouraging your guests to indulge and mingle. For more presentation tips, check out Food52’s Guide to Food Styling.
Whether you’re enjoying them with a friend or showing off at a gathering, these suggestions will ensure your marbled sugar cookies shine!
Time Breakdown for Marbled Sugar Cookies
Preparation time
The preparation time for your marbled sugar cookies is approximately 20 minutes. This is when you’ll mix your ingredients, roll the dough, and create those delightful marbled patterns.
Chilling time
Once you’ve got your dough ready, chilling is essential—plan for about 1 hour. This helps the flavors meld and the dough to firm up, making it easier to slice.
Baking time
When you’re ready to bake, allot around 10 to 12 minutes. You want those beautiful cookies to be lightly golden for that perfect texture.
Total time
Overall, you’re looking at about 1 hour and 30 minutes from start to finish, including preparation, chilling, and baking. Just think of how sweet your kitchen will smell! For an in-depth guide on cookie timing, check out resources from King Arthur Baking.
Make these marbled sugar cookies for your next gathering, and watch everyone smile!
Nutritional Facts for Marbled Sugar Cookies
Calories per cookie
If you’re curious about the caloric content of these delightful marbled sugar cookies, each cookie typically packs around 120 calories. It’s a little treat that won’t break the calorie bank, perfect for a sweet indulgence without the guilt.
Breakdown of carbs, protein, and fat
When it comes to macronutrients, here’s the scoop:
- Carbohydrates: Approximately 18 grams
- Protein: About 1 gram
- Fat: Roughly 5 grams
These cookies are primarily made up of carbs, making them an excellent quick energy source. If you’re looking to balance your intake, enjoy your marbled sugar cookies alongside a protein-rich beverage like a smoothie or a simple glass of milk. For more on nutritional needs, check out resources from the USDA.
Remember, moderation is key. Savor each bite, and they’ll surely brighten your day!
FAQs about Marbled Sugar Cookies
What makes marbled sugar cookies different from regular sugar cookies?
Marbled sugar cookies are a delightful twist on the classic sugar cookie. Unlike their plain counterparts, marbled sugar cookies incorporate vibrant swirls of color that create a stunning visual appeal. This is achieved by gently blending flavored or colored doughs, resulting in a unique pattern that is as fun to look at as it is to eat. The flavor profile can also differ, as you can experiment with various extracts, such as vanilla, almond, or even citrus, to create a cookie that’s deliciously layered and eye-catching.
How do I store leftover cookies?
Storing your marbled sugar cookies properly will keep them fresh and tasty for longer. Here are some tips:
- Room Temperature: Place the cookies in an airtight container separated by parchment paper to keep them from sticking together.
- In the Fridge: If you want to store them for a week, keep them in the fridge in a sealed container.
- Avoid Moisture: Ensure the container is completely dry to prevent the cookies from becoming soggy.
For more tips on cookie storage, check out the USDA’s food storage guidelines.
Can I freeze unbaked cookie dough?
Absolutely! Freezing unbaked marbled sugar cookie dough is a fantastic way to have freshly baked cookies at your fingertips. Just roll the dough into individual balls, place them on a baking sheet to freeze until firm, then transfer them to a freezer-safe bag or container. When you’re ready to bake, just pop them into the oven without thawing and add a couple of extra minutes to the baking time. This method not only saves you time but also ensures you can enjoy these delicious cookies anytime!
Conclusion on Marbled Sugar Cookies
Celebrating homemade treats: Why marbled sugar cookies bring joy
Marbled sugar cookies are more than just a delightful dessert; they embody the joy of homemade treats. The visual appeal of their swirled colors instantly brightens any occasion, making them perfect for celebrations or casual get-togethers.
When you bake these cookies, you’re not just creating something delicious; you’re crafting memories. The mingling of flavors evokes a sense of nostalgia, reminding us of the comfort food of our childhood. Whether you’re enjoying them with friends or gifting them, marbled sugar cookies are sure to elicit smiles.
For tips on maximizing flavor and color, check out this expert guide on baking success!
PrintMarbled Sugar Cookies: The Best Indulgent Treat for Every Occasion
Delicious and visually appealing, these marbled sugar cookies are perfect for any occasion.
- Prep Time: 20 minutes
- Cook Time: 12 minutes
- Total Time: 32 minutes
- Yield: 24 cookies 1x
- Category: Dessert
- Method: Baking
- Cuisine: American
- Diet: Vegetarian
Ingredients
- 2 ¾ cups all-purpose flour
- 1 teaspoon baking powder
- ½ teaspoon salt
- 1 cup unsalted butter, softened
- 1 ½ cups granulated sugar
- 1 teaspoon vanilla extract
- 1 large egg
- ½ cup cocoa powder
- ¼ cup powdered sugar
Instructions
- Preheat the oven to 350°F (175°C).
- In a bowl, whisk together the flour, baking powder, and salt.
- In a separate bowl, cream the butter and sugar until fluffy. Add vanilla and egg, mixing well.
- Gradually add the dry ingredients to the mixture.
- Divide the dough in half and mix cocoa powder into one half.
- Drop spoonfuls of each dough on a baking sheet, swirled together.
- Bake for 10-12 minutes. Allow to cool before dusting with powdered sugar.
Notes
- For even more flavor, consider adding almond extract.
- Ensure your butter is at room temperature for better mixing.
Nutrition
- Serving Size: 1 cookie
- Calories: 150
- Sugar: 10g
- Sodium: 50mg
- Fat: 8g
- Saturated Fat: 5g
- Unsaturated Fat: 2g
- Trans Fat: 0g
- Carbohydrates: 20g
- Fiber: 0g
- Protein: 2g
- Cholesterol: 30mg
Keywords: Marbled Sugar Cookies, Cookies, Treats, Desserts