Introduction to Classic Apple Crisp Recipe
The irresistible charm of apple crisp
There’s something undeniably heartwarming about a freshly baked apple crisp. Imagine the sweet aroma wafting through your kitchen, a delightful blend of caramelized apples melded with a crunchy, buttery topping. It effortlessly captures the essence of comfort food, evoking memories of family get-togethers and chilly autumn evenings. This classic apple crisp recipe is not just a dish; it’s an invitation to celebrate life’s simple joys, whether you’re treating yourself after a long day or hosting friends for a cozy gathering.
The versatility of apple crisp makes it a go-to dessert to whip up in a pinch. You can experiment with different apple varieties—from tart Granny Smith to sweet Honeycrisp—adjusting the spice level to suit your personal preference. Plus, it’s a great way to use up any leftover apples you might have lingering in your pantry. This recipe can even be adapted for various dietary needs—consider swapping in gluten-free oats or sugar alternatives for a guilt-free indulgence.
Why homemade food matters for young professionals
As a young professional juggling responsibilities, finding time to enjoy home-cooked meals can feel like an insurmountable challenge. Yet, studies have shown that cooking at home not only fosters creativity but also significantly improves your overall well-being. According to research by the American Journal of Preventive Medicine, individuals who cook regularly enjoy better nutrition and lower stress levels.
By making your own apple crisp, you’re not just treating yourself to a delicious dessert; you’re investing in a healthier lifestyle. Creating something from scratch also provides a sense of satisfaction that takeout simply can’t match. Plus, with just a few ingredients, this classic apple crisp recipe brings the added benefit of minimizing food waste—another win for sustainability.
Imagine inviting friends over and serving them warm apple crisp straight out of the oven, topped with a scoop of vanilla ice cream. It’s these little moments of connection that make cooking worthwhile. So, grab your apron and let’s bring some homemade joy into your kitchen!
For more tips on creating memorable meals, consider checking out Cooking Light for plenty of easy and health-conscious recipes.
Ingredients for Classic Apple Crisp
When it comes to creating a warm and comforting dessert, nothing beats a delicious classic apple crisp. Let’s break down the key ingredients that make this recipe a timeless favorite!
Essential ingredients for the filling
To prepare the delectable filling, you’ll need:
- Apples: About 6 cups of your choice, such as Granny Smith or Honeycrisp, offers the perfect balance of tartness and sweetness.
- Sugar: A trio of sugar types—granulated, brown, and cinnamon sugar—adds depth and caramel notes.
- Cinnamon: About a teaspoon to enhance the apple’s flavor and add warmth.
- Lemon juice: A splash to brighten up the filling and help balance the sweetness.
- Cornstarch: Just a bit to thicken the juices, creating that delightful gooey texture.
Key ingredients for the topping
Now, let’s talk about that mouthwatering topping that makes an apple crisp recipe truly shine:
- Oats: Old-fashioned rolled oats provide a chewy texture that contrasts beautifully with the tender apples.
- Flour: All-purpose flour gives the topping more structure.
- Brown sugar: This adds richness and sweetness, making each bite indulgent.
- Butter: Using cold, diced butter helps create a crisp, crumbly topping.
- Nuts (optional): Chopped walnuts or pecans can add extra crunch and flavor.
These ingredients combine to create an irresistible classic dish that feels like a warm hug on a plate. Pair it with a scoop of vanilla ice cream for an unforgettable experience! For more inspiration, check out this article on the benefits of apples.
Step-by-step Preparation of Classic Apple Crisp
Creating a classic apple crisp is a delightful process that can warm up any chilly evening and bring joy to any occasion. Whether you’re a seasoned baker or a complete novice, this guide will walk you through every step, making sure you end up with a delicious dessert that smells as good as it tastes. Ready to dive in? Let’s get started!
Prepping the apples
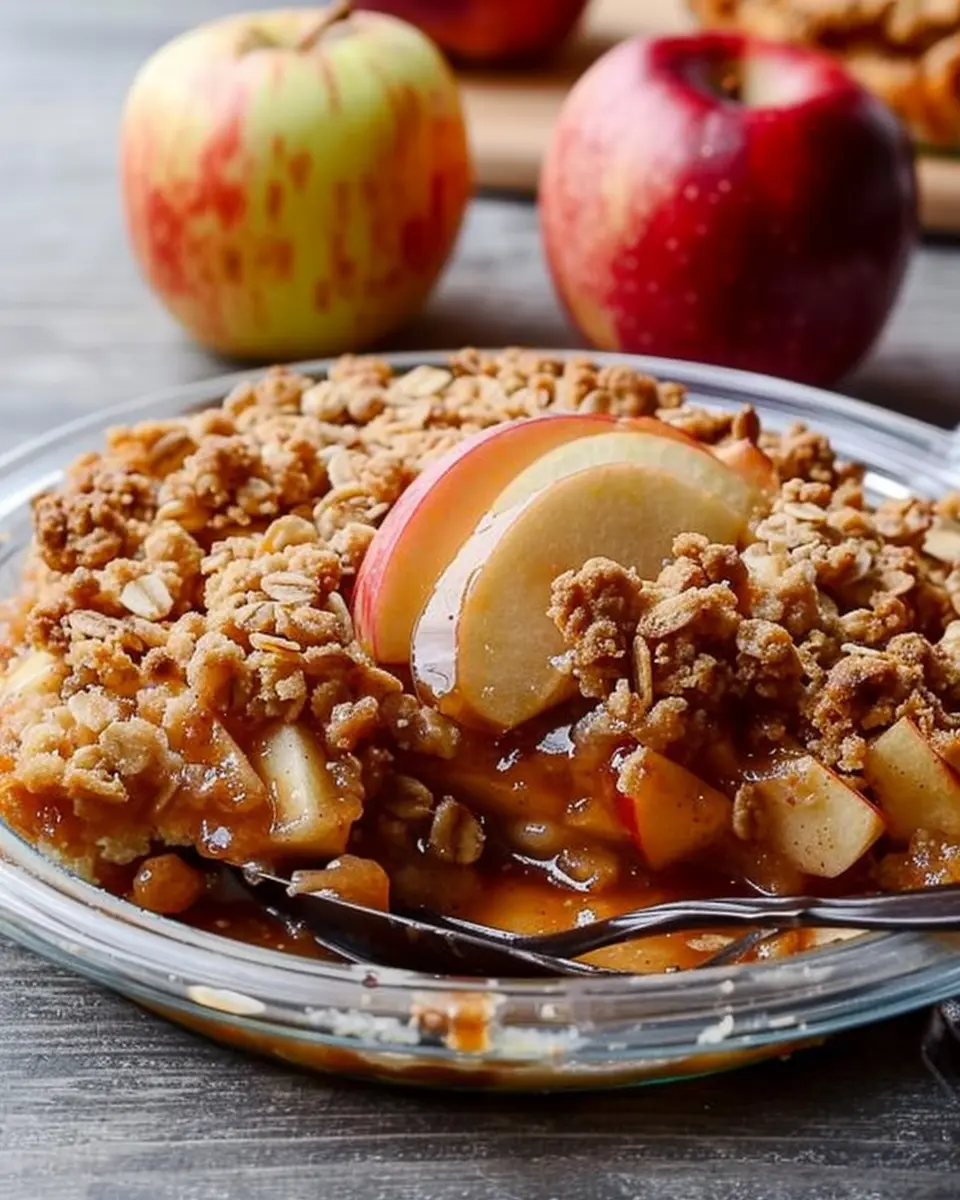
The foundation of any great classic apple crisp recipe begins with the apples. You want to choose a mix of tart and sweet varieties to achieve the perfect balance in flavor. Here’s how to prep them:
- Select your apples: Popular choices include Granny Smith for tartness and Fuji or Honeycrisp for sweetness. A mix works best!
- Wash and peel: Start by washing the apples thoroughly. Then, peel them carefully to remove the skin.
- Core and slice: Use a sharp knife or an apple corer to remove the core. Then slice the apples into thin, even pieces, about a quarter of an inch thick. This helps them cook evenly.
- Toss with lemon juice: To prevent browning and enhance flavor, toss the sliced apples with a tablespoon of lemon juice.
Did you know that apples are a great source of dietary fiber and vitamins? Including apples in your diet can provide health benefits, making this dessert feel a little less indulgent!
Combining the filling ingredients
Next, we’ll create a sweet and tart apple filling that pairs perfectly with our crumbly topping.
-
Mix the spices: In a large mixing bowl, combine the sliced apples with the following ingredients:
-
1/2 cup of granulated sugar
-
1 teaspoon of ground cinnamon
-
1/4 teaspoon of nutmeg (optional for an extra kick)
-
A pinch of salt
-
Add the thickener: To help thicken the filling as it bakes, stir in 2 tablespoons of all-purpose flour. This will absorb some of the juices released from the apples, creating a lovely syrupy mixture.
Once everything is well combined, let it sit for a few minutes to allow the flavors to meld. The smell alone is enough to get anyone’s taste buds tingling!
Crafting the crumbly topping
The topping is where the magic truly happens in a classic apple crisp recipe. It should be both buttery and crunchy, giving that delightful texture to each bite.
-
Combine dry ingredients: In another bowl, whisk together:
-
1 cup of rolled oats
-
1 cup of all-purpose flour
-
1/2 cup of packed brown sugar
-
1/2 teaspoon of salt
-
Mix in the butter: Cut in 1/2 cup (1 stick) of cold, unsalted butter until the mixture resembles coarse crumbs. You can use a pastry cutter or your fingers to achieve this.
Feel free to get creative here! If you like nuts, you can mix in some chopped walnuts or pecans for added crunch.
Assembling and baking the crisp
Now that we have our filling and topping ready, it’s time to assemble and bake!
-
Layer the filling: Preheat your oven to 350°F (175°C). Pour the apple mixture into a greased 9×13-inch baking dish, spreading it out evenly.
-
Add the topping: Generously sprinkle the crumbly topping over the apples, making sure to cover them completely for that perfect crispy layer.
-
Bake away: Place the dish in the oven and bake for about 40-45 minutes, or until the topping is golden brown and the apples are bubbling.
Cooling and serving tips
After your classic apple crisp emerges from the oven, it’s hard to resist the warm, fragrant goodness. However, giving it some time to cool will enhance the flavors.
- Let it rest: Allow the crisp to cool for at least 15-20 minutes; this will help it set a bit more.
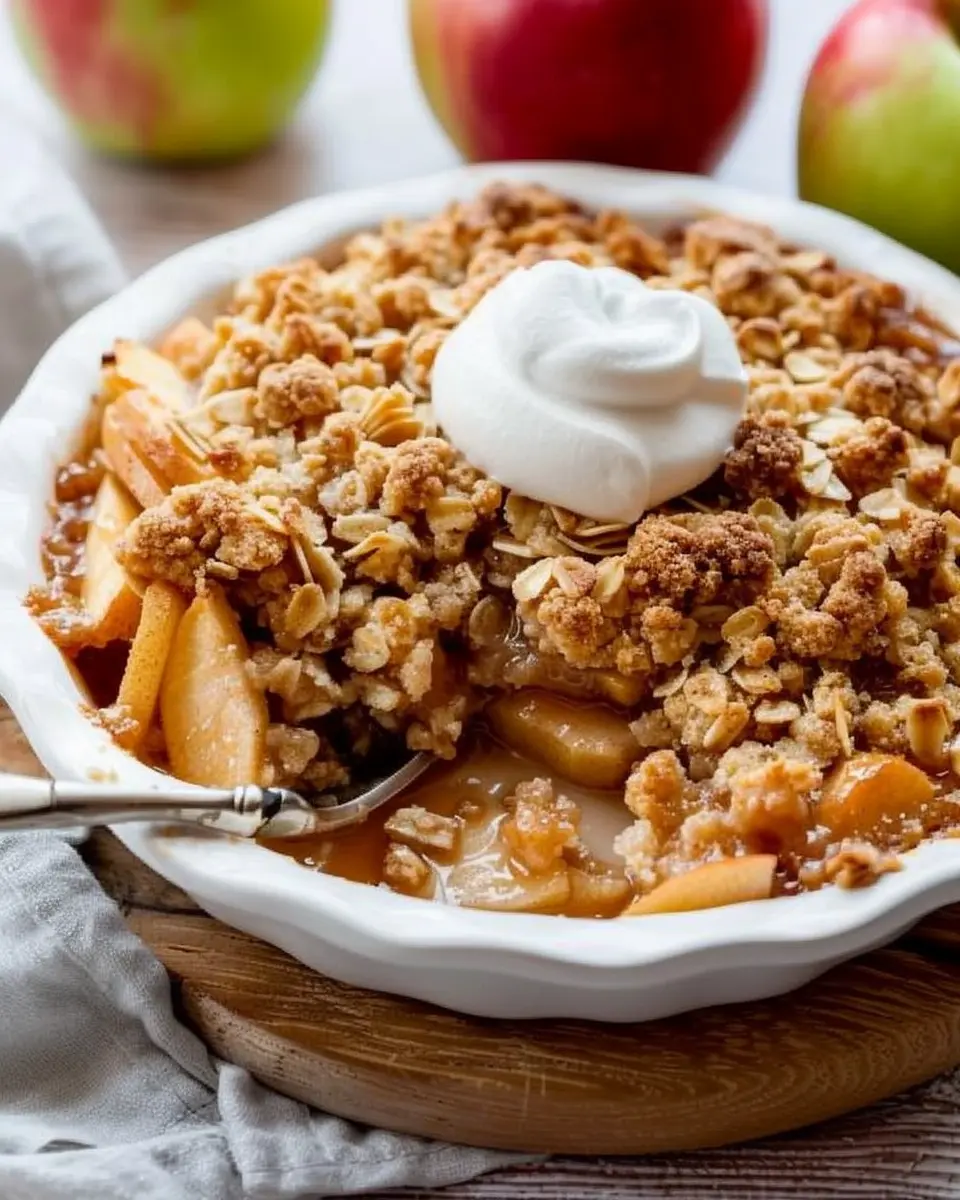
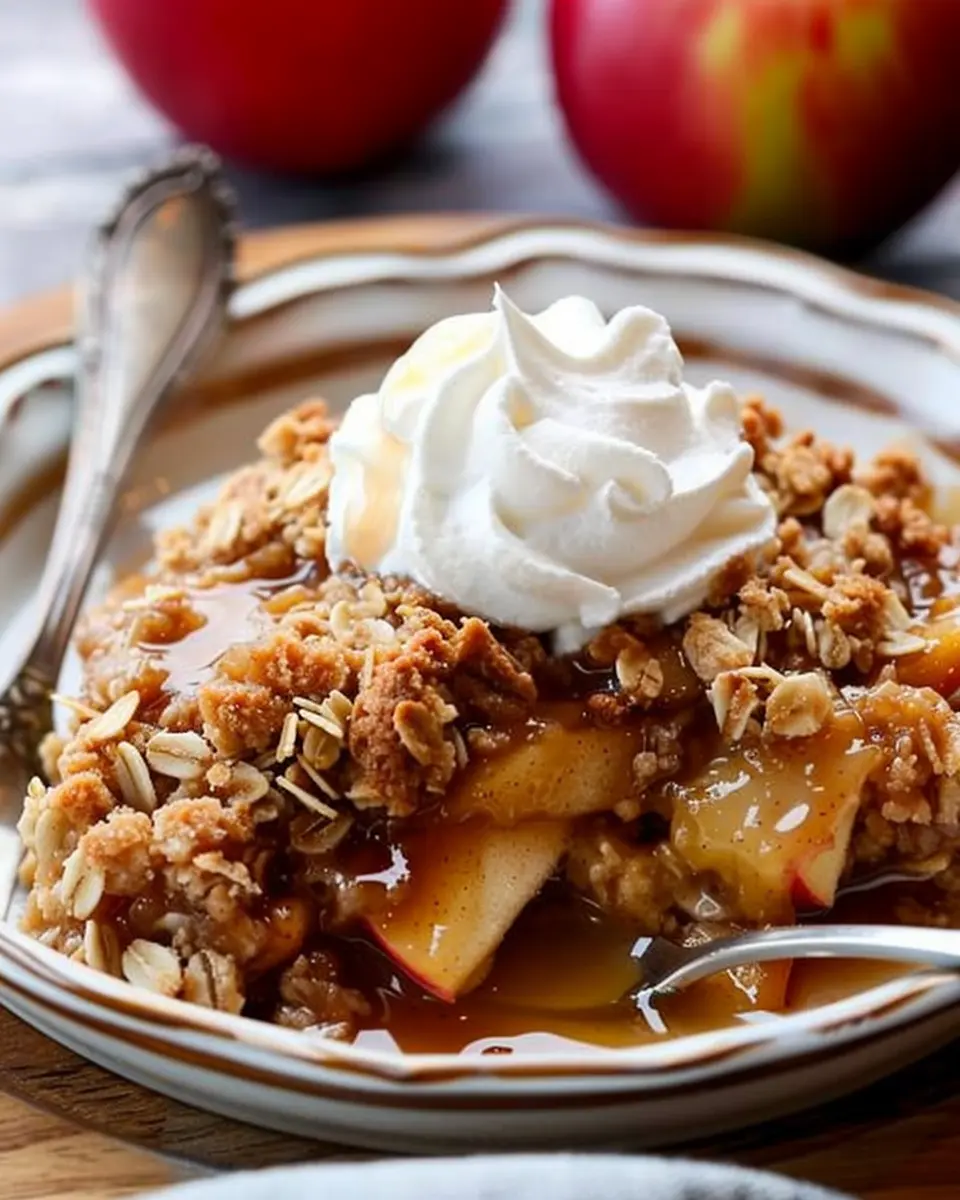
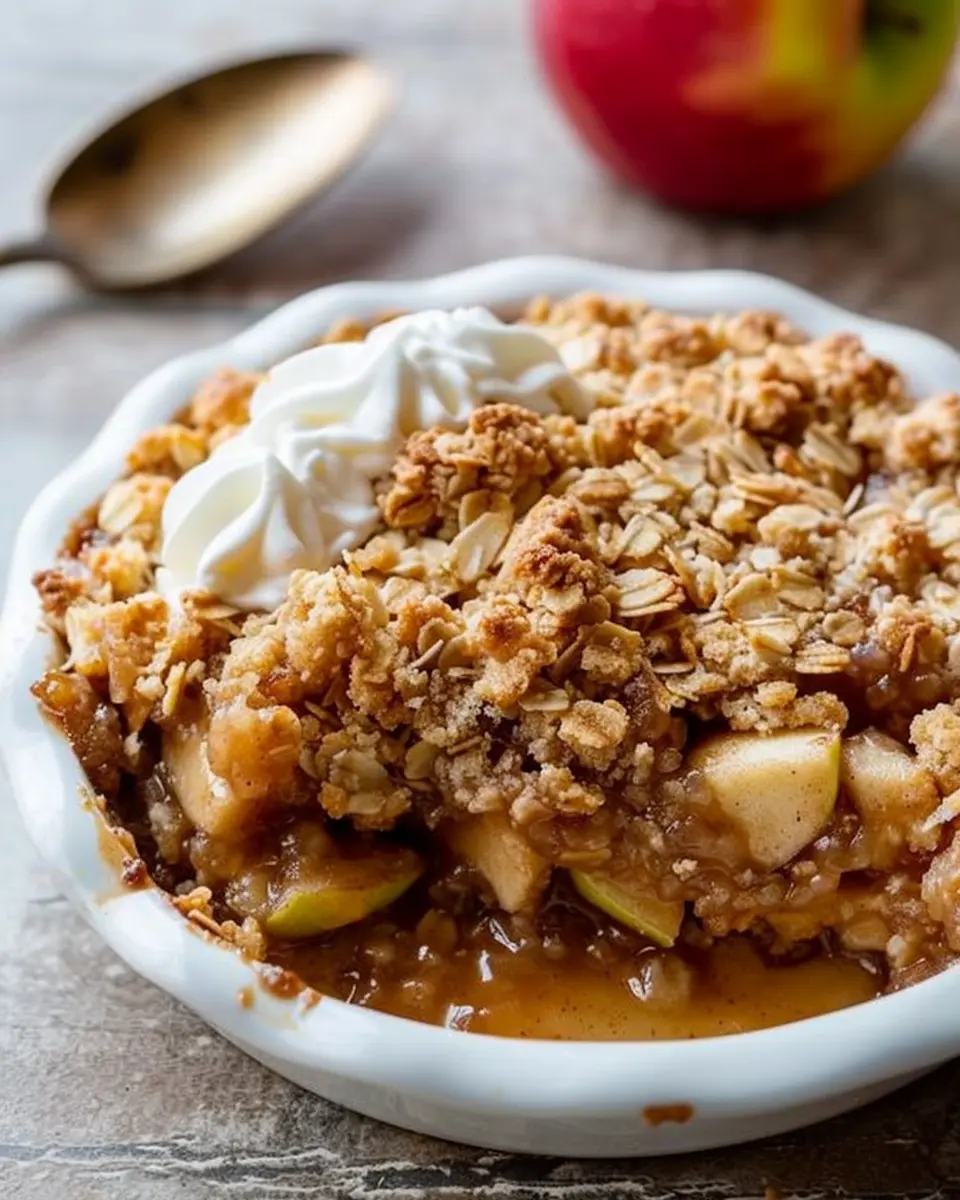
- Serving options: Serve warm, ideally with a scoop of vanilla ice cream or a dollop of whipped cream. The contrasting temperatures create a divine experience!
If you’re feeling adventurous, consider drizzling a little caramel sauce over the top for an extra indulgent touch.
Embrace the joy of baking and sharing; this classic apple crisp recipe is sure to become a favorite in your kitchen. Enjoy every delicious bite!
Variations on Classic Apple Crisp
Apple crisp is a beloved dessert that can easily be tailored to suit your taste buds, creating endless variations on the classic apple crisp recipe. Here are a few delightful ideas to inspire your next baking session.
Apple Crisp with Nuts
For an added crunch and richness, try incorporating nuts into your classic apple crisp recipe. Walnuts, pecans, or almonds make fantastic additions. Simply chop your preferred nuts and mix them into the crumb topping, or sprinkle them between layers of the apple filling. Not only does this add texture, but nuts also provide healthy fats and protein. According to a study by the American Heart Association, incorporating nuts into your diet can help reduce the risk of heart disease.
Tropical Twist: Pineapple Apple Crisp
If you’re craving something a bit different, give a tropical twist to your apple crisp by including pineapple. Dice fresh or canned pineapple and mix it with your apples before baking. The sweetness of the pineapple elevates the dish, creating a bright, refreshing flavor profile. You could even add a sprinkle of coconut flakes for an extra hint of the tropics! This variation is perfect for summer gatherings when you want something light and fruity.
Apple Crisp with a Berry Medley
Another delicious alternative is to merge your apples with a medley of berries. Think strawberries, blueberries, and raspberries! This not only heightens the color appeal but also brings a burst of tartness that balances the sweetness of the apples. Toss the berries in with your apples before you top them with the crisp mixture. For a healthier spin, consider using whole-grain oats in the topping to increase fiber content.
These variations can easily elevate your classic apple crisp, adding depth and exciting new flavors. So, why not experiment with these options next time you’re in the kitchen? Your taste buds will thank you! For more tips on variations, consider checking out resources from The Kitchn or BBC Good Food.
Cooking Tips and Notes for Classic Apple Crisp
Choosing the Best Apples for Baking
Selecting the right apples can make or break your classic apple crisp recipe. For optimal results, consider using a blend of tart and sweet varieties. Granny Smith apples are fantastic for their tartness, while Honeycrisp or Fuji apples add a lovely sweetness and texture. Mixing these types not only enhances flavor but also creates the perfect balance of tart and sweet in each bite.
Storage and Reheating Tips
Once you’ve savored your delicious apple crisp, you’ll want to store any leftovers (if there are any!). Cover your dish tightly with aluminum foil or transfer it to an airtight container. Stored properly in the refrigerator, it can last up to five days. For reheating, simply pop it in the oven at 350°F for about 15-20 minutes, or until warm and inviting again. You can also try microwaving individual portions for a quick treat!
For more tips on storing baked goods, check out this comprehensive guide on food storage safety. Happy cooking!
Serving Suggestions for Classic Apple Crisp
Serving Warm with Vanilla Ice Cream
One of the best ways to enjoy your classic apple crisp recipe is to serve it warm, fresh out of the oven. The delicious contrast of the warm, spiced apples with a scoop of creamy vanilla ice cream is nothing short of divine. As the ice cream slowly melts, it creates a delightful blend that makes each bite even more satisfying. If you’re feeling adventurous, try adding a sprinkle of cinnamon atop the ice cream for an extra flavor kick!
Perfect Pairings: Caramel Drizzle and More
Looking to enhance your apple crisp experience? Consider drizzling some rich caramel sauce over the top right before serving. The sweet, gooey texture perfectly complements the crisp’s crunchiness.
You can also try these exciting accompaniments:
- Chopped nuts: Pecans or walnuts add a nice crunch.
- Fresh berries: Raspberries or blueberries can introduce a tart contrast.
- Whipped cream: For those who prefer an airy topping over ice cream, whipped cream is a classic choice.
Exploring these options can transform your classic apple crisp recipe into a memorable dessert that friends and family will rave about!
Time Breakdown for Classic Apple Crisp
Preparation Time
Getting started on your classic apple crisp recipe takes about 15 minutes. This is your time to gather those delicious apples and mix up that buttery oat topping.
Cooking Time
Once prepped, it’s time for the oven magic! Baking will take approximately 45 minutes, allowing the flavors to meld beautifully while the topping becomes golden brown.
Total Time
In total, you’re looking at around an hour for the entire process. It’s a small investment for a dessert that’s sure to impress friends or family. Want to know more about perfecting your apple recipes? Check out this guide for great tips!
Making this classic apple crisp will quickly become one of your go-to desserts!
Nutritional Facts for Classic Apple Crisp
When indulging in a homemade classic apple crisp recipe, it’s helpful to know what you’re putting on your plate. Let’s dive into the nutritional details of this delightful dessert.
Calories per serving
A typical serving of classic apple crisp contains around 200-250 calories, depending on the amount of sugar and butter used. It’s a sweet treat that can fit into many balanced diets.
Sugar and fiber content
While this dessert provides a satisfying sweetness, it generally contains about 14-20 grams of sugar per serving. However, don’t fret—apples are also a great source of dietary fiber, with approximately 3-4 grams per serving, which helps with digestion and adds a sense of fullness.
Key nutrients in apples
Apples are not just delicious; they offer essential nutrients! Each apple contributes vitamins like vitamin C, potassium, and various antioxidants. For more insights on these health benefits, check out sources like the USDA Nutrition Database. Adding a classic apple crisp to your dessert repertoire can be both tasty and nutritious!
FAQs about Classic Apple Crisp Recipe
Can I make apple crisp ahead of time?
Absolutely! One of the best things about a classic apple crisp recipe is its flexibility. You can prepare the filling and topping separately the day before you plan to serve it. Just keep them in the refrigerator until you’re ready to bake. This way, you can enjoy it fresh from the oven with minimal fuss. If you’re short on time but still want to delight your guests, this makes for the perfect solution!
What apples are best for this recipe?
Choosing the right apples can really elevate your classic apple crisp recipe. Look for firm, tart varieties that hold their shape during baking. Some excellent choices include:
- Granny Smith: Their tartness contrasts beautifully with the sweet topping.
- Honeycrisp: Known for juicy sweetness and crisp texture.
- Braeburn: A tangy flavor that stands up well to baking.
Mixing a few types can add depth and complexity to your dish. If you want to dive deeper into apple varieties, check out this apple guide for more insights!
How do I store leftovers properly?
If you’re lucky enough to have leftovers, storing them correctly ensures you can enjoy that comforting taste again. Simply cover your apple crisp with plastic wrap or transfer it to an airtight container. It can be stored in the refrigerator for up to 3-4 days. For longer storage, consider freezing it. Just ensure that it’s cooled completely before freezing, and when you’re ready to savor those flavors again, reheat it in the oven for the best results.
Your classic apple crisp recipe can become a delightful treat even days after baking—so don’t hesitate to indulge!
Conclusion on Classic Apple Crisp Recipe
The joy of sharing homemade desserts
There’s something truly special about sharing a homemade dessert like this classic apple crisp recipe. It’s more than just tasty; it sparks memories and creates connections. Whether you’re gathering with friends, celebrating a milestone, or just enjoying a cozy night in, serving a warm dish of apple crisp fosters a sense of togetherness. Plus, the delightful aroma wafting through your kitchen is an experience in itself!
Encouragement to try the recipe today
Why not bring a little sweetness into your life? Trying this classic apple crisp recipe today could transform your afternoon or evening. It’s simple, requires minimal ingredients, and the process is a joy in itself. So roll up your sleeves, grab those apples, and let’s make some delicious memories together. Remember, homemade desserts are just a recipe away! For more inspiration, check out PBS Food for tips on perfecting your baking techniques. Happy baking!
PrintClassic Apple Crisp Recipe: The Best Comforting Dessert Made Easy

A delightful and easy-to-make classic apple crisp that’s perfect for any occasion.
- Prep Time: 15 minutes
- Cook Time: 35 minutes
- Total Time: 50 minutes
- Yield: 8 servings 1x
- Category: Dessert
- Method: Baking
- Cuisine: American
- Diet: Vegetarian
Ingredients
- 4 cups sliced apples
- 1 cup rolled oats
- 1 cup brown sugar
- 1/2 cup all-purpose flour
- 1/2 teaspoon cinnamon
- 1/2 cup unsalted butter, melted
Instructions
- Preheat the oven to 350°F (175°C).
- In a large bowl, toss sliced apples with 1/2 cup brown sugar and cinnamon.
- Spread the apples in a baking dish.
- In another bowl, mix oats, remaining brown sugar, flour, and melted butter.
- Spread the oat mixture evenly over the apples.
- Bake for 30-35 minutes until the topping is golden brown.
Notes
- Serve warm with vanilla ice cream for an extra treat.
- You can substitute apples with pears or peaches for variation.
Nutrition
- Serving Size: 1 serving
- Calories: 250
- Sugar: 15g
- Sodium: 180mg
- Fat: 10g
- Saturated Fat: 6g
- Unsaturated Fat: 4g
- Trans Fat: 0g
- Carbohydrates: 37g
- Fiber: 3g
- Protein: 2g
- Cholesterol: 15mg
Keywords: Classic Apple Crisp Recipe, apple dessert, easy dessert