Introduction to Christmas Cookie Bars
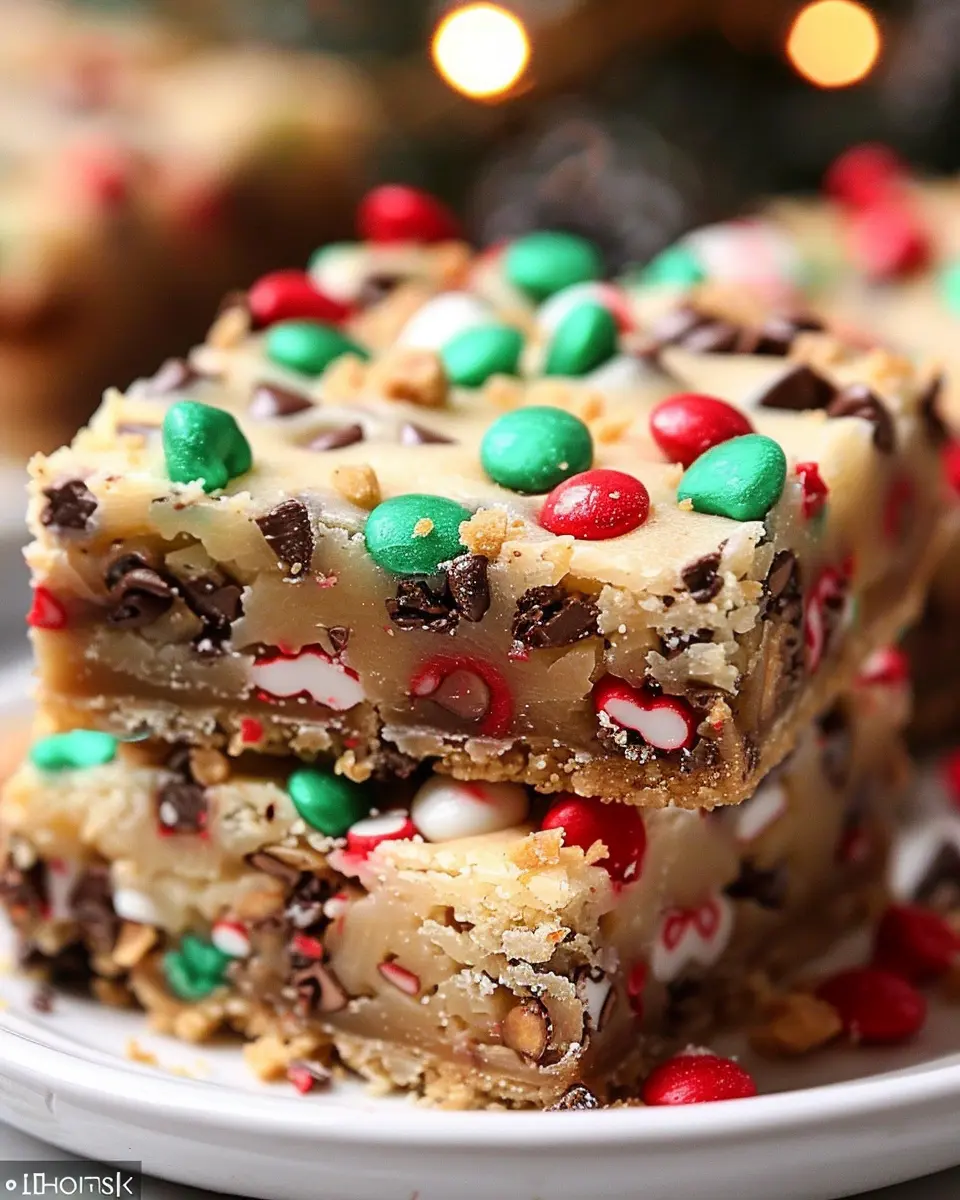
When the holiday season rolls around, the air gets filled with the spirit of joy, giving, and, of course, delicious treats. One such delicacy you must consider baking this year is Christmas Cookie Bars. These scrumptious creations blend the best elements of traditional cookies with the comforting layers of a bar dessert. But what exactly are they, and why should they be part of your holiday festivities?
What are Christmas Cookie Bars?
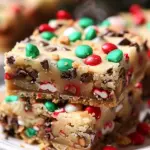
Simply put, Christmas Cookie Bars are a delightful hybrid of cookies and brownies, offering a soft, chewy texture that practically melts in your mouth. Unlike regular cookies that require scooping and baking each batch individually, cookie bars are easy to whip up in a single pan, making them perfect for those busy holiday schedules. You can cut them into squares, rectangles, or any festive shape you desire, and they’re great for sharing at parties or gifting to friends and family.
The best part about Christmas Cookie Bars is their versatility. You can customize them with various add-ins like chocolate chips, dried fruit, nuts, or even festive sprinkles. If you’re looking to impress, you can layer multiple flavors or incorporate seasonal spices like cinnamon and nutmeg for that quintessential holiday taste.
Baking enthusiasts and busy professionals alike appreciate how easy they are to make. By swapping out some classic ingredients with alternatives, you can even create variations to cater to dietary restrictions. For example, using oat flour instead of all-purpose flour can add a hearty twist while still keeping that classic cookie bar comfort.
Did you know that according to the National Confectioners Association, over 50% of people enjoy baking during the holidays? Creating Christmas Cookie Bars can be a delightful bonding experience, bringing friends and family together in the kitchen.
So, as you prepare for the festive season, why not try your hand at these delightful bars? They’ll not only satisfy your sweet cravings but also fill your home with the warm aroma of baked goods. Plus, they make wonderful gifts for neighbors or coworkers who appreciate a homemade touch. Interested in diving deeper into a festive recipe? Check out this link for inspiration!
Ingredients for Christmas Cookie Bars
Creating delicious Christmas Cookie Bars is all about gathering the right ingredients to form that perfect blend of flavor and texture. Whether you’re hosting a holiday gathering or treating your coworkers at the office, these bars are sure to impress. Let’s dive into what you’ll need!
Essential Ingredients
To whip up a batch of these scrumptious bars, you’ll need:
- Butter: 1 cup, softened, for that rich flavor.
- Granulated Sugar: 1 cup, adding sweetness.
- Brown Sugar: 1 cup, for depth and moisture.
- Eggs: 2 large, binding it all together.
- Vanilla Extract: 1 teaspoon, enhancing the aroma.
- All-Purpose Flour: 2 cups, forming the base.
- Baking Powder: 1 teaspoon, giving it that perfect rise.
- Salt: ½ teaspoon, to elevate the flavors.
- Festive Mix-Ins: Chocolate chips, nuts, or dried fruits—your choice to make these Christmas Cookie Bars uniquely yours!
Feel free to explore different combinations of mix-ins; for example, consider using walnuts or cranberries for a delightful twist. If you want to learn more about the best types of chocolate for baking, check out this helpful guide.
Now that you’ve got the essentials sorted, you’re just a few steps away from enjoying warm, gooey cookie bars that bring holiday cheer to any occasion!
Step-by-Step Preparation for Christmas Cookie Bars
Baking can be a wonderfully therapeutic experience, especially when creating something as delightful as Christmas Cookie Bars. These delicious treats are perfect for sharing with family and friends during the holiday season. Let’s jump right into a step-by-step guide to ensure that your cookie bars turn out magnificent every time!
Preheat the oven and prepare the baking pan
Before you do anything else, it’s important to set the stage for your baking success. Preheat your oven to 350°F (175°C). Meanwhile, grab a 9×13-inch baking pan and grease it lightly with butter or non-stick spray. This will ensure that your bars release easily after baking. If you’re feeling extra festive, you can also line the pan with parchment paper, leaving some overhanging so you can lift out the bars effortlessly later!
Mix the dry ingredients together
In a medium mixing bowl, you’ll want to combine your dry ingredients to create a solid foundation. Whisk together:
- 2 cups all-purpose flour
- 1 teaspoon baking soda
- 1/2 teaspoon salt
- 1 teaspoon cinnamon (for that cozy holiday flavor)
By whisking them together, you’ll help to evenly distribute the baking soda and salt, ensuring that your Christmas Cookie Bars rise beautifully.
Cream the butter and sugars
In a large mixing bowl, it’s time to create that rich, buttery goodness that will serve as the backbone of your bars. Using an electric mixer, cream together:
- 1 cup unsalted butter (softened)
- 1 cup brown sugar (packed)
- 1/2 cup granulated sugar
Mix these ingredients on medium speed for about 3 to 4 minutes, or until the mixture becomes light and fluffy. The combination of brown sugar and granulated sugar adds a perfect depth of flavor, making these bars irresistible!
Incorporate eggs and vanilla into the mixture
Next, it’s time to add some richness and flavor to your batter. Beat in:
- 2 large eggs (at room temperature)
- 1 tablespoon vanilla extract
Mix well until the eggs are fully incorporated. This is where your Christmas Cookie Bars start to come alive, as the sweet, comforting aroma of vanilla fills your kitchen.
Combine the wet and dry ingredients
Now that you have your wet mixture and dry ingredients, it’s time to combine them! Gradually add the dry mixture to the wet mixture, mixing just until combined. Be careful not to overmix, as this can result in denser bars. It’s perfectly okay if there are a few small lumps!
Add mix-ins and spread the batter in the pan
This is where the fun really starts! You can personalize your Christmas Cookie Bars by adding mix-ins like:
- 1 cup chocolate chips
- 1 cup chopped nuts (like walnuts or pecans)
- 1 cup holiday-themed candies
Fold these mix-ins into your batter gently. Once everything is well combined, pour the mixed batter into the prepared baking pan and spread it evenly using a spatula.
Bake to perfection
Now it’s your turn to let the oven work its magic! Place the pan in the preheated oven and bake for about 25 to 30 minutes, or until a toothpick inserted in the center comes out clean. Keep an eye on them—every oven is a little different, so don’t forget to check for that lovely golden-brown top!
Cool and cut the cookie bars
Once they’re baked to perfection, remove the pan from the oven, and allow it to cool in the pan for 10 to 15 minutes. This makes it easier to cut and handle. After cooling slightly, you can use the parchment paper to lift the entire batch out of the pan. Place it on a cutting board and slice into squares.
Remember, enjoy the festive scents and don’t forget to share these delicious Christmas Cookie Bars with your favorite people! Happy baking!

Variations on Christmas Cookie Bars
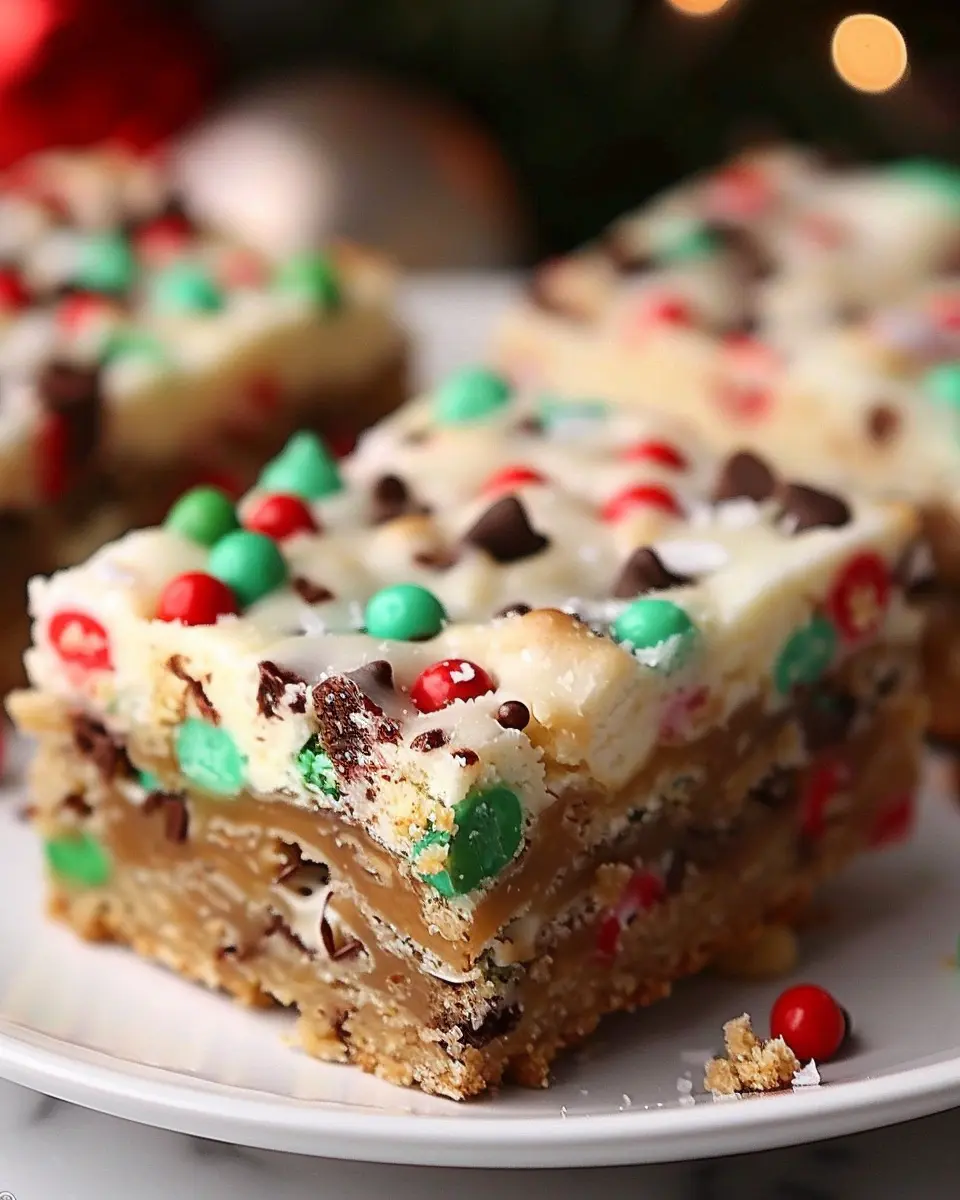
Chocolate Chip and Nut Variations
When it comes to Christmas Cookie Bars, the classic chocolate chip and nut combo is a timeless favorite that never goes out of style. You can easily switch things up by experimenting with different types of chocolate. Try using dark chocolate chips for a richer flavor or white chocolate for a sweeter twist.
Adding nuts can enhance both texture and taste. Consider incorporating chopped walnuts, pecans, or even hazelnuts. If you’re looking for a nut-free option, sunflower seeds offer a delightful crunch without the added allergens. Mixing in some dried fruit like cranberries or cherries can elevate the holiday spirit, bringing a tartness that cuts through the sweetness.
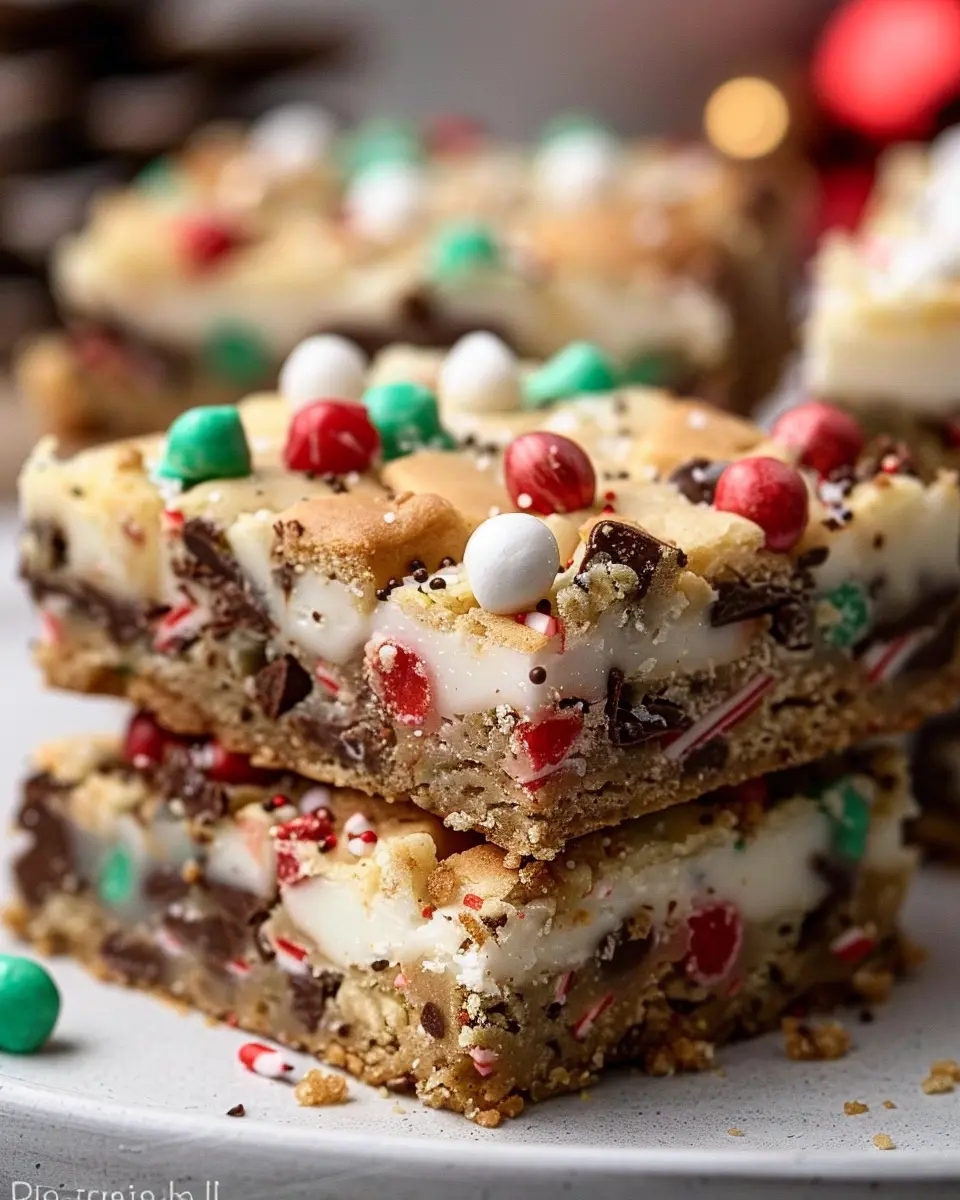
Festive Holiday Sprinkle Options
What’s a holiday treat without a festive touch? Boost the visual appeal of your Christmas Cookie Bars by experimenting with holiday-themed sprinkles. Use red and green sugar crystals for a vibrant look, or perhaps some snowy white edible glitter to give your bars a wintery charm.
If you want to add a bit of texture, consider using crushed candy canes. Not only does this add a delightful peppermint flavor, but it also gives your cookies a cheerful pop of color. For those who prefer a more understated look, a dusting of powdered sugar can provide a touch of elegance.
As you play around with these variations, remember: the only limit is your creativity! So, what combination will you try first? Explore more ideas at sites like Food Network or Bakerella for inspiration to create your own signature holiday treat!
Cooking Tips and Notes for Christmas Cookie Bars
Creating the perfect Christmas Cookie Bars can be a joyous and heartwarming activity, especially when you share them with family and friends. Here are some helpful tips to ensure your baking goes smoothly.
Use Quality Ingredients
Opt for high-quality butter and pure vanilla extract to enhance the flavor of your cookie bars. While it might be tempting to go for budget options, the taste will be significantly better with premium ingredients. For more on the importance of baking ingredients, check out King Arthur Baking.
Don’t Overmix the Batter
When combining your ingredients, avoid overmixing. This can lead to tough cookie bars rather than the soft, chewy texture we all love. Mix until just combined, and then fold in any add-ins, like chocolate chips or nuts, gently.
Cooling Time is Key
Before cutting your Christmas Cookie Bars, allow them to cool completely in the pan. This helps them firm up and ensures cleaner cuts. Patience pays off here!
Storage Tips
Store your cookie bars in an airtight container at room temperature for up to a week. For longer storage, consider freezing them—just make sure to wrap them tightly. Enjoying them later will be a delightful surprise!
By following these tips and taking your time, your Christmas Cookie Bars are sure to be a hit during the festive season!
Serving Suggestions for Christmas Cookie Bars
When it comes to celebrating the holidays, Christmas Cookie Bars are more than just a sweet treat; they can elevate your festive gatherings! Here are some delightful serving suggestions to present these delicious bars in style.
Festive Presentation Ideas
- Layered Display: Create a whimsical dessert tower by stacking Christmas Cookie Bars on cake stands of varying heights. This not only looks appealing but also draws attention to your sweet spread.
- Individual Portions: Cut your bars into small squares and place them in festive cupcake liners. This makes for an easy grab-and-go option for guests.
Pairings That Enhance Flavor
Consider serving your Christmas Cookie Bars with complementary sides. A dollop of whipped cream or a scoop of vanilla ice cream makes for a classic combination. For a non-alcoholic twist, try pairing them with hot chocolate or spiced apple cider.
Personal Touches
Don’t hesitate to personalize your presentation with a handwritten note or tag describing your Christmas Cookie Bars. This small detail adds a thoughtful touch that your guests will appreciate.
For more festive inspirations, check out ideas on Epicurious for holiday gatherings, or consider planning your menu with suggestions from Food Network. Your Christmas Cookie Bars will surely be a hit!
Time Breakdown for Christmas Cookie Bars
Preparation time
To get started on your Christmas Cookie Bars, you’ll need about 15-20 minutes for preparation. This includes gathering your ingredients, mixing the dough, and spreading it evenly into your baking dish. Setting everything up is crucial for a smooth process, so take your time!
Baking time
Once your dough is in the oven, baking typically takes around 25-30 minutes. Keep an eye on those edges; once they turn golden brown, your cookie bars are ready to come out!
Total time
In total, you’re looking at approximately 40-50 minutes from start to finish. This makes your Christmas Cookie Bars a quick yet delightful treat for the holiday season!
You can explore more about cookie baking times on King Arthur Baking. Plus, if you’re looking for more inspiration, check out some festive ideas on BBC Good Food. Happy baking!
Nutritional Facts for Christmas Cookie Bars
When it comes to holiday treats, knowing the nutritional value of Christmas Cookie Bars can help you indulge mindfully. Let’s break down the key components of these delightful bars.
Calories
A typical serving of Christmas Cookie Bars packs around 200-250 calories. This makes them a sweet treat that’s perfect for those festive gatherings without completely derailing your daily caloric intake.
Carbohydrates
These cookie bars are rich in carbohydrates, with an estimated 30-35 grams per serving. Most of this comes from the flour and sugar, which give them that deliciously chewy texture you love.
Sugar Content
As for sugar, you’ll find about 12-18 grams in each serving. While this gives the bars their delightful sweetness, balancing this with some proteins or fibers from your meals can help stabilize your energy levels throughout the day.
For more on balanced eating, check out NutritionData for additional insights. Enjoy those Christmas Cookie Bars, and remember, moderation is key!
FAQs about Christmas Cookie Bars
Can I use gluten-free flour for this recipe?
Absolutely! If you or someone you’re baking for has a gluten intolerance, you can easily substitute regular flour with a gluten-free flour blend. Many blends on the market, like those from Bob’s Red Mill or King Arthur, work wonderfully in cookie recipes, including these delightful Christmas Cookie Bars. Just make sure to choose a blend that includes xanthan gum for the best texture.
How long can I store Christmas Cookie Bars?
Christmas Cookie Bars can be stored at room temperature for about 3-4 days in an airtight container. If you want them to last longer, you can keep them in the refrigerator, where they’ll remain fresh for up to a week. Just make sure to separate layers with parchment paper to prevent sticking.
What’s the best way to freeze cookie bars?
Freezing is a fantastic option if you want to prolong the life of your Christmas Cookie Bars. To do so, cut the bars into individual pieces and wrap each one tightly in plastic wrap. Then, place them in a freezer-safe bag or container. They’ll stay fresh for up to three months. When you’re ready to enjoy them, just thaw them in the fridge overnight or at room temperature for a few hours. This way, you’ll always have a holiday treat on hand, no matter the season!
For more tips on baking and storage, check out resources like the American Institute for Cancer Research. Happy baking!
Conclusion on Christmas Cookie Bars
In wrapping up, Christmas Cookie Bars are the ultimate dessert for the festive season, combining the best elements of cookies into a convenient bar format. These treats not only simplify baking during busy holiday preparations but also create a great centerpiece for your dessert table. With their rich flavors and appealing presentation, they’re bound to impress friends and family alike!
When you whip up a batch, don’t forget to experiment with your favorite mix-ins or toppings. Whether you’re a fan of chocolate chunks or festive sprinkles, the possibilities are endless. For more inspiration, check out this ultimate guide to holiday baking. Enjoy your baking, and let these cookie bars become a cherished tradition in your home!
PrintChristmas Cookie Bars: Easy Indulgence for Your Holiday Baking
Delight your family and friends with delicious Christmas Cookie Bars that are simple to make and perfect for the holiday season.
- Prep Time: 15 minutes
- Cook Time: 30 minutes
- Total Time: 45 minutes
- Yield: 12 servings 1x
- Category: Dessert
- Method: Baking
- Cuisine: American
- Diet: Vegetarian
Ingredients
- 2 cups all-purpose flour
- 1 cup brown sugar
- 1/2 cup granulated sugar
- 1 cup butter, softened
- 2 large eggs
- 1 teaspoon vanilla extract
- 1 cup chocolate chips
- 1 cup chopped nuts (optional)
Instructions
- Preheat the oven to 350°F (175°C) and grease a 9×13 inch baking pan.
- In a large bowl, beat the butter and sugars together until creamy.
- Add the eggs and vanilla, mixing well.
- Gradually add the flour and mix until combined.
- Stir in chocolate chips and nuts if using.
- Spread the batter evenly into the prepared pan.
- Bake for 25-30 minutes or until golden brown.
- Let cool before cutting into bars.
Notes
- For a festive touch, sprinkle with powdered sugar before serving.
- These bars can be customized with different add-ins like dried fruit or coconut.
Nutrition
- Serving Size: 1 bar
- Calories: 250
- Sugar: 18g
- Sodium: 100mg
- Fat: 12g
- Saturated Fat: 7g
- Unsaturated Fat: 4g
- Trans Fat: 0g
- Carbohydrates: 30g
- Fiber: 1g
- Protein: 3g
- Cholesterol: 40mg
Keywords: Christmas Cookie Bars