Introduction to Cannoli Bars
If you’re a young professional navigating the hustle and bustle of city life, you know how important it is to treat yourself occasionally. Enter cannoli bars—the ultimate dessert that combines convenience with that classic Italian flair. But why exactly are these delectable bars perfect for your busy lifestyle?
Why Cannoli Bars Are the Ultimate Dessert for Young Professionals
First off, let’s talk about versatility. Cannoli bars are incredibly easy to make, allowing you to whip up a batch even on a weeknight. With just a handful of ingredients, you can create an indulgent treat that impresses friends and satisfies your sweet tooth—without spending hours in the kitchen. Perfect for those impromptu gatherings, right?
Plus, they fit seamlessly into your busy routine. Got a late-night work session? Slice yourself a piece as an energizing snack. Planning a brunch with friends? These bars will elevate the menu without requiring you to be a pastry chef. Imagine discovering how a simple dessert can turn an ordinary evening into a fun, festive occasion!
But let’s not forget about taste. The creamy filling, rich flavors, and that delightful crunch of the outer layer in these cannoli bars can be a game changer. It’s like taking a bite out of Italy, right in the comfort of your kitchen. Experts say that indulging in small treats can actually improve your mood and productivity, making these bars not just delicious, but beneficial too.
Also, did you know that homemade desserts can be healthier than store-bought options? You can modify your cannoli bars to suit any dietary preference, from gluten-free to vegan, just by swapping ingredients. You’re in control of what goes into your treat, ensuring a guilt-free indulgence.
In a world where the work-life balance is often a tightrope walk, cannoli bars offer a delightful reprieve. So roll up your sleeves and treat yourself—you deserve something sweet! Check out more delicious dessert inspirations at Serious Eats or BBC Good Food to keep your culinary creativity flowing!
Ingredients for Cannoli Bars
Essential Ingredients for the Biscoff Cookie Crust
To create a delightful base for your cannoli bars, you’ll need a few key ingredients that will make this crust a memorable part of the dessert. Here’s what you’ll need:
- Biscoff cookies: About 2 cups, crushed. These add a unique touch with their spiced flavor.
- Butter: ½ cup, melted. It binds everything together and adds richness.
- Sugar: ¼ cup. A bit of sweetness helps balance the spiced cookies.
Feel free to explore other crust options if you’re feeling adventurous! Check out resources like Serious Eats for more ideas.
Ingredients for Cannoli Cheesecake Filling
The filling is where the magic happens – creamy, sweet, and oh-so-delicious! Gather these ingredients to create a luscious layer:
- Cream cheese: 16 oz, softened. This forms the rich base of your cheesecake filling.
- Ricotta cheese: 1 cup, drained. Adds a light texture and authentic cannoli flavor.
- Powdered sugar: 1 cup. For that sweet finish, it blends seamlessly.
- Vanilla extract: 1 tsp. A must for flavor enhancement.
- Mini chocolate chips: ⅓ cup. Optional, but recommended for an extra layer of sweetness.
Combining these will lead you to a scrumptious dessert experience that your friends will rave about. Want to know the perfect pairing for your cannoli bars? Try a nice cup of coffee or herbal tea while enjoying them!
Preparing Cannoli Bars
Making cannoli bars is a delightful process that combines the rich flavors of traditional cannoli into an easy-to-manage bar format. Whether you’re hosting a get-together or craving a sweet treat, these bars will impress friends and family alike! Let’s dive into the steps involved.
Prepare the Biscoff Cookie Crust
First things first, we’ll need to create the base for our cannoli bars. The Biscoff cookie crust adds a deliciously spiced and caramelized flavor that complements the filling wonderfully.
- Ingredients: You’ll need about 2 cups of crushed Biscoff cookies, 1/2 cup of melted butter, and a pinch of salt.
- In a mixing bowl, combine the crushed cookies and melted butter until the mixture resembles wet sand.
- Spread the mixture evenly into a parchment-lined baking pan, pressing it firmly to create a stable crust.
- Bake in a preheated oven at 350°F for 10-12 minutes, or until golden brown. Allow it to cool while we prepare the heavenly filling.
This cookie crust is not only easy to make but also an exciting twist—many opt for traditional pie crusts, but the flavor and texture of Biscoff are undeniably superior. If you’d like to learn more about the unique flavor profiles of different crusts, check out this Baking Basics resource.
Mix the Cannoli Cheesecake Filling
Next up is the star of the show: the cannoli cheesecake filling. This creamy mixture is what gives the bars their signature taste.
- Ingredients: For this decadent filling, gather together 16 ounces of cream cheese (softened), 1 cup of powdered sugar, 1 teaspoon of vanilla extract, and about 1 cup of mini chocolate chips.
- In a large mixing bowl, beat the softened cream cheese until it’s smooth and creamy.
- Gradually add in the powdered sugar and vanilla extract, mixing until incorporated.
- Gently fold in the mini chocolate chips for those delightful bursts of flavor!
It’s essential to make sure your cream cheese is at room temperature for that perfect creamy texture. If you’re curious about achieving the best results when mixing cream cheeses, consider exploring this guide.
Assemble the Cannoli Bars
Now that we have both the crust and filling ready, it’s time to put everything together.
- Pour the filling over the cooled cookie crust and spread it evenly.
- If you’re feeling adventurous, you can add additional toppings like crushed nuts or more chocolate chips on top for extra crunch and taste.
- Be sure to smooth out the surface so you have a beautiful finish when you slice the bars later.
Chill the Cannoli Bars
Patience is a virtue, especially when making delicious desserts like these cannoli bars!
- Cover the assembled bars with plastic wrap and pop them into the refrigerator.
- Allow them to chill for at least 3 hours—or even overnight—so they firm up nicely. This chilling process helps all those flavors meld together beautifully.
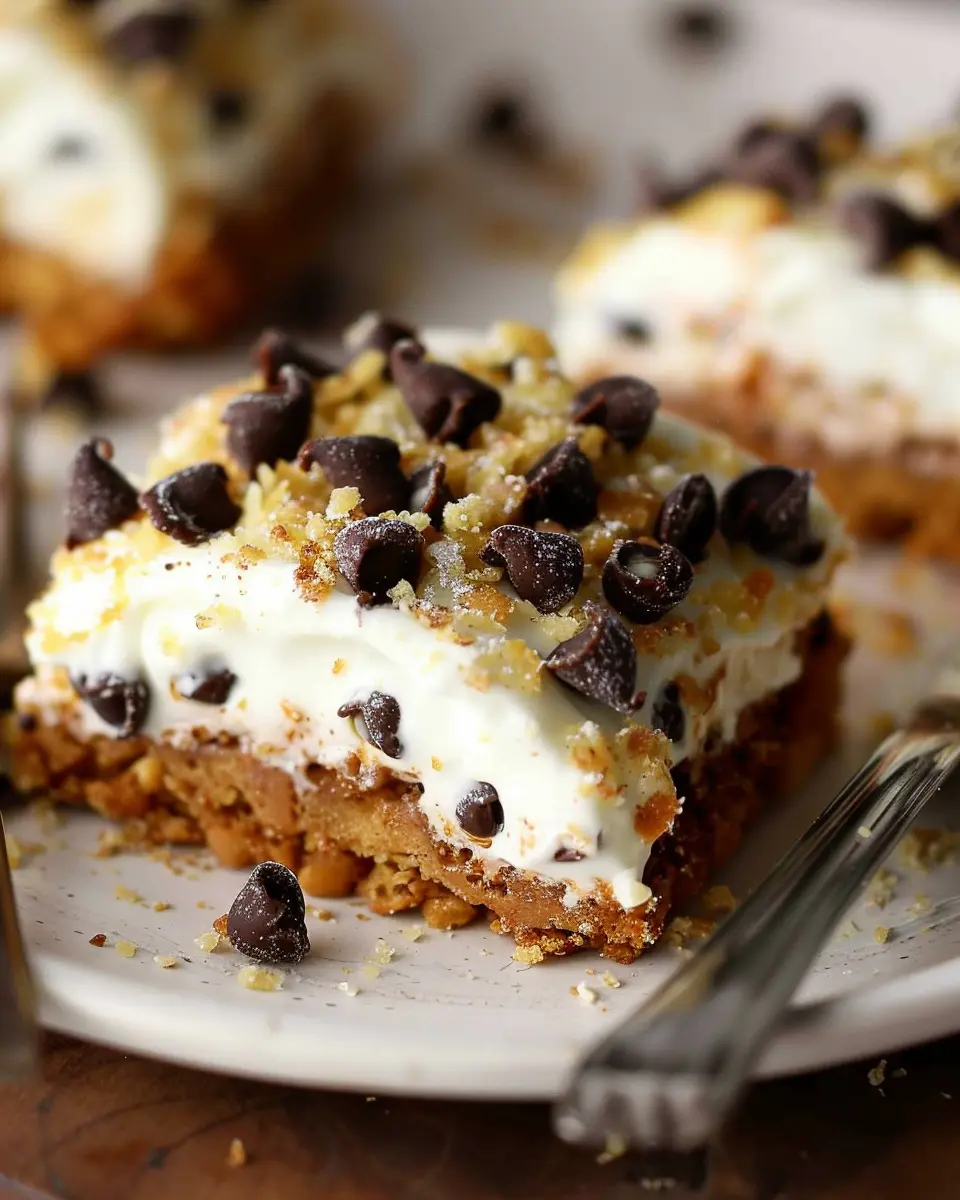
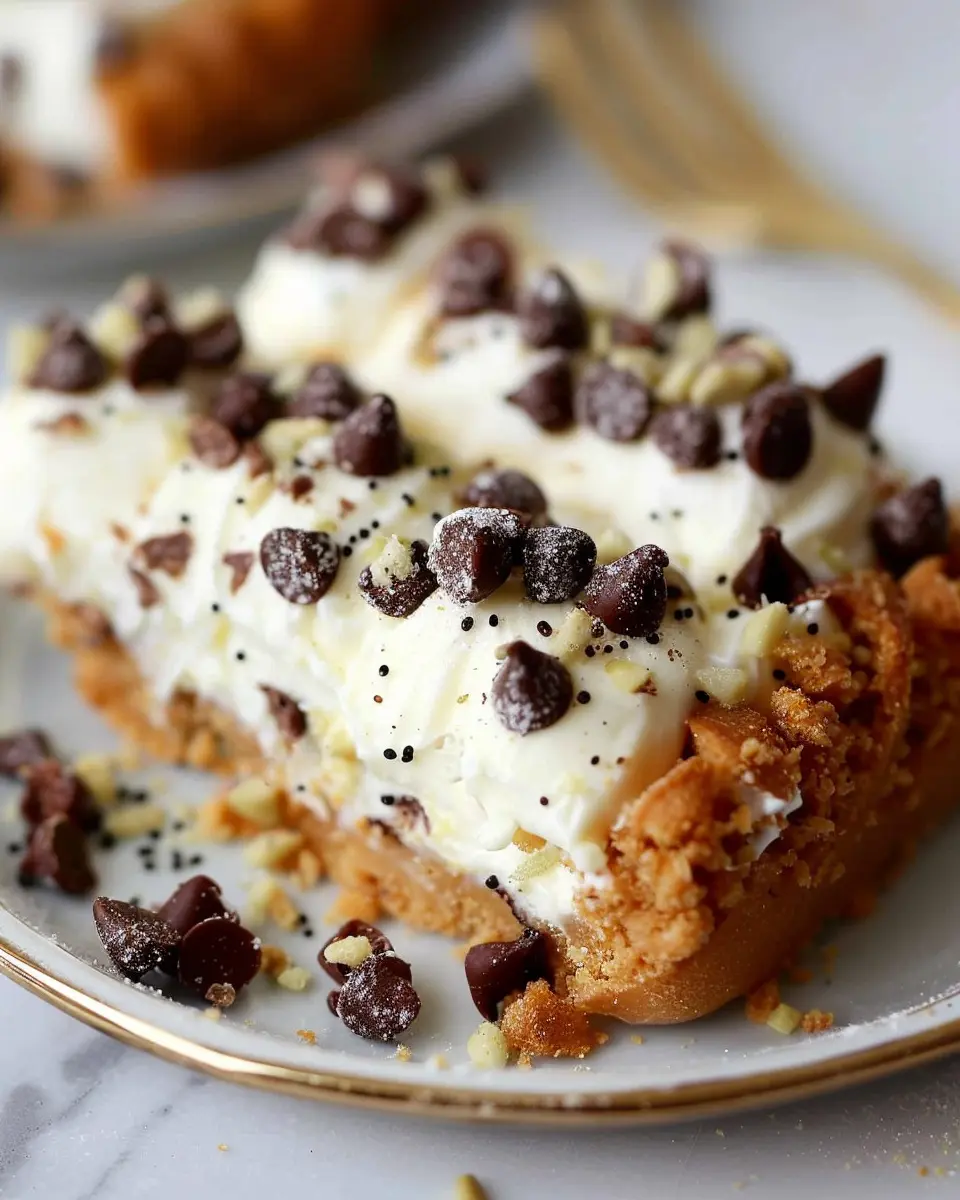
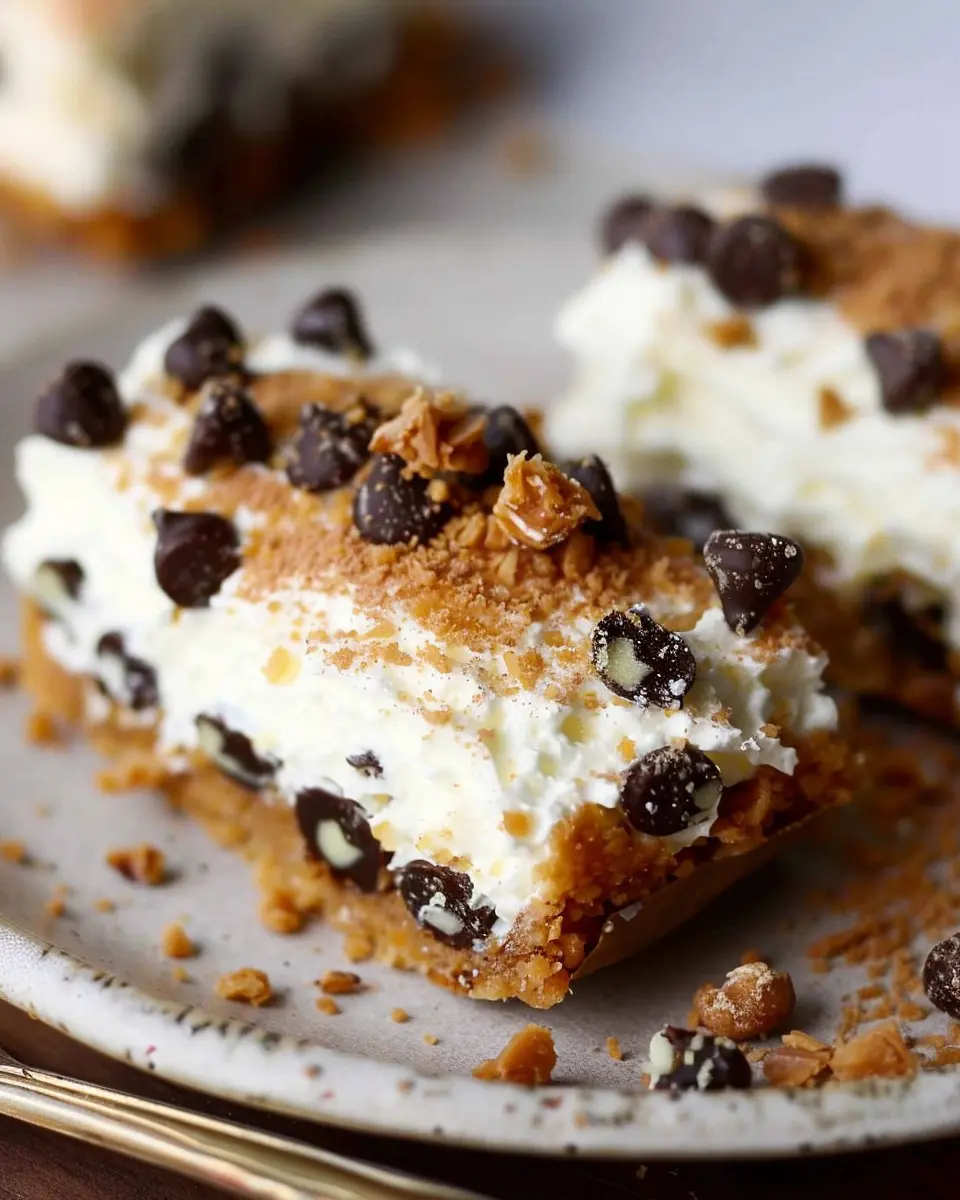
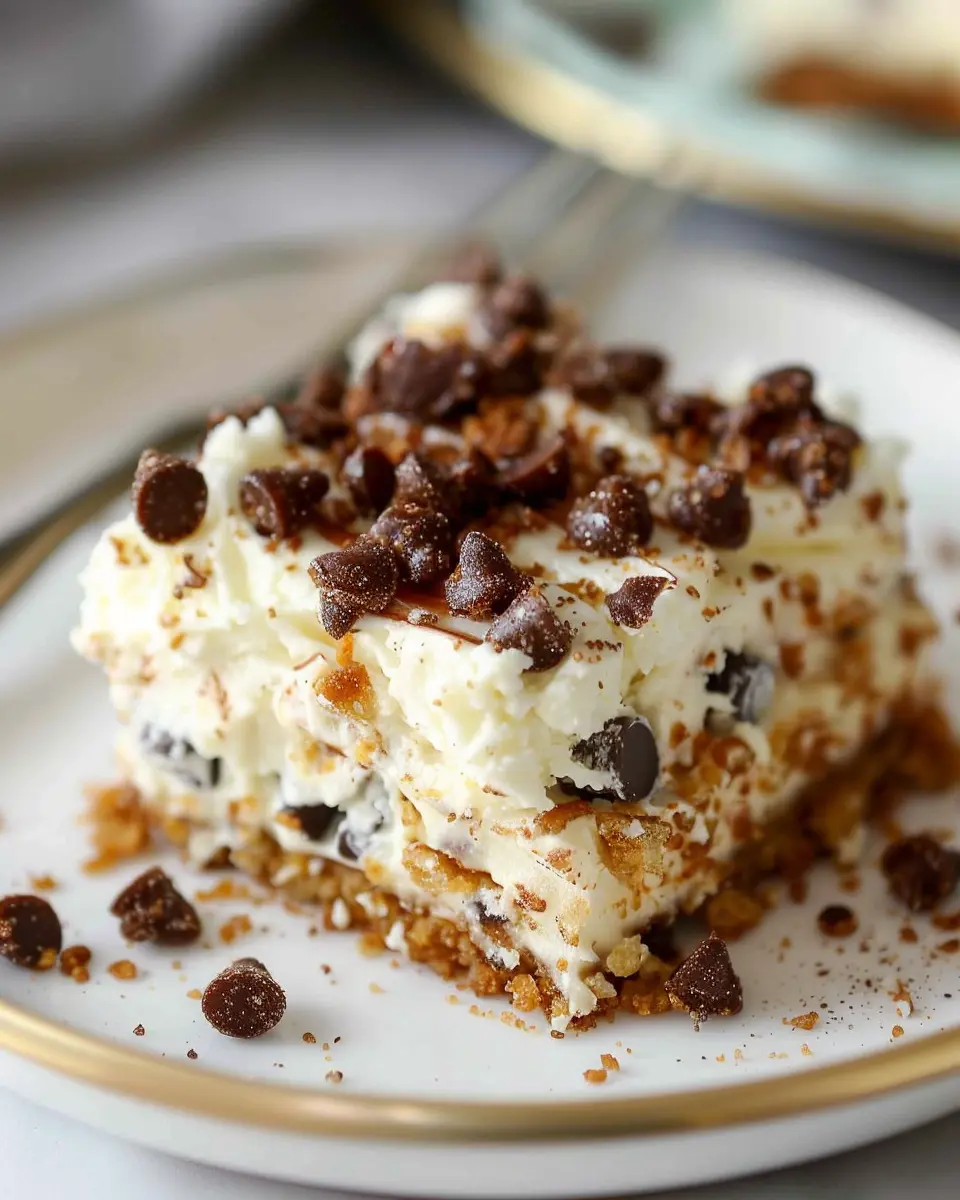
Slice and Serve the Cannoli Bars
Finally, the moment we’ve all been waiting for—slicing and serving those luscious cannoli bars!
- Once set, lift the bars out of the pan using the parchment paper. Place them on a cutting board and slice them into squares or rectangles.
- For an elegant presentation, dust with powdered sugar and garnish with a few chocolate chips or whipped cream on the side.
Enjoy these sweet treats with a strong cup of coffee or a refreshing herbal tea. They’ll be the talk of any gathering!
With these steps, you’re well on your way to creating delicious cannoli bars that combine the classic essence of the traditional dessert with the practicality of a bar format. Trust me, once you try these, you may never go back to traditional cannoli!
Variations on Cannoli Bars
Cannoli bars offer a delightful twist on the traditional Italian pastry, making them accessible for everyone to enjoy. While the classic version is always a hit, why not explore some fun variations?
Fruity Cannoli Bars with Mixed Berries
If you’re looking to brighten up your cannoli experience, fruity cannoli bars with mixed berries are a fantastic option. Imagine velvety ricotta filling combined with fresh blueberries, strawberries, and raspberries. These fruits add a burst of flavor and vibrant color, making your dessert not only delicious but also visually appealing. You can mix the berries right into the filling or layer them on top for a stunning presentation.
To make these fruity delights:
- Use a traditional cannoli bar base.
- Fold in 1 cup of mixed berries into your ricotta filling.
- Drizzle with a bit of honey for extra sweetness!
Serve them chilled, and you have a perfect dessert for a summer gathering or a cozy night in.
Nutty Cannoli Bars with Almonds and Hazelnuts
For those who adore a bit of crunch, nutty cannoli bars with almonds and hazelnuts present a rich, flavorful option. Mixing finely chopped nuts into your ricotta filling not only enhances the texture but also adds a delightful complexity to each bite.
Try this nutty version by:
- Toasting ½ cup of sliced almonds and ½ cup of chopped hazelnuts.
- Incorporating them into your filling for that extra crunch.
Top with a dusting of powdered sugar and chopped nuts to provide an appealing finish. These nutty cannoli bars are perfect for impressing guests or simply treating yourself!
These variations on cannoli bars not only diversify your dessert repertoire but also allow you to get creative in the kitchen. Don’t hesitate to experiment with different flavors and textures—each combination brings something unique to the table! For more ideas, check out sources like Epicurious for further inspiration.
Cooking Tips and Notes for Cannoli Bars
Tips for Achieving the Perfect Crust
When making cannoli bars, the crust is your canvas, so let it shine! Here are some tips:
- Use cold ingredients: Make sure your butter and eggs are cold. This will help create a flakier texture, giving your crust that irresistible crunch.
- Don’t overmix: Mix until just combined. Overworking the dough can result in a tough crust, and nobody wants that!
- Chill before baking: Letting your dough chill for at least 30 minutes allows the gluten to relax and helps maintain structure during baking.
For more crust tips, check out this comprehensive guide on perfect pie dough from Serious Eats.
Notes on Making a Smooth Cheesecake Filling
Your cheesecake filling is where the magic happens in your cannoli bars. To achieve that perfectly smooth texture:
- Room temperature ingredients: Let your cream cheese and eggs come to room temperature before mixing. This prevents lumps in your filling.
- Blend well: Use a stand mixer or an immersion blender for a super smooth consistency. Say goodbye to those pesky lumps!
- Flavor it up: Don’t forget to add vanilla extract or citrus zest for that extra oomph, making your filling unforgettable.
For a deeper dive into making cheesecakes, take a look at this detailed resource on cheesecake techniques.
With these tips, your cannoli bars will surely impress family and friends alike! Happy baking!
Serving Suggestions for Cannoli Bars
Creative Plating Ideas for the Perfect Presentation
Making your cannoli bars visually appealing can elevate any gathering. Start by cutting the bars into uniform pieces for a tidy look. Drizzle melted chocolate or caramel on the plate before placing the bars atop—this adds a gourmet touch. Consider garnishing with powdered sugar, toasted pistachios, or fresh berries for a pop of color. Serve them on a rustic wooden board or a sleek white plate for contrast, and don’t forget small dessert forks to enhance the dining experience.
Perfect Pairings: Beverages to Serve with Cannoli Bars
Pairing your cannoli bars with the right beverages can create a delightful tasting experience. Try serving them with a rich cup of coffee or espresso; the bitterness of the coffee complements the sweetness of the bars perfectly. A refreshing vanilla or almond-infused iced tea can also be great choices, especially during warmer months. For something unique, consider offering a sparkling citrus-infused water that refreshes the palate without overpowering the dessert.
Looking for more ideas? Check out The Spruce Eats for inspiration on beverage pairings that complement sweet treats.
Time Breakdown for Making Cannoli Bars
Preparation Time
Making cannoli bars is a fun and rewarding experience that begins with about 30 minutes of preparation. This is the time you’ll spend gathering your ingredients and creating the delicious filling. Don’t forget to measure everything out neatly—precision is key!
Chill Time
Once you have everything mixed and ready, you’ll want to let those scrumptious layers chill for at least 2 hours. This step is crucial as it helps the flavors meld beautifully, resulting in that decadent taste you crave. Pop them in the fridge and consider whipping up a quick salad while you wait.
Total Time
In total, you’re looking at approximately 2.5 hours from start to finish, including preparation and chill time. So, grab your favorite playlist and enjoy the process—these cannoli bars are totally worth it!
For more cooking tips, check out resources from Serious Eats and Bon Appétit.
Nutritional Facts for Cannoli Bars
Calories and Serving Size
When it comes to indulgent treats like cannoli bars, it’s essential to be mindful of calories. A typical serving of these delicious desserts clocks in around 250-300 calories. This makes them a manageable dessert option, especially when shared with friends or family. Just remember to keep portion sizes in check — sometimes, a small slice can satisfy that sweet craving just as well!
Nutritional Benefits of Key Ingredients
What makes cannoli bars a bit more than just a guilty pleasure are their key ingredients:
-
Ricotta Cheese: Rich in protein and calcium, ricotta cheese adds a creamy texture while offering nutritional benefits. A great source of essential nutrients, it can help support muscle health and strengthen bones.
-
Almonds: Often used in crusts or as a topping, almonds are high in healthy fats, fiber, and protein. They can promote heart health and provide lasting energy.
-
Dark Chocolate: If your version includes dark chocolate, you’re in luck! Dark chocolate is packed with antioxidants and can elevate mood. It’s all about balance, right?
For more in-depth nutritional insights, you might want to check out resources like the USDA FoodData Central or the Academy of Nutrition and Dietetics. Treat yourself to cannoli bars in moderation, and you’ll enjoy their deliciousness while still nourishing your body!
FAQs about Cannoli Bars
Can I make Cannoli Bars ahead of time?
Absolutely! Cannoli Bars are a fantastic make-ahead dessert. You can prepare the crust and filling a day in advance, which actually allows the flavors to blend beautifully. Just keep the filling separate from the crust until you’re ready to serve to maintain that delightful crunch. If you’re hosting a party, this is a game-changer! You can have your dessert ready to go with minimal stress.
How do I store leftover Cannoli Bars?
If you find yourself with extra cannoli bars, storing them is a breeze. Just pop them in an airtight container and place them in the refrigerator. They should stay fresh for about three to five days. But trust me, they’re so delicious, they may not last that long! If you notice the crust softening over time, consider storing the crust and filling separately for the best texture.
What can I use instead of Biscoff cookies for the crust?
Not a fan of Biscoff cookies, or maybe you want to try something new? No problem! You can substitute them with several alternatives. Here are a few options:
- Graham Crackers: They provide that classic sweet and crunchy texture.
- Digestive Biscuits: Perfect for a British twist!
- Chocolate Cookies: If you love chocolate, this could take your cannoli bars to another level.
Experiment with different flavors and textures to find your favorite. It’s all about making this dessert your own!
If you want to learn more about cannoli bars and their versatility, check out this resource on Italian desserts. It’s a treasure trove of delicious ideas!
Conclusion on Cannoli Bars
Making Cannoli Bars Your New Go-To Dessert
Incorporating cannoli bars into your dessert rotation is a delightful choice for anyone looking to impress without too much fuss. These bars not only offer the rich, creamy flavors of traditional cannoli but are also easy to make and serve—perfect for gatherings or cozy nights in.
Think of the joy on your friend’s faces as they indulge in these delectable creations! Plus, they can be customized with various toppings like chocolate chips or fresh fruit, making each batch uniquely yours. For a quick guide on presentation tips, check out this helpful article on dessert styling here.
So why not try making these decadent treats your new favorite dessert? Your sweet tooth will thank you!
PrintCannoli Bars: The Best Indulgent Treat for Home Cooks
Indulge in the delightful taste of cannoli bars, a delicious treat for any occasion.
- Prep Time: 15 minutes
- Cook Time: 30 minutes
- Total Time: 45 minutes
- Yield: 12 bars 1x
- Category: Dessert
- Method: Baking
- Cuisine: Italian
- Diet: Vegetarian
Ingredients
- 1 cup all-purpose flour
- 1/2 cup granulated sugar
- 1/2 cup ricotta cheese
- 1/4 cup unsweetened cocoa powder
- 1/2 teaspoon vanilla extract
- 1 teaspoon baking powder
- 1/4 teaspoon salt
- 1/2 cup mini chocolate chips
Instructions
- Preheat your oven to 350°F (175°C).
- In a mixing bowl, combine the flour, sugar, cocoa powder, baking powder, and salt.
- Add the ricotta cheese and vanilla extract, mixing until well combined.
- Fold in the mini chocolate chips.
- Spread the mixture into a greased baking dish.
- Bake for 25-30 minutes or until a toothpick comes out clean.
- Allow to cool before cutting into bars.
Notes
- For added flavor, consider adding orange zest to the mixture.
- These bars are great served with whipped cream.
Nutrition
- Serving Size: 1 bar
- Calories: 200
- Sugar: 10g
- Sodium: 180mg
- Fat: 8g
- Saturated Fat: 4g
- Unsaturated Fat: 3g
- Trans Fat: 0g
- Carbohydrates: 28g
- Fiber: 1g
- Protein: 4g
- Cholesterol: 20mg
Keywords: Cannoli Bars