Introduction to Garlic Herb Dutch Oven Bread
Why homemade bread is a game changer
There’s something magical about the aroma of fresh bread baking in your kitchen. When you decide to make your own, you don’t just elevate a meal; you take part in a therapeutic process that can bring families together. Homemade bread allows you to control the ingredients and flavors, giving you the freedom to experiment with various herbs and spices. Just think—your garlic herb Dutch oven bread recipe can transform an ordinary dinner into a warm and inviting experience, making every bite feel special.
Moreover, baking your own bread can be much healthier than store-bought options. Many commercial breads contain preservatives and additives. When you make bread at home, not only can you avoid these unwanted ingredients, but you can also introduce nutritious additions like whole grains, seeds, or herbs. This is especially important for young professionals looking to maintain a healthy lifestyle while enjoying delicious foods.
The benefits of a Dutch oven for baking
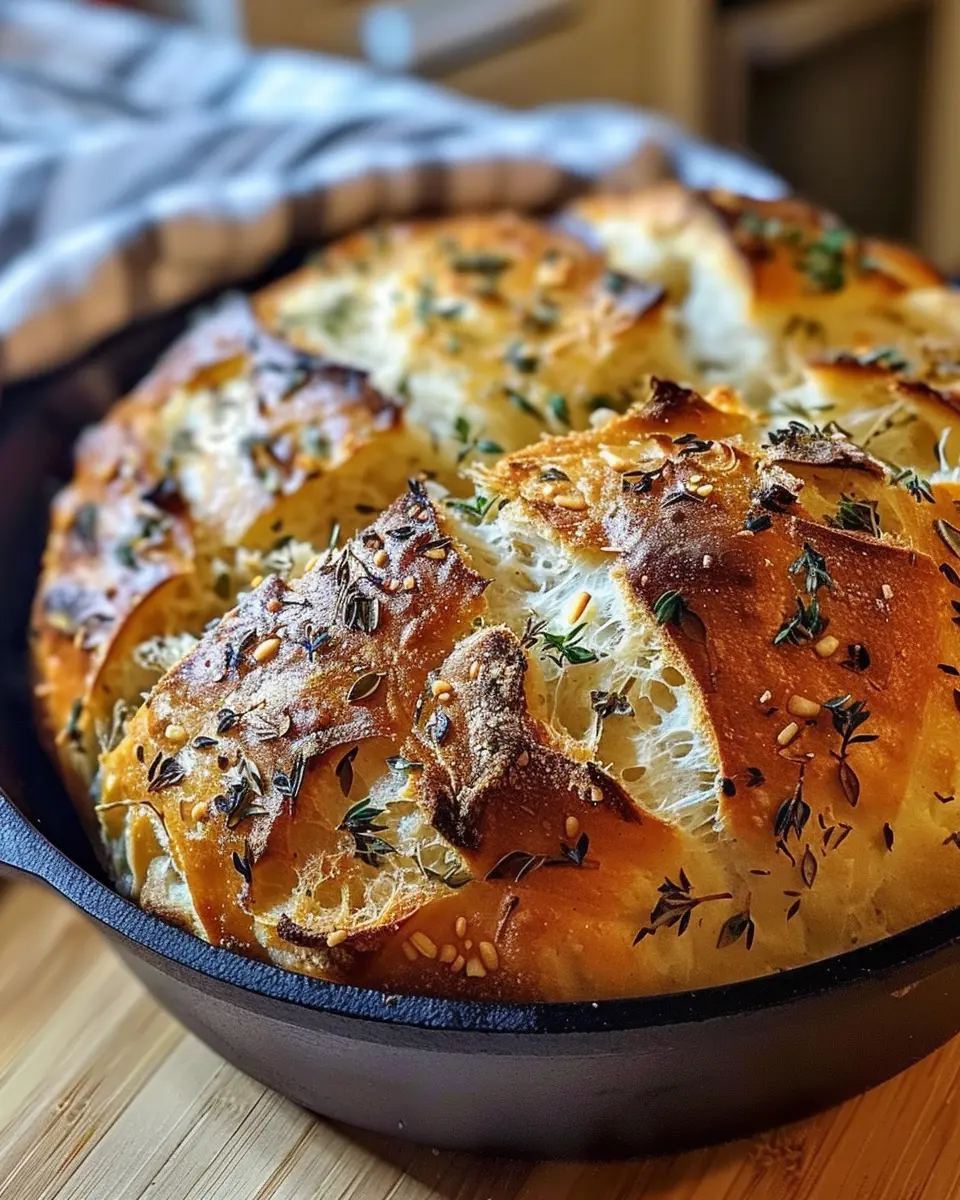
If you haven’t yet jumped on the Dutch oven bandwagon, now’s the time! These versatile cooking pots are fantastic for crafting mouthwatering garlic herb Dutch oven bread. Why? Well, for starters, the heavy lid traps steam, resulting in a beautifully crusty exterior while keeping the inside soft and airy. This effect mimics the conditions of a bakery oven, which is why Dutch ovens are frequently touted by professional bakers.
- Even heat distribution: The cast iron maintains consistent temperatures so you won’t encounter hot spots during baking.
- Versatility: From slow cooking to quick baking, the Dutch oven can handle it all.
- Ease of use: Simply combine your ingredients, let them rise, then bake right in the pot.
If you want to dive deeper into the benefits of homemade bread, check out resources like America’s Test Kitchen or Serious Eats. These sites offer valuable insights and tips to elevate your baking game.
Ready to roll up your sleeves and get your hands floury? Let’s dive into our garlic herb Dutch oven bread recipe that will surely impress friends and family alike!
Ingredients for Garlic Herb Dutch Oven Bread
Essential ingredients for the perfect loaf
To whip up a delicious garlic herb Dutch oven bread, you’ll need a handful of essential ingredients that come together beautifully. Here’s what you shouldn’t skip:
- All-purpose flour: 3 cups for the perfect texture.
- Warm water: 1 ½ cups to activate your yeast.
- Active dry yeast: 2 teaspoons; fresh yeast will give you that airy rise.
- Salt: 1 teaspoon; a key ingredient to enhance flavors.
- Olive oil: 2 tablespoons to enrich the dough.
- Minced garlic: 4 cloves, or more if you’re feeling adventurous.
- Fresh herbs: A mix of rosemary and thyme brings a wonderful aroma.
Looking for a guide on bread-making techniques? Check out this bread-making basics article.
Optional ingredients for extra flavor
Want to take your garlic herb Dutch oven bread recipe to the next level? Consider these optional additions:
- Parmesan cheese: ½ cup for a cheesy kick.
- Turkey bacon or chicken ham bits: For extra heartiness.
- Red pepper flakes: A pinch will add a delightful kick.
These extras can elevate your bread into something truly special. The beauty of this recipe is its versatility. Don’t hesitate to experiment and find the flavor profile that speaks to you!
Step-by-step Preparation of Garlic Herb Dutch Oven Bread
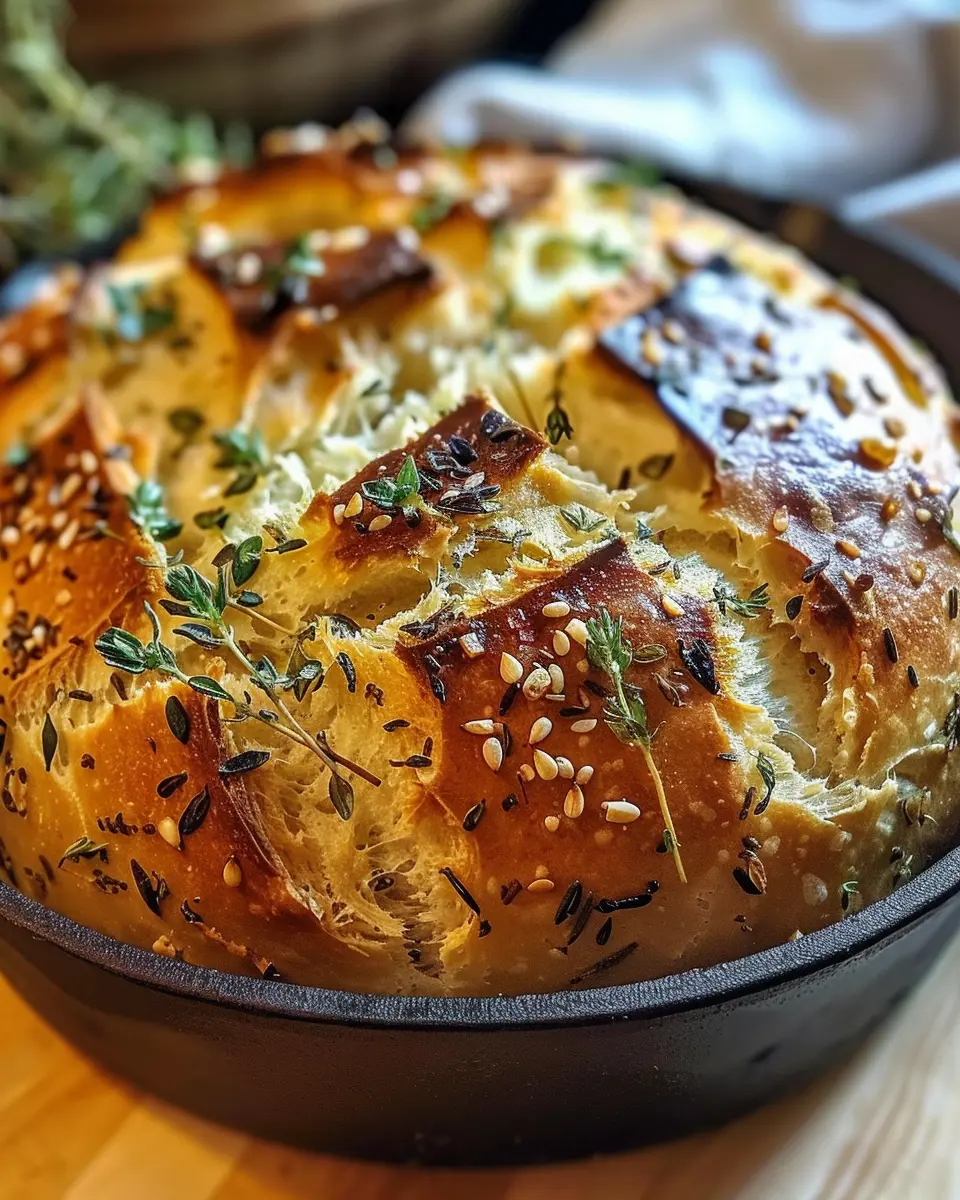
Making garlic herb dutch oven bread is a rewarding experience that fills your kitchen with delightful aromas and beckons everyone to gather around the table. This rustic bread is easy to prepare and uses simple ingredients while offering a complex flavor profile that’s perfect for any meal. Let’s walk through the preparation step by step!
Combine the dry ingredients
First things first: let’s get those dry ingredients ready. In a large mixing bowl, whisk together:
- 3 cups of all-purpose flour
- 1 packet of instant yeast (about 2 ¼ teaspoons)
- 1 teaspoon of salt
- 1 teaspoon of sugar (this helps activate yeast)
- 1 teaspoon of garlic powder (for that flavorful kick)
Mixing these together forms the backbone of your bread and brings out the flavor of the garlic herb dutch oven bread recipe. Ensuring the ingredients are evenly combined at this stage sets you up for a successful rise later.
Mix in the garlic and herbs
Now, let’s add some freshness! Stir in:
- 2 tablespoons of finely chopped fresh rosemary
- 2 tablespoons of finely chopped fresh parsley
- 2 cloves of garlic, minced
These herbs not only enhance the flavor but also contribute to a gorgeous aroma as the bread bakes. Pro tip: if you’re looking for a shortcut, you can use dried herbs, but fresh herbs will give a much brighter flavor profile.
Incorporate the water and form the dough
Gradually pour in 1 ½ cups of lukewarm water into the dry mixture while stirring with a wooden spoon or spatula. The key here is to mix until everything is just combined. You’re aiming for a shaggy dough that is slightly sticky but cohesive. It’s okay if it doesn’t look perfect at this stage; it will come together as it kneads and rests.
Let the dough rise to perfection
Cover your mixing bowl with a damp cloth or plastic wrap, and place it in a warm area of your kitchen. Allow it to rise for about 1 to 2 hours, until the dough has doubled in size. This fermentation process is essential and can greatly affect the flavor and texture of your garlic herb dutch oven bread.
Shape and rest the dough
Once the dough has risen beautifully, turn it out onto a well-floured surface. Gently shape it into a ball by folding the edges into the center. This shaping step is crucial for developing the dough structure. After shaping, let it rest for another 30-60 minutes, covered with a cloth. This allows the dough to relax, making it easier to handle and giving it that perfect texture.
Preheat the Dutch oven and prepare for baking
While the dough rests, preheat your Dutch oven in the oven at 450°F (232°C) for at least 30 minutes. Preheating the pot will ensure an even bake and create that wonderfully crispy crust everyone loves. Remember, the sizzling sound when the dough meets the hot cast iron is what we live for!
Bake the bread to golden perfection
Now, for the grand finale! Carefully place parchment paper in the bottom of the hot Dutch oven and transfer your loaf onto it. Cover it with the lid and bake for 30 minutes. After this, remove the lid and bake for an additional 15-20 minutes to achieve that gorgeous golden crust.
Once baked, let it cool on a wire rack for at least 30 minutes before slicing. This allows the bread to set properly, enhancing the flavor and texture. Trust me; it’s hard to resist tearing into this garlic herb dutch oven bread fresh from the oven!
And there you have it! A simple yet delicious recipe that is perfect for any occasion—be it a family dinner or a cozy night in. Don’t forget to serve it with butter or olive oil for dipping. Enjoy the process and the delightful results!
Variations on Garlic Herb Dutch Oven Bread
When it comes to the garlic herb Dutch oven bread recipe, the possibilities for delightful variations are practically endless. You can easily customize this easy-to-make bread to suit different taste preferences or to impress guests at your next gathering. Let’s dive into a couple of my favorite twists!
Cheesy Garlic Herb Bread
If you’re a cheese lover, this version is tailor-made for you. Adding cheese not only enhances the flavor but also introduces a delightful gooey texture.
- Ingredients to Add: Incorporate shredded mozzarella or a tangy Parmesan into the dough. For an extra kick, consider a sprinkle of chili flakes or diced jalapeños.
- Preparation: Mix the cheese directly into the dough before the second rise, or layer it within the dough for a melty surprise when you slice into it. Serve this alongside marinara sauce for a fun twist on the classic breadstick!
Sun-Dried Tomato and Basil Variant
This variant brings a refreshing Mediterranean flair to your garlic herb Dutch oven bread recipe. The combination of sun-dried tomatoes and fresh basil not only provides vibrant flavors but also adds a beautiful color.
- Ingredients to Add: Chop up some sun-dried tomatoes and mix in fresh basil leaves.
- Preparation: Fold these into the dough during mixing for a lovely hint of sweetness from the tomatoes and a fragrant aroma from the basil.
Feel free to explore these variations or even create your own! The beauty of this bread lies in its versatility. For more inspiration, check out The Spruce Eats for additional flavor combinations and tips! Remember, each loaf is an opportunity to express your unique taste. Enjoy experimenting!
Cooking Tips and Notes for Garlic Herb Dutch Oven Bread
Key techniques for success
Creating the perfect garlic herb Dutch oven bread is all about technique. Here are some essential tips:
- Knead with intention: Aim for a soft, tacky dough. Over-kneading can lead to tough bread, while under-kneading results in a dense texture.
- Proof correctly: Allow your dough to rise in a warm spot. A cozy kitchen or a pre-warmed oven works wonders. Just make sure it doubles in size!
- Steam it up: A Dutch oven traps steam, creating that delightful crust. Bake with the lid on for the first 30 minutes to lock in moisture, then remove it for a crispy finish.
Common mistakes to avoid
Even seasoned cooks make slip-ups! Here are a few pitfalls to steer clear of:
- Not using fresh herbs: Fresh herbs add brightness and flavor. Dried herbs can’t replicate that aromatic punch!
- Ignoring temperature: Ensure your oven is fully preheated; otherwise, you may end up with unevenly baked bread.
- Skipping the Dutch oven preheat: It’s tempting to toss your dough in a cold pot, but a preheated Dutch oven helps achieve that glorious crust you crave.
For further insights, consider checking out sources like the King Arthur Baking Company or Serious Eats for more bread-baking wisdom!
Serving Suggestions for Garlic Herb Dutch Oven Bread
Perfect pairings for your fresh bread
This garlic herb Dutch oven bread recipe is a versatile delight that pairs wonderfully with numerous dishes. Imagine savoring a warm slice alongside:
- Soup: Whether it’s a hearty tomato basil or a creamy potato leek, the bread’s flavors enhance the richness of your soup.
- Salads: A light, zesty salad topped with vinaigrette complements the savory notes in the bread beautifully.
- Dips: Enjoy your favorite hummus or a spinach artichoke dip as a delicious appetizer—perfect for gatherings.
Feeling inspired? Check out This American Bite for more bread-related serving ideas!
Creative uses for leftovers
If you happen to have some garlic herb Dutch oven bread left over, don’t fret! There are plenty of great ways to make the most of those slices:
- Bread Crumbs: Toast and blend leftover bread into crumbs for a crunchy topping on casseroles or salads.
- French Toast: Transform stale bread into a luxurious breakfast by dipping slices in a mixture of eggs, milk, and vanilla before frying to golden perfection.
With these suggestions, you’ll enjoy every last crumb of your delicious bread!
Time Breakdown for Garlic Herb Dutch Oven Bread
When it comes to baking this delicious garlic herb dutch oven bread recipe, understanding the time needed is essential for perfecting this warm, aromatic delight. Here’s a neat breakdown:
Preparation Time
You’ll want to carve out about 15-20 minutes to gather your ingredients and mix them together. It’s the perfect time to enjoy some music or a podcast while you whisk away!
Rising Time
Let your dough have some beauty sleep! It requires approximately 1-2 hours to rise, depending on the warmth of your kitchen. This is when those lovely flavors start to develop. While you wait, consider prepping your favorite spread or dip.
Baking Time
Finally, the moment you’ve been waiting for! Bake the garlic herb dutch oven bread for about 30-40 minutes. The aroma filling your kitchen will be irresistible, so maybe prepare a glass of fresh lemonade or herbal tea as a companion for your bread.
For additional tips on perfecting your baking skills, check out resources from King Arthur Baking or Taste of Home. Enjoy your homemade bread experience!
Nutritional Facts for Garlic Herb Dutch Oven Bread
Calories and Macronutrients
When you indulge in this garlic herb Dutch oven bread recipe, you’re treating yourself to a delightful balance of flavors and nutrients. One serving typically contains about 190 calories, focusing on macronutrients that support your active lifestyle. You can expect:
- Carbohydrates: Approximately 35g
- Protein: Roughly 6g
- Fat: About 3g
This combination makes it a wonderful addition to your meals, perfect for pairing with hearty soups or enjoying with dips.
Health Benefits of Homemade Bread
Homemade bread not only tastes better, but it’s also a fantastic way to ensure you’re consuming high-quality ingredients. By making your own garlic herb Dutch oven bread, you can control what goes in, avoiding preservatives and additives found in store-bought versions.
Some benefits include:
- Nutrient Control: You can add ingredients like whole grains or seeds for extra fiber and protein.
- Gut Health: The fermentation process in bread-making increases beneficial bacteria, promoting gut health.
- Satisfaction: The smell of baking bread can elevate your mood and provide a cozy atmosphere at home.
If you’re interested in the science behind homemade bread, check out this portion of the Harvard Health Blog, where experts discuss the health benefits of whole grains. So the next time you pull a loaf out of the oven, remember, it’s not just about taste—it’s a nourishing choice!
FAQs about Garlic Herb Dutch Oven Bread
Can I use whole wheat flour?
Definitely! While our garlic herb Dutch oven bread recipe calls for all-purpose flour for a lighter texture, you can substitute part or all of it with whole wheat flour. Just keep in mind that this will affect the flavor and density of the bread. If you’re switching entirely, consider adding a little extra water to compensate for the absorbency of whole wheat. For a balanced approach, try 50% all-purpose and 50% whole wheat.
How do I store homemade bread?
Storing your garlic herb Dutch oven bread properly is key to keeping it fresh. Here are a few tips for optimal storage:
- Room Temperature: Place your cooled bread in a paper bag to absorb moisture and prevent it from getting soggy.
- Freezing: If you’re looking to store it longer, wrap the bread tightly in plastic wrap and then in aluminum foil. It can last up to three months in the freezer.
- Reheating: When you’re ready to enjoy it again, warm it in a preheated oven at 350°F for about 10 minutes.
What are some ways to enhance the flavor?
Looking to elevate your garlic herb Dutch oven bread? Here are some flavorful suggestions:
- Add Herbs: Fresh or dried herbs like rosemary, thyme, or oregano can add a delightful aroma and taste.
- Cheese: Incorporating shredded cheese like Parmesan or Cheddar can create a savory twist.
- Infused Oils: Use garlic-infused olive oil in your dough or as a drizzle before baking to kick the flavors up a notch.
Feel free to experiment; after all, cooking is all about making recipes your own! For more on baking techniques, consider checking resources like the King Arthur Baking Company for expert tips.
Conclusion on Garlic Herb Dutch Oven Bread
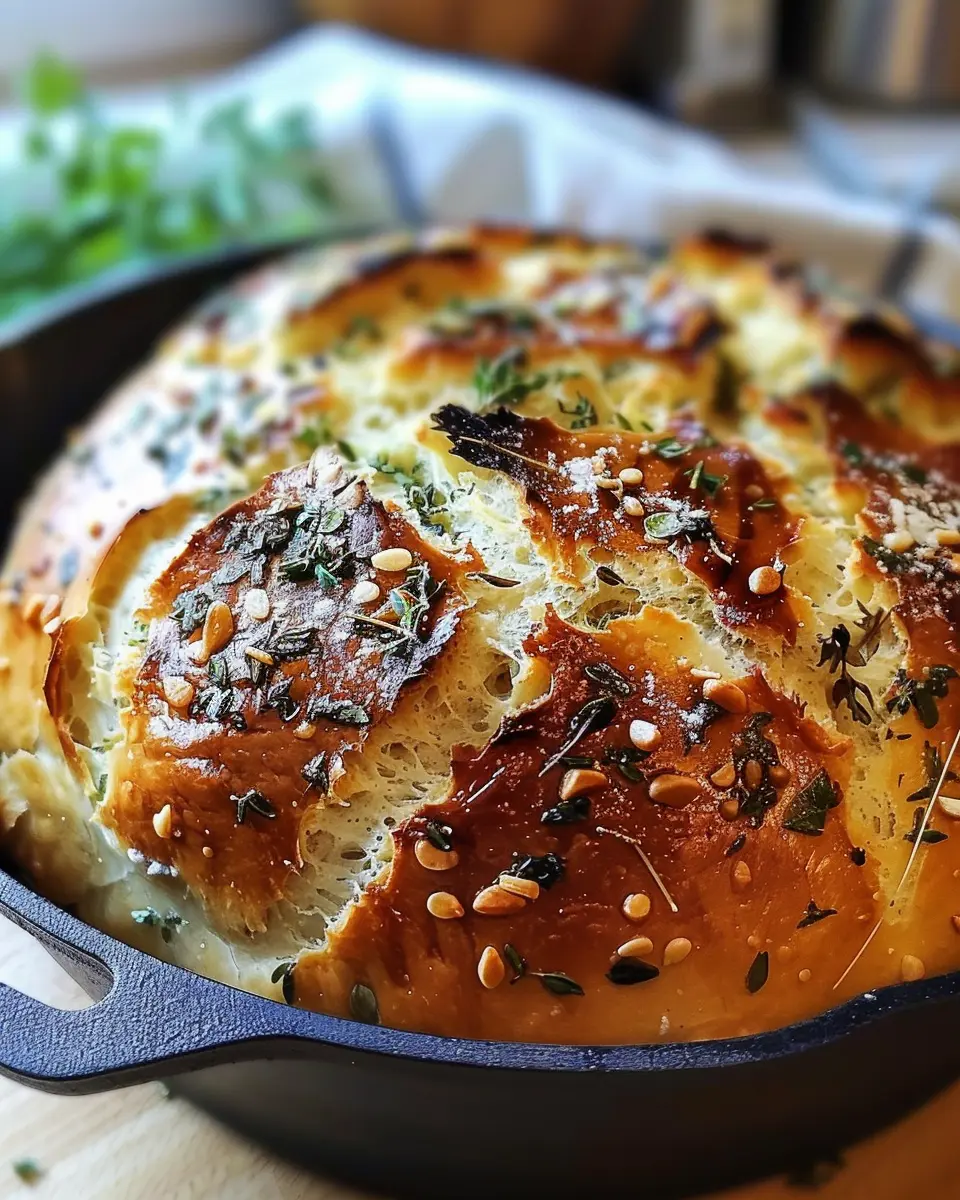
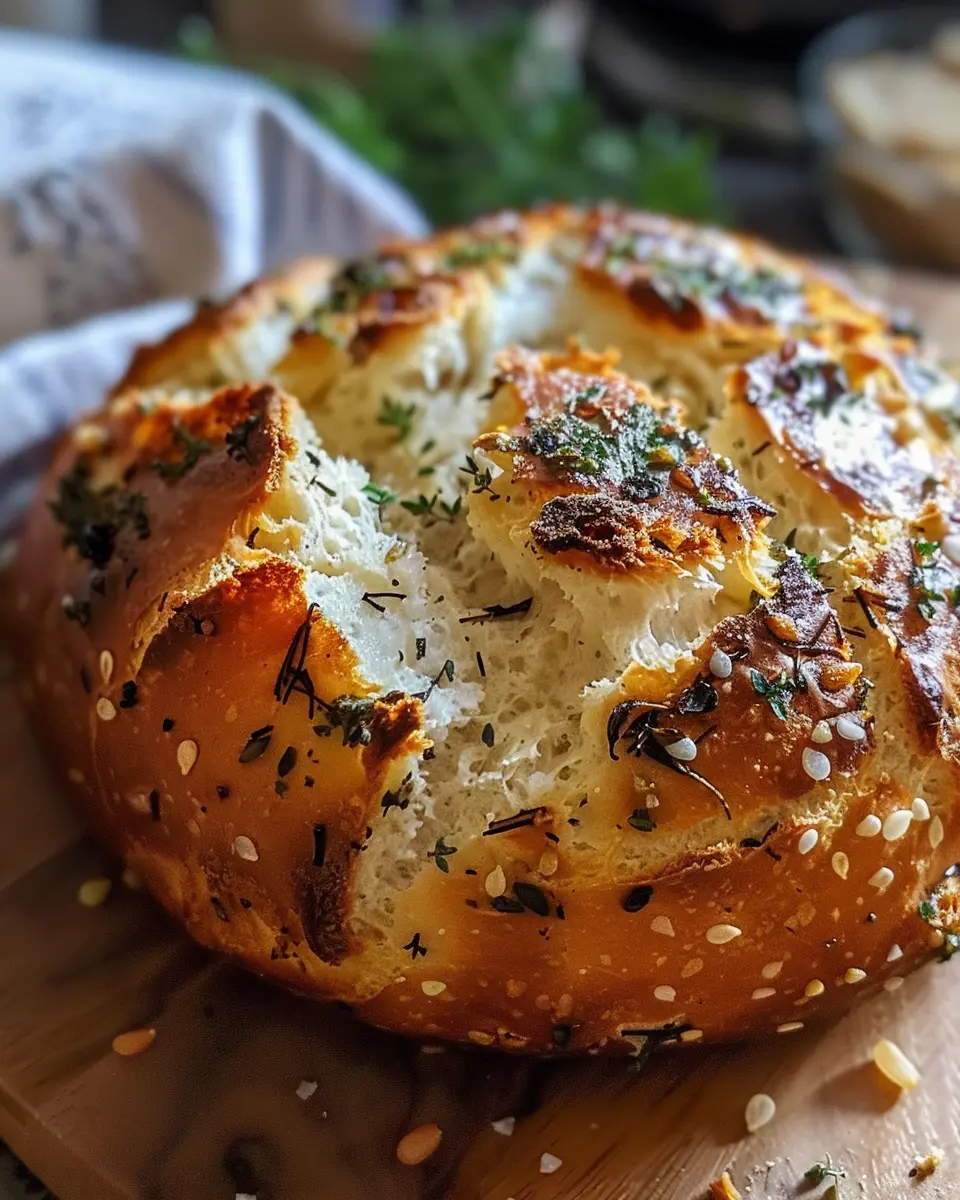
Making your own bread is a delightful experience, bringing warmth and joy to your kitchen. The garlic herb Dutch oven bread recipe combines the rich flavors of garlic and herbs, creating a loaf that’s both aromatic and beautifully crusty. It’s incredibly satisfying to slice into your creation, revealing that soft, inviting interior.
Whether you’re enjoying it fresh from the oven with a spread of butter or as a base for sandwiches, the versatility of this bread makes it a staple. Share this experience with friends or family, and embrace the simple pleasure of homemade bread. For more inspiration, check out resources like The Bread Kitchen for further baking tips!
PrintGarlic Herb Dutch Oven Bread Recipe: The Best Homemade Delight
This Garlic Herb Dutch Oven Bread is a delightful homemade bread recipe that is easy to follow and yields a beautifully crusty loaf.
- Prep Time: 10 minutes
- Cook Time: 45 minutes
- Total Time: 18 hours 55 minutes
- Yield: 1 loaf 1x
- Category: Bread
- Method: Baking
- Cuisine: American
- Diet: Vegetarian
Ingredients
- 3 cups all-purpose flour
- 1 1/2 tsp salt
- 1/2 tsp active dry yeast
- 1 1/2 cups warm water
- 2 tbsp chopped fresh herbs (like rosemary and thyme)
- 4 cloves garlic, minced
Instructions
- In a large bowl, combine flour, salt, yeast, garlic, and herbs.
- Add warm water and stir until a rough dough forms.
- Cover and let rise for 12-18 hours at room temperature.
- Preheat your oven to 450°F (232°C) and place a Dutch oven inside.
- Once heated, carefully remove the Dutch oven, place the dough inside, and cover.
- Bake for 30 minutes covered, then remove the lid and bake for an additional 15-20 minutes until golden brown.
Notes
- Let the bread cool before slicing for the best texture.
- Experiment with different herbs to customize the flavor.
Nutrition
- Serving Size: 1 slice
- Calories: 200
- Sugar: 0g
- Sodium: 360mg
- Fat: 1g
- Saturated Fat: 0g
- Unsaturated Fat: 0g
- Trans Fat: 0g
- Carbohydrates: 43g
- Fiber: 2g
- Protein: 6g
- Cholesterol: 0mg
Keywords: Garlic Herb Dutch Oven Bread, homemade bread, easy bread recipe