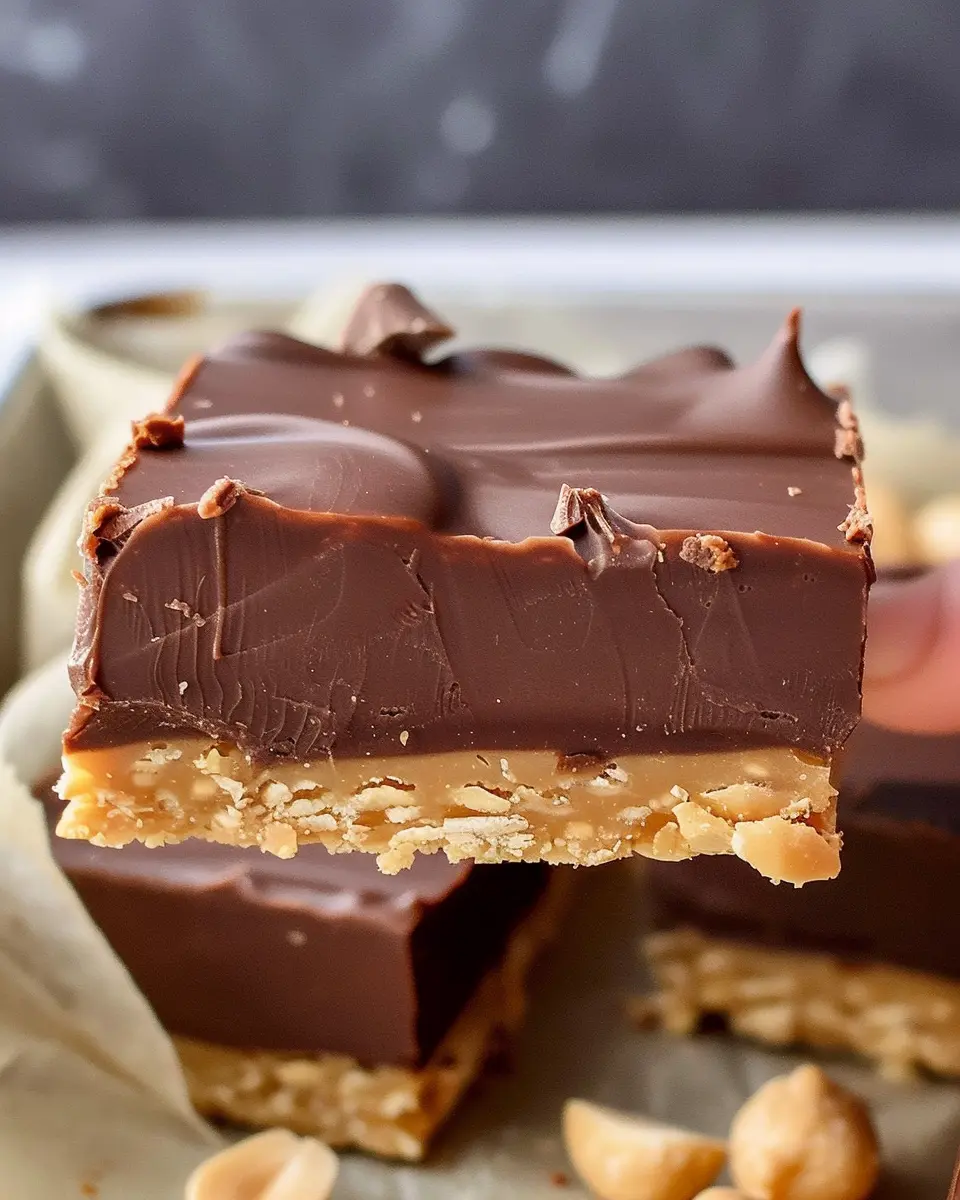
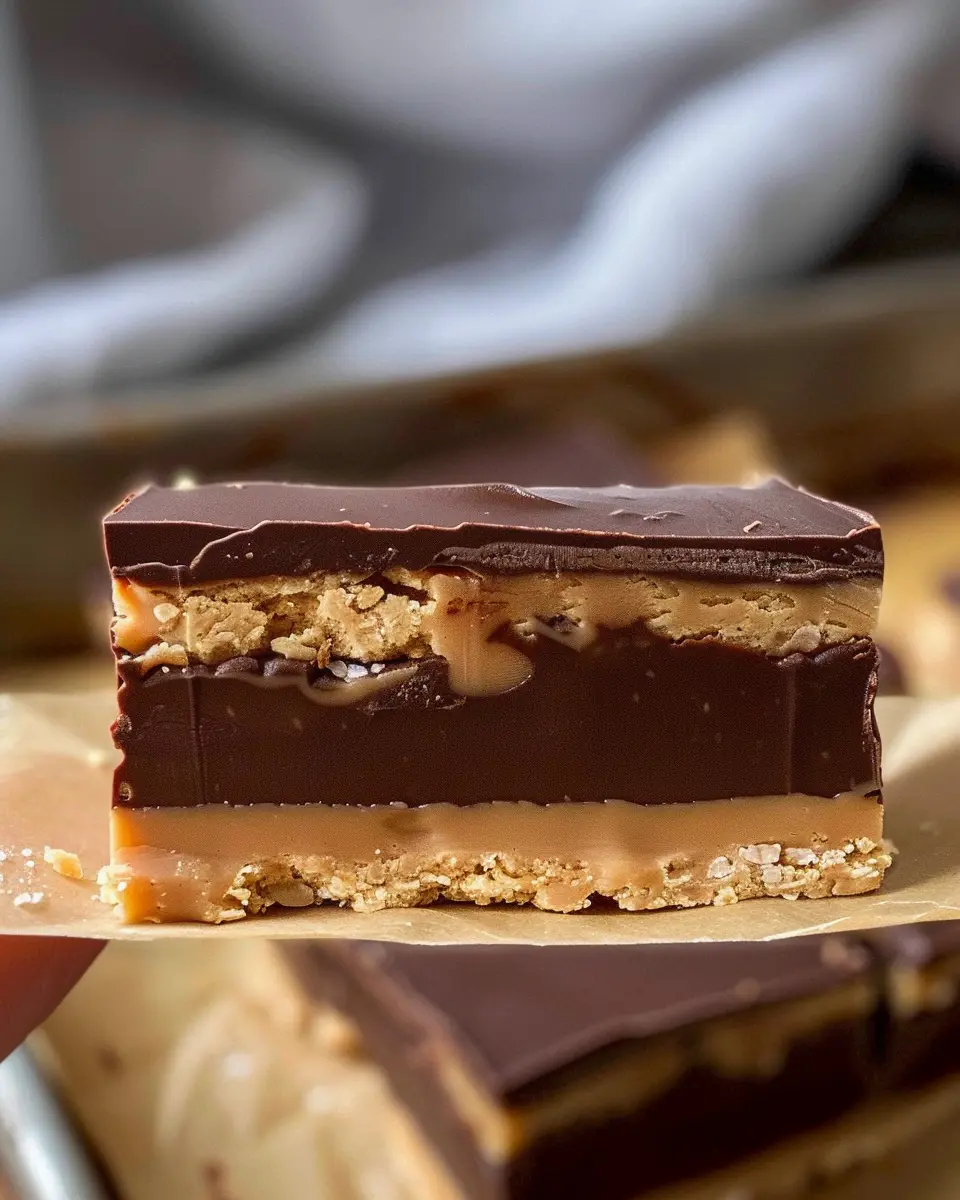
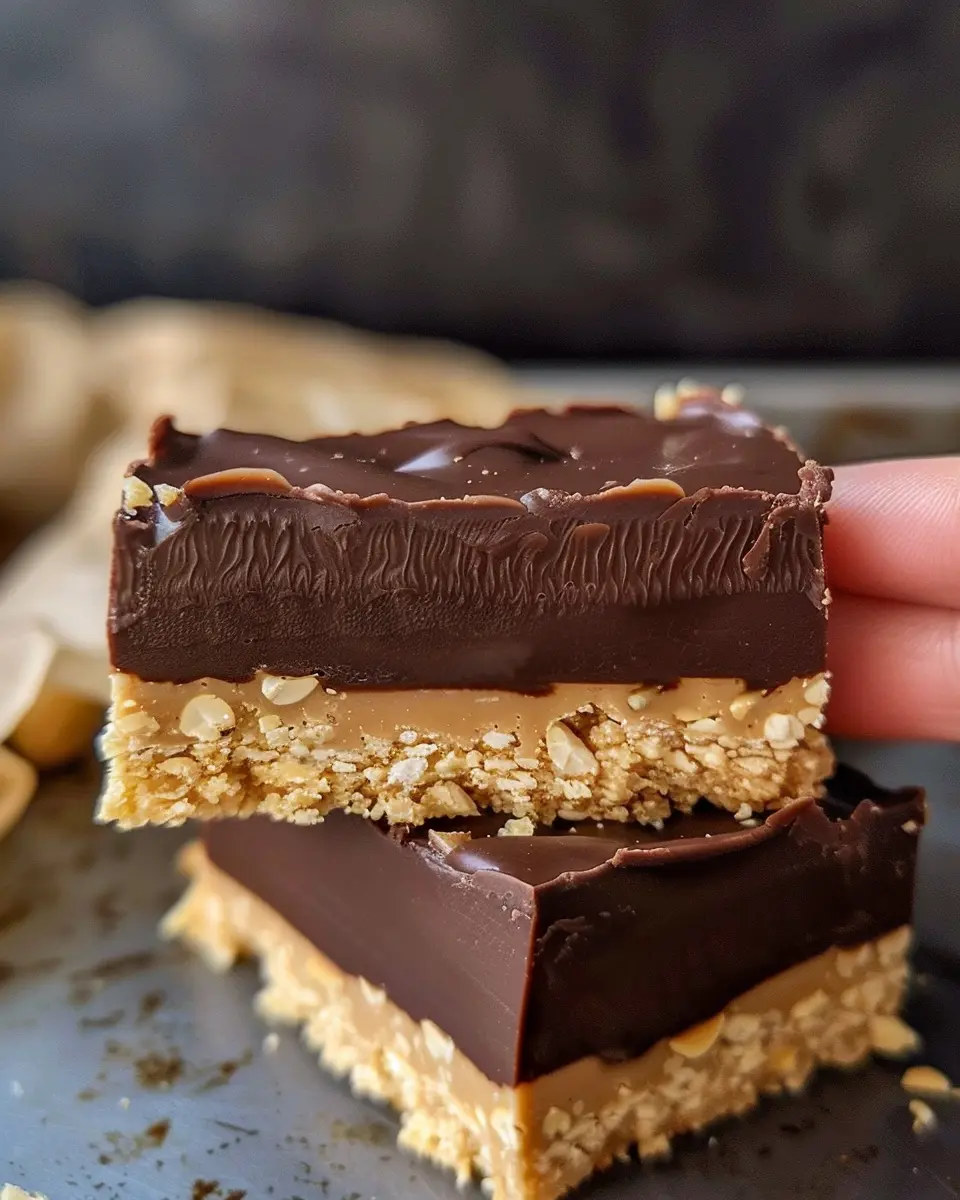
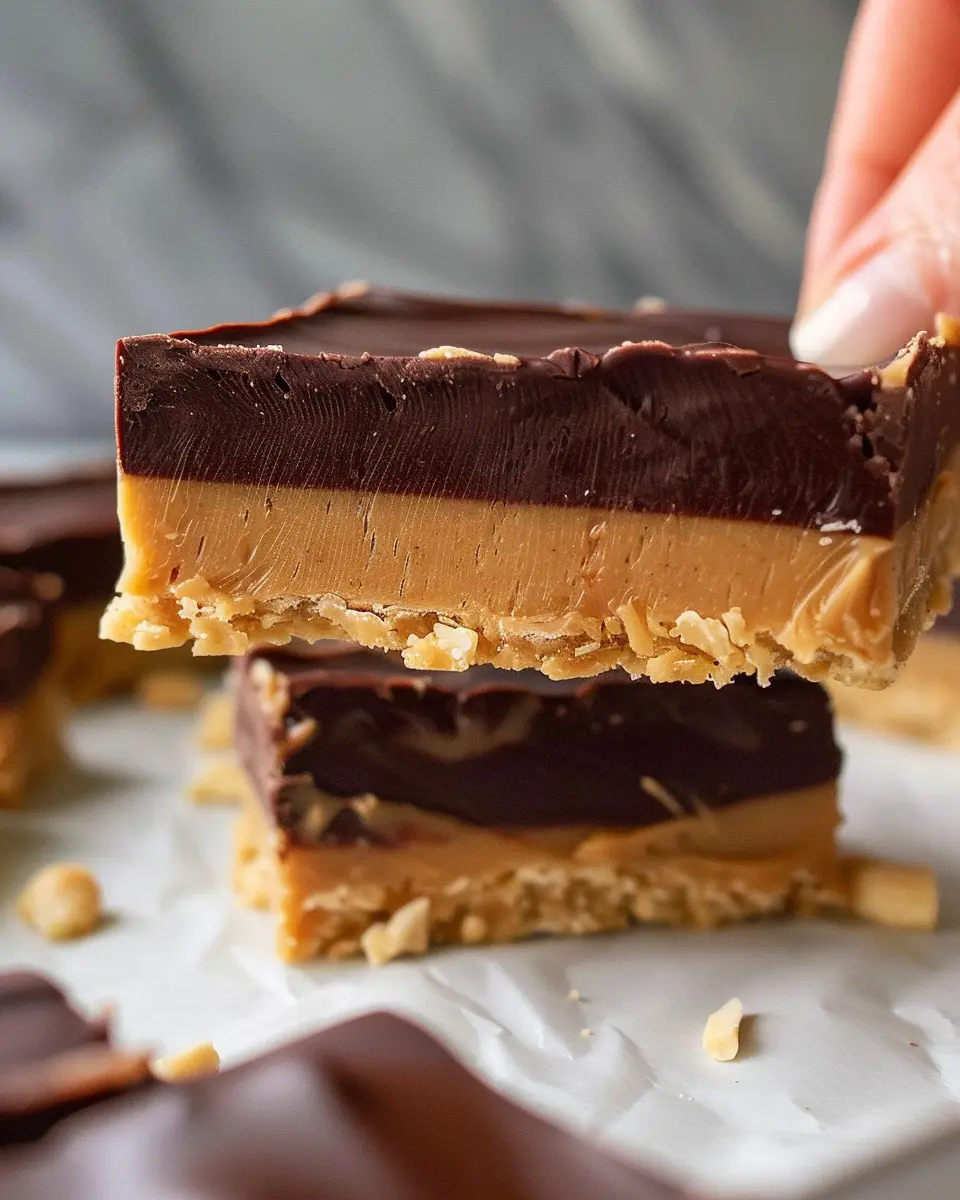
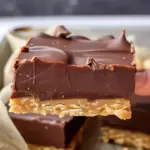
Introduction to Chocolate Peanut Butter No Bake Bars
Why choose no-bake treats?
Have you ever found yourself craving something sweet but thought, “Do I really want to turn on the oven?” If that sounds familiar, you’re not alone! No-bake treats have skyrocketed in popularity for good reason. They save time, energy, and can be just as delicious as baked goods. With the hustle and bustle of life, particularly for young professionals, quick-to-make snacks like chocolate peanut butter no bake bars are perfect for satisfying those sweet tooth cravings without the hassle of preheating your kitchen.
Plus, no-bake recipes typically require fewer ingredients and less cleanup, making it a win-win! You can throw together a batch after work, making it ideal for parties or simply keeping your own pantry stocked. Learn more about the benefits of no-bake recipes here.
The allure of chocolate and peanut butter
Now, let’s talk about why chocolate and peanut butter are a match made in culinary heaven. The rich, creamy taste of peanut butter coupled with the deep, dark notes of chocolate creates an indulgent combo that is hard to resist. According to research, the satisfaction of this combination stems from the balance of sweet and savory flavors, which appeals to our taste buds in a unique way.
You can find chocolate and peanut butter in countless desserts, from cookies to pies, and they never seem to go out of style. A survey by the National Peanut Board highlighted that nearly 60% of Americans enjoy peanut butter in various forms, emphasizing its popularity. You can indulge without the guilt when you’re enjoying chocolate peanut butter no bake bars, which often feature healthier ingredients like oats, nuts, and natural sweeteners.
And you don’t even have to be a culinary wizard to whip these up! With simple ingredients and a straightforward process, anyone can become a no-bake dessert connoisseur. Imagine serving these bars to friends or enjoying them post-workout – a nutritious treat that feels indulgent but fuels your busy lifestyle!
Stay tuned for the full recipe, where we’ll guide you step-by-step in creating these delightful chocolate peanut butter no bake bars!
Ingredients for Chocolate Peanut Butter No Bake Bars
When whipping up a delightful batch of chocolate peanut butter no bake bars, having the right ingredients on hand makes all the difference. Let’s dive into what you’ll need to make this scrumptious treat that’s perfect for a quick snack or dessert.
Base ingredients
To create the flavorful base, gather:
- 1 cup rolled oats: These provide a hearty texture and boost fiber.
- 1 cup peanut butter: Go for the natural stuff, which adds rich creaminess and healthy fats.
- ½ cup honey or maple syrup: This natural sweetener binds everything together while adding a hint of sweetness.
- ½ cup protein powder (optional): A great addition if you’re looking to amp up the nutritional value.
Topping ingredients
Don’t overlook the delicious toppings that elevate your chocolate peanut butter no bake bars:
- 1 cup dark chocolate chips: Melt these for that irresistible chocolate layer.
- 2 tablespoons coconut oil: This helps the chocolate melt smoothly and adds a touch of coconut flavor.
With these ingredients in your pantry, you’re just a few easy steps away from enjoying these delectable bars. For more insight, check out this guide on the benefits of oats!
Preparing Chocolate Peanut Butter No Bake Bars
Making chocolate peanut butter no bake bars is as easy as pie—or should I say, easier! These delicious treats come together quickly and require no oven time, making them perfect for those hot days or when you just don’t want to deal with baking. Let’s roll up our sleeves and dive into the steps of preparing these delightful bars!
Gather Your Equipment
Before we start mixing, it’s important to have all your tools ready to go. Here’s what you’ll need:
- A mixing bowl (large enough to hold all your ingredients)
- A rubber spatula or wooden spoon for mixing
- A measuring cup and spoons
- An 8×8 or 9×9 inch square baking pan
- Parchment paper (optional, but recommended for easy removal)
- A microwave-safe bowl for melting chocolate
- A whisk or fork for stirring
Having everything in place ensures a smoother process, and trust me, it makes the experience way more enjoyable! Plus, who wants to hunt down a spatula halfway through mixing?
Prepare the Base Mixture
Now it’s time to get that creamy, dreamy base mixture made. You’ll want to include the following ingredients:
- 1 cup of oats (rolled, not instant)
- 1 cup of peanut butter (the creamy kind works wonderfully)
- ½ cup of honey or maple syrup for sweetness
- A pinch of salt for balance
Starting with the oats, toss them into your mixing bowl. Next, add in the peanut butter and honey (or maple syrup). Using your spatula, blend these ingredients until they’re just combined. The mixture should be sticky but manageable. If you want to mix it up, you can also add some chia seeds or flaxseeds for a nutritional boost!
For more on the health benefits of oats, check out Healthline’s informative guide.
Press the Base into the Pan
Now comes the fun part: pressing that mixture into the baking pan. You want to ensure the mixture is evenly spread and tightly packed:
- Line your baking pan with parchment paper for easy removal later.
- Use your hands (or spatula) to press the mixture firmly into the bottom of the pan. Aim for an even layer about ½ inch thick.
Not only does this help in shaping the bars, but it also ensures that they hold together nicely once set. Take a moment to appreciate the comforting aroma of peanut butter and oats filling your kitchen—it’s a great feeling!
Melt the Chocolate Topping
While your base mixture is setting up quietly, it’s time to prepare the indulgent chocolate layer! You’ll need either semi-sweet chocolate chips or dark chocolate for a more decadent touch. Here’s how to melt it:
- Place chocolate in a microwave-safe bowl.
- Heat in the microwave in 30-second intervals, stirring in between until completely smooth.
Make sure not to overheat the chocolate; it can burn easily. If you’d prefer a lower-sugar option, you can use sugar-free chocolate or even cocoa powder mixed with a bit of coconut oil for a healthier version.
Pour and Chill
Finally, it’s time to assemble our chocolate peanut butter no bake bars!
- Pour the melted chocolate over the peanut butter base layer, using your spatula to spread it evenly.
- Now, place the pan in the fridge for about 2-3 hours. This will allow the bars to firm up nicely.
As they chill, think about all the ways you can enjoy them—snacks, desserts, or a boost before the gym! You may even want to cut them into fun shapes once they set.
Once ready, lift the bars from the pan using the parchment paper and slice them into squares or rectangles. Enjoy your homemade chocolate peanut butter no bake bars! They’re perfect for meal prepping too. You’ll find they disappear quickly—good luck saving some for later!
Variations on Chocolate Peanut Butter No Bake Bars
When you think of chocolate peanut butter no bake bars, you may envision a classic combination of creamy peanut butter, rich chocolate, and a hint of sweetness. But the beauty of these bars lies in their versatility! Here are some fun adaptations to suit your taste and dietary needs.
Nut-free options
If you or someone you know has nut allergies, don’t worry! You can easily replace peanut butter with sunbutter or soy nut butter. Both options deliver that same creamy texture and rich flavor while being nut-free. Additionally, using pumpkin seeds or hemp seeds can add some crunch without the risk of allergens.
For a completely different approach, try incorporating a seed blend or nut-free granola to give your bars texture without using any nuts. Always check labels to ensure your ingredients are truly nut-free, especially when opting for store-bought items.
Flavor twists
Now, let’s have some fun with flavors! The chocolate peanut butter no bake bars can easily be customized to elevate your dessert game.
- Mint Chocolate: Add a few drops of mint extract to the chocolate layer for a refreshing minty twist.
- Coconut Delight: Sprinkle unsweetened shredded coconut on top for a tropical vibe.
- Cookie Dough: Mix in some mini chocolate chips and a few teaspoons of vanilla extract to replicate cookie dough flavors.
Remember, the combinations are only limited by your imagination! Don’t hesitate to experiment. For more creative ideas, check out this Flavor Combinations Guide.
Embrace your inner chef and let your taste buds lead the way with these wonderful variations on your favorite chocolate peanut butter no bake bars!
Cooking Tips for Chocolate Peanut Butter No Bake Bars
Ensuring the Right Consistency
When making chocolate peanut butter no bake bars, achieving the perfect consistency is crucial. Too crumbly, and your bars will fall apart; too soft, and they’ll never hold their shape. Aim for a mixture that is slightly sticky but holds together when pressed. A good rule of thumb is to start with the recommended ratios of peanut butter and oats, but feel free to adjust slightly based on your brand of ingredients. If it’s too dry, consider adding a tablespoon of honey or maple syrup for added moisture and sweetness.
Tips for Melting Chocolate
Melting chocolate can be a game-changer in your dessert crafting. Here’s how to do it smoothly:
- Use a double boiler: This gentle heat method helps prevent scorching. If you don’t have one, a heatproof bowl over simmering water works beautifully.
- Opt for high-quality chocolate: Premium chocolate melts better and will elevate your bars.
- Stir frequently: Constant stirring helps achieve that glossy finish and ensures even melting.
For additional guidance, check out expert tips from the professionals at Serious Eats.
With these tips on hand, you’re well on your way to creating delicious, stress-free chocolate peanut butter no bake bars that your friends and family will love!
Serving suggestions for Chocolate Peanut Butter No Bake Bars
Pairing with Fruits
Elevate your chocolate peanut butter no bake bars by serving them alongside fresh fruits. The natural sweetness and refreshing flavors of fruits, such as sliced bananas, strawberries, or apples, create a delightful contrast with the rich, decadent bars. Consider creating a fun fruit platter for a colorful presentation that impresses your guests. Plus, pairing fruits with these bars not only enhances the taste but also adds nutritional value. Did you know that combining peanut butter with fruits can help maintain steady energy levels? It’s a win-win!
Serving Sizes and Occasions
These versatile no bake bars are perfect for various occasions! When it comes to serving sizes, consider cutting them into smaller pieces for a light snack or larger portions for dessert. Whether it’s a casual brunch, a cozy movie night, or a potluck, these bars fit right in. Make them a part of your weekly meal prep routine to have a satisfying treat on hand. They’re also an excellent option for after-work snacks, offering a quick energy boost to keep you going.
For more fruit pairings, check out this guide from Healthline.
Time breakdown for Chocolate Peanut Butter No Bake Bars
Preparation time
Getting started on your chocolate peanut butter no bake bars is quick and easy! You’ll need about 15 minutes to gather your ingredients and mix everything together. Make sure to measure out your nut butter and chocolate chips accurately for the best results.
Cooling time
After mixing, the hardest part is waiting! You’ll want to let your bars chill in the refrigerator for at least 1 hour. This step is essential for achieving the perfect texture and making sure they hold their shape when cut.
Total time
In total, you’re looking at about 1 hour and 15 minutes from start to finish. It’s a great way to whip up a delicious treat without spending your whole evening in the kitchen. Plus, these bars are a fantastic snack to have on hand throughout the week! Want some tips on how to store them? Check out this handy guide on snack storage.
Nutritional facts for Chocolate Peanut Butter No Bake Bars
Calories per serving
One serving of chocolate peanut butter no bake bars typically contains around 200 calories. This makes them a delightful treat without completely derailing your healthy eating plans.
Nutritional highlights
These bars are packed with goodness! Here are some nutritional highlights to consider:
- Protein Power: Thanks to the peanut butter, each bar provides a good boost of protein.
- Fiber-Rich: The oats contribute fiber, which is essential for digestive health.
- Healthy Fats: Peanut butter is a source of healthy fats that promote satiety.
- No Added Sugars: If you choose natural sweeteners, you’ll avoid unnecessary sugars.
For a deeper dive into nutrition, check out this detailed guide on healthy snacking. Making these bars a part of your snack routine means you can indulge with peace of mind!
Whether enjoying your chocolate peanut butter no bake bars as an afternoon pick-me-up or a sweet addition to your post-workout routine, they offer flavor and nutrition in every bite.
FAQs about Chocolate Peanut Butter No Bake Bars
Can I use different nut butters?
Absolutely! While the classic combination of chocolate and peanut butter is hard to beat, chocolate peanut butter no bake bars can easily be customized. If you have a nut allergy or just prefer something different, consider almond butter, cashew butter, or even sunflower seed butter for a nut-free option. Each will give the bars a slightly different taste and texture, so feel free to experiment!
How do I store these bars?
Storing your chocolate peanut butter no bake bars is a breeze! Place them in an airtight container to keep them fresh. They can be stored at room temperature for about a week, or in the fridge for up to two weeks. If you want to make a larger batch, these bars freeze beautifully—just be sure to wrap them individually or layer them with parchment paper to prevent sticking. For tips on preserving your baked goods, check out this helpful guide.
What can I substitute for maple syrup?
If maple syrup isn’t your thing, there are several alternatives you can consider. Agave nectar, honey (if not vegan), or brown rice syrup can step in quite nicely. The key here is to find a sweetener that complements the richness of chocolate without overpowering it. Keep in mind that using a sweeter alternative might slightly change the final flavor profile, but that’s the fun of making your own chocolate peanut butter no bake bars—you can tailor them to your taste!
Conclusion on Chocolate Peanut Butter No Bake Bars
Recap of the Benefits
In summary, chocolate peanut butter no bake bars are not just a treat; they’re a deliciously convenient and healthier snack option. These bars combine the rich flavors of chocolate and peanut butter while being incredibly easy to whip up without turning on your oven. Packed with protein and healthy fats, they can fuel your busy lifestyle.
By preparing these bars in advance, you can always have a nutritious snack on hand that satisfies your sweet tooth. Whether you’re powering through work or enjoying a post-workout bite, these bars are a perfect choice. Check out more recipes and tips on healthy snacking at Healthline or EatingWell!
PrintChocolate Peanut Butter No Bake Bars: Indulgent Treats for Everyone
This indulgent treat combines rich chocolate and creamy peanut butter for a delicious no-bake dessert.
- Prep Time: 10 minutes
- Cook Time: 0 minutes
- Total Time: 20 minutes
- Yield: 12 bars 1x
- Category: Dessert
- Method: No Bake
- Cuisine: American
- Diet: Vegetarian
Ingredients
- 1 cup peanut butter
- 1 cup honey
- 2 cups rolled oats
- 1 cup chocolate chips
- 1/2 cup cocoa powder
Instructions
- In a large bowl, mix together the peanut butter and honey until well combined.
- Add the rolled oats, cocoa powder, and chocolate chips, stirring until fully incorporated.
- Press the mixture into a lined baking pan and refrigerate until set.
- Once set, cut into bars and serve.
Notes
- For added flavor, consider sprinkling sea salt on top before refrigerating.
- Store in an airtight container for up to a week.
Nutrition
- Serving Size: 1 bar
- Calories: 250
- Sugar: 12g
- Sodium: 5mg
- Fat: 15g
- Saturated Fat: 4g
- Unsaturated Fat: 10g
- Trans Fat: 0g
- Carbohydrates: 30g
- Fiber: 4g
- Protein: 6g
- Cholesterol: 0mg
Keywords: Chocolate Peanut Butter No Bake Bars, no bake dessert, indulgent treats