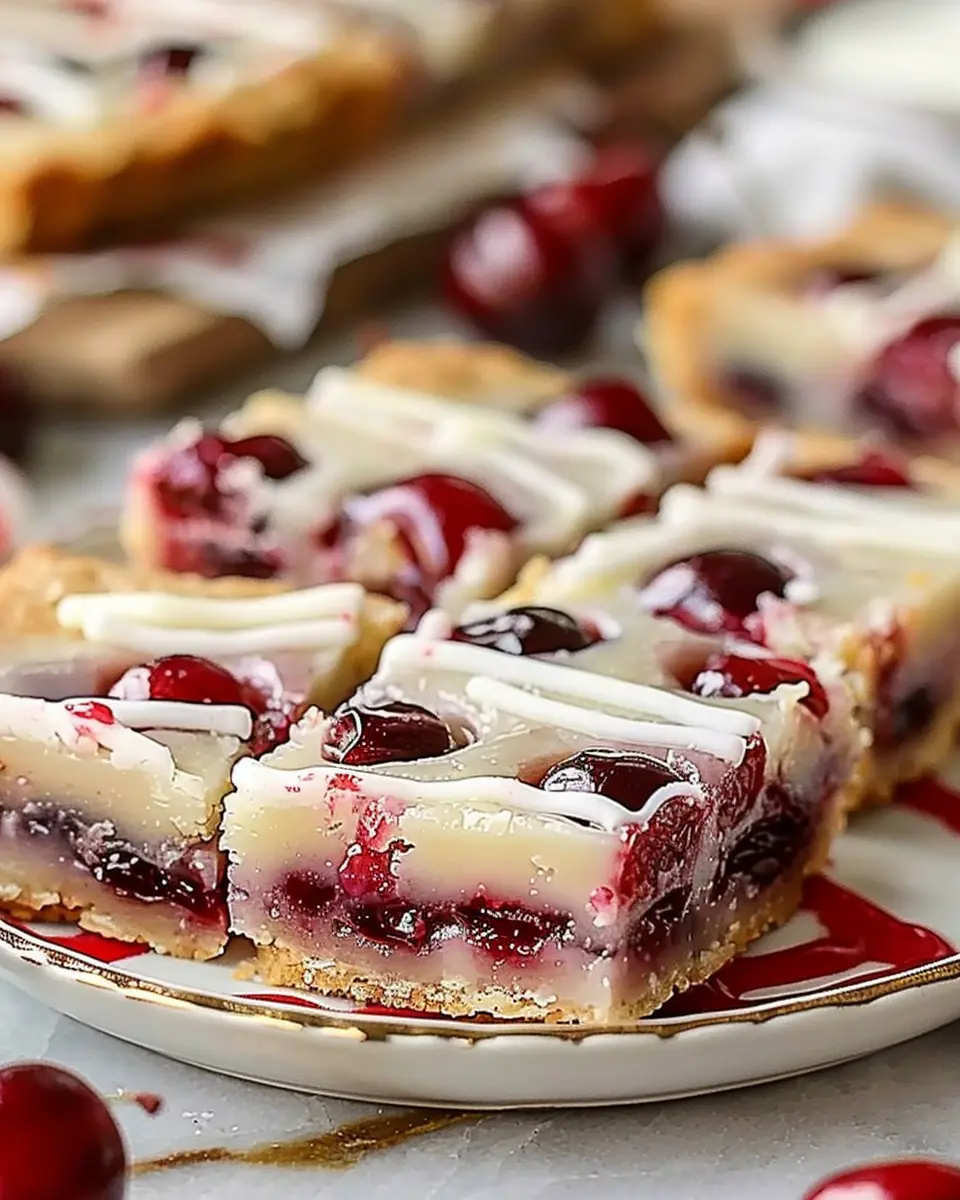
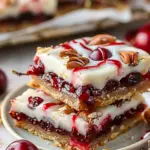
Introduction to Christmas Cherry Bars
When the festive season arrives, it’s the perfect time to indulge in sweet treats that evoke warmth and joy, and Christmas Cherry Bars are undeniably a top contender. These delightful bars blend the lusciousness of cherries with a buttery, cookie-like base, making them a unique and satisfying dessert that everyone will love.
Why Christmas Cherry Bars are the perfect holiday treat?
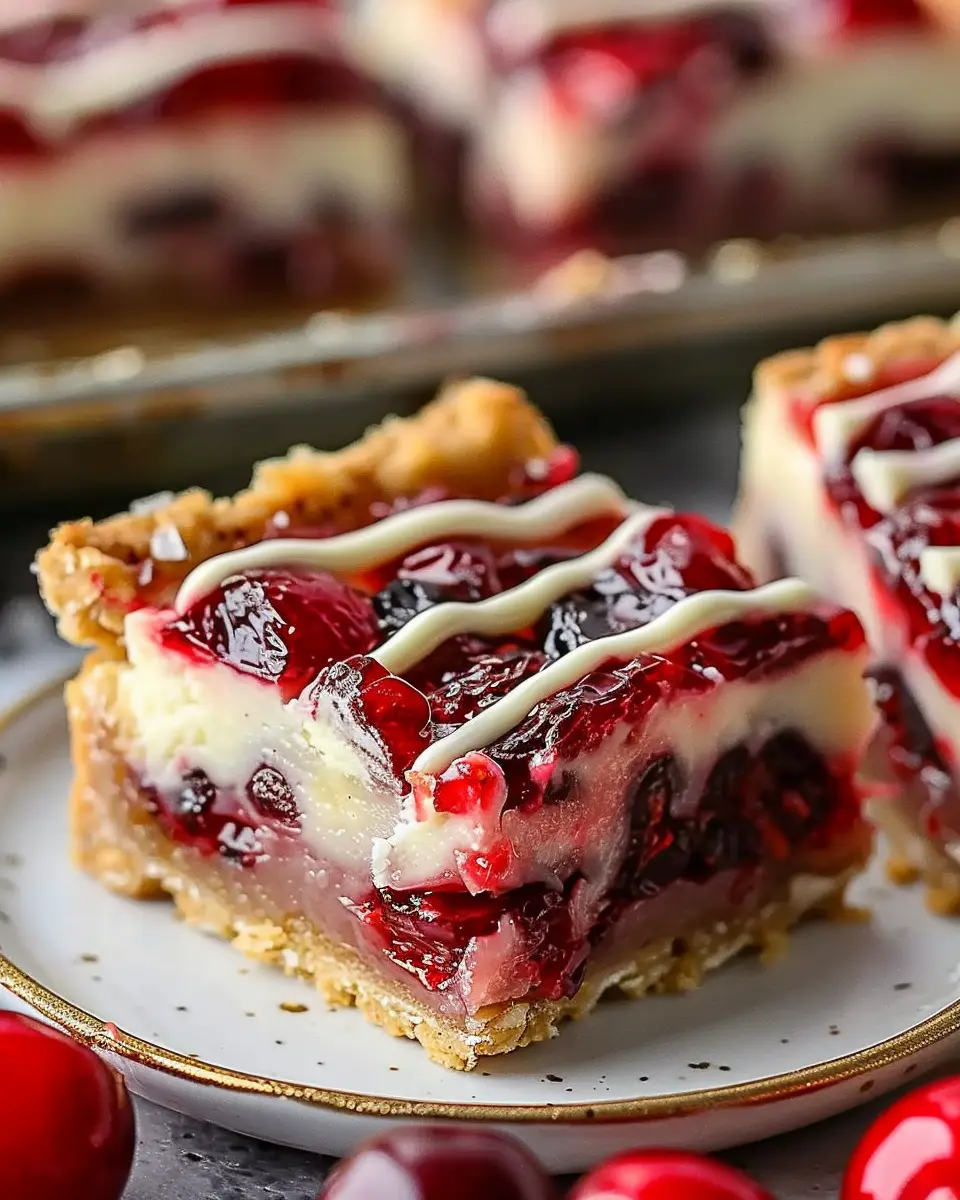
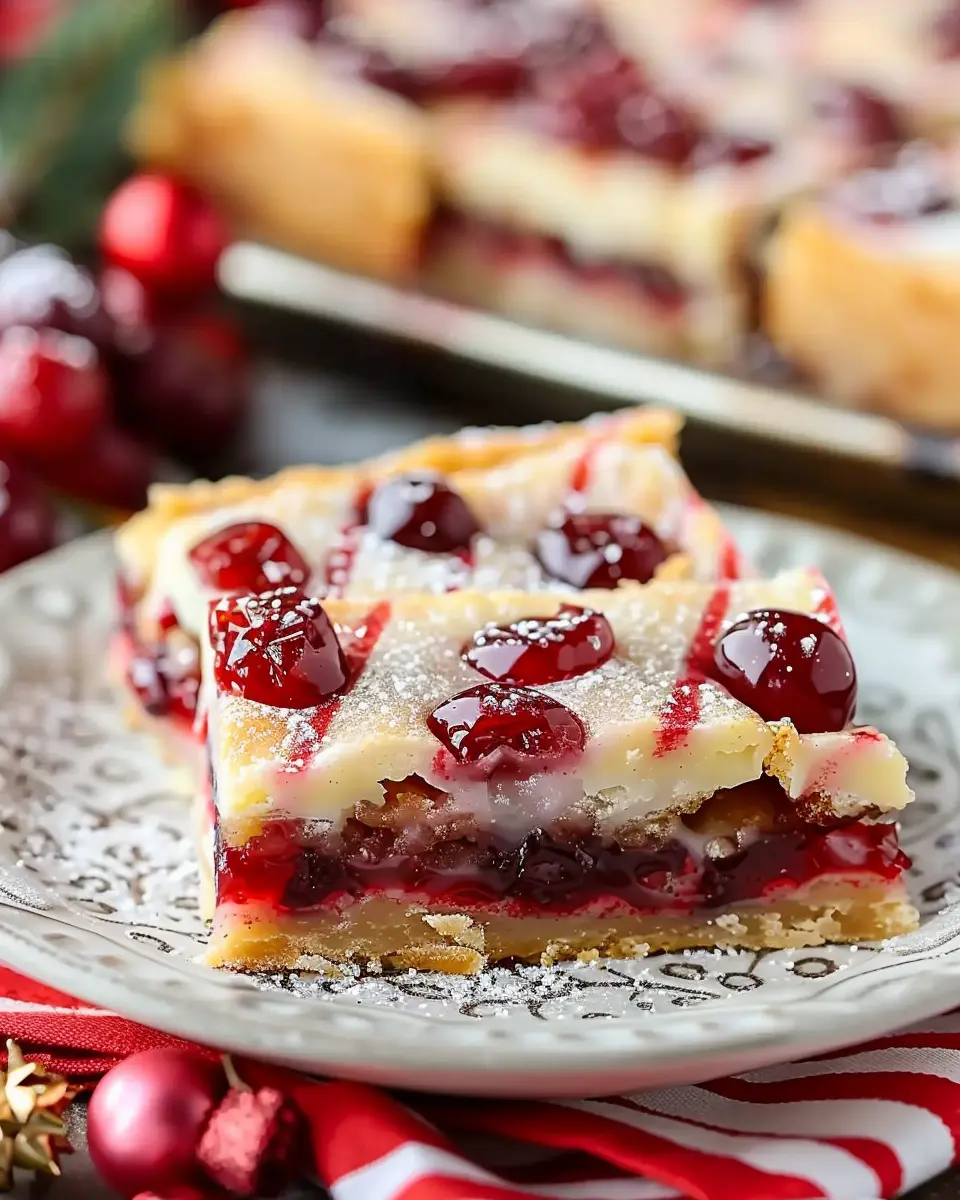
So, why are Christmas Cherry Bars the go-to choice for your holiday get-togethers? It starts with their vibrant color and inviting aroma. The brilliant red of the cherries immediately adds that festive touch to your dessert table, turning heads and whetting appetites before you even cut into them. Imagine hosting a holiday party and watching guests reach for those colorful bars, eager to take a bite.
These bars are not just eye-catching; they’re incredibly simple to make. With just a handful of ingredients, including cream cheese, cherries, and a sweet crust, you can whip them up in no time. Plus, they can be prepared ahead of time, allowing you to focus on enjoying the festive atmosphere rather than spending all your hours in the kitchen.
Guided by experts, it’s noted that cherry-containing desserts are associated with enhancing antioxidants in our diets, making them a guilt-free indulgence as you celebrate. Moreover, they are an excellent alternative to heavier holiday desserts that can leave you feeling sluggish. With each bite of Christmas Cherry Bars, you balance indulgence with lightness—perfect for the season of joy.
And don’t forget about customization! Consider adding a drizzle of melted chocolate or a sprinkle of crushed nuts on top for an extra touch. This is your opportunity to bring a personal flair to your baking.
So whether you’re hosting a holiday gathering, bringing a dish to a potluck, or simply treating yourself and your loved ones, these bars are sure to delight. Why not gather your ingredients and bring a taste of the holidays to your kitchen? For an inspiring way to bring festive cheer into your recipes, check out more captivating ideas on baking at Food Network.
Ingredients for Christmas Cherry Bars
Creating delightful Christmas Cherry Bars doesn’t have to feel overwhelming! The key to success lies in gathering quality ingredients that mesh together seamlessly. Here’s what you’ll need:
-
Shortbread Crust:
-
1 cup all-purpose flour
-
1/2 cup unsalted butter, softened
-
1/4 cup powdered sugar
-
A pinch of salt
-
Cherry Filling:
-
1 cup cherry pie filling (homemade or store-bought)
-
1 tablespoon cornstarch (for thickening, optional)
-
Topping:
-
1/2 cup rolled oats
-
1/3 cup brown sugar
-
1/4 cup butter, melted
-
A sprinkle of cinnamon for extra warmth
With these building blocks, you’ll be well on your way to crafting a festive treat that everyone will love! Remember, a splash of creativity can elevate even the simplest recipes. For variations, consider adding walnuts or coconut flakes to your topping for a little extra crunch. For tips on selecting the best cherries, check out these insights. Enjoy your holiday baking!
Step-by-step Preparation of Christmas Cherry Bars
Creating Christmas Cherry Bars is a delightful way to celebrate the season with friends and family. These sweet and tart treats bring joy and warmth to any holiday gathering. If you’re ready to impress your loved ones with a festive dessert, let’s dive right in!
Gather your ingredients
First things first, let’s make sure you have everything you need for these scrumptious bars. Here’s a quick checklist of ingredients to gather:
-
For the crust:
-
1 ½ cups all-purpose flour
-
¾ cup granulated sugar
-
½ teaspoon baking powder
-
A pinch of salt
-
½ cup cold unsalted butter
-
For the filling:
-
1 can (about 21 ounces) cherry pie filling
-
1 cup semisweet chocolate chips
-
1 teaspoon vanilla extract
-
For the crumble topping:
-
½ cup all-purpose flour
-
½ cup old-fashioned oats
-
1/3 cup brown sugar
-
1 teaspoon cinnamon
-
3 tablespoons cold unsalted butter
Once you’ve rounded up these ingredients, it’s time to roll up your sleeves!
Preheat the oven and prepare the pan
Put your oven to work by preheating it to 350°F (175°C). Meanwhile, prepare a 9×13 inch baking pan by greasing it lightly with butter or non-stick cooking spray. This will help prevent the bars from sticking, ensuring easy removal once they’re baked.
Mix the dry ingredients
In a large mixing bowl, combine the flour, granulated sugar, baking powder, and salt. Whisk them together until thoroughly mixed. This step is essential, as it ensures that the leavening agents are evenly distributed throughout the crust. If you’d like to learn more about the importance of this step in baking, you can check out sites like Bake It Better.
Incorporate the chilled butter
Next, it’s time to add the cold butter into the flour mixture. Using a pastry cutter or your fingers, work the butter into the flour until the mixture resembles coarse crumbs. This chilled butter is key to a flaky crust, so don’t skip this part!
Add egg yolk and extracts to form the dough
Now, stir in the egg yolk and vanilla extract into your mixture. Use a fork to combine until everything is just moistened and forms a dough. If the mixture feels too crumbly, feel free to add a teaspoon of cold water at a time until it holds together.
Bake the crust briefly
Spread the dough evenly in your prepared baking pan, pressing it down gently. Bake it in the preheated oven for about 10-12 minutes, or until it’s lightly golden. This initial baking helps create a sturdy base for your Christmas Cherry Bars.
Prepare the fruit and chocolate topping
While the crust is baking, it’s the perfect time to prepare your cherry filling. Open the can of cherry pie filling and gently stir it with the chocolate chips and vanilla extract in a separate bowl. This mixture is the heart of your bars, and the combination of cherries and chocolate is simply irresistible.
Assemble and top with crumble
Once your crust has cooled slightly, pour the cherry-chocolate mixture on top, spreading it evenly. In a small bowl, mix the crumble topping ingredients—flour, oats, brown sugar, and cinnamon—with cold butter until crumbly. Sprinkle this crumble evenly over the cherry filling.
Bake until golden and bubbly
Return your assembled masterpiece to the oven and bake for another 25-30 minutes. The topping should be golden brown, and if you peek and see bubbling cherries, you know you’re on the right track!
Cool and cut into bars
Let your Christmas Cherry Bars cool in the pan for at least 10-15 minutes. Once they’ve cooled, transfer them to a cutting board and slice them into squares or bars, depending on your preference.
Now that you’ve finished, it’s time to enjoy these festive treats with family and friends. Happy baking!
Variations on Christmas Cherry Bars
When you think of Christmas cherry bars, you might imagine the classic fruity flavor mixed with sweetness. But why stop there? Elevating this delightful dessert with personal touches can turn a seasonal favorite into your unique signature treat. Here are some creative twists!
Adding pistachios for a festive crunch
Incorporating pistachios lends a bright green color and adds a delightful crunch to your Christmas cherry bars. The nutty flavor complements cherries beautifully, creating a taste sensation that’s a feast for both the eyes and palate. Simply chop a handful of roasted pistachios and fold them into your batter. You can even sprinkle some on top before baking to enhance that festive look. Not only do they add texture, but they also contribute healthy fats and protein!
Using dark chocolate instead of white
If you prefer a richer flavor profile, consider swapping the traditional white chocolate for dark chocolate. This variation balances the sweetness of the cherries and adds a touch of sophistication to your Christmas cherry bars. For an added kick, use dark chocolate with at least 70% cocoa. This not only brings out the flavors of the cherries but also offers some cool health benefits. Dark chocolate is rich in antioxidants and may even improve heart health—now that’s a win during the holiday season!
Swapping dried cranberries for cherries
Feeling adventurous? Try substituting dried cranberries for the cherries in your bars. This flavor shift adds a tangy twist that pairs exceptionally well with a hint of citrus zest. Plus, cranberries are loaded with vitamins and can offer a festive pop of color. They’re perfect for those who enjoy a more tart flavor, and they still maintain that holiday spirit.
These variations make it easy to impress your friends and family with each bite. Christmas cherry bars can be as unique as you are, so don’t be afraid to experiment! If you’re curious about other festive dessert ideas, check out sources like Food Network and Bon Appétit. Happy baking!
Cooking Tips and Notes for Christmas Cherry Bars
Making Christmas Cherry Bars can be a delightful holiday experience, but a few tips can elevate your baking game! Here are some handy notes to keep in mind while you whip up these delicious bars:
Choosing Your Cherries
Opt for fresh or frozen cherries for a burst of flavor. If using canned cherries, be sure to drain them well; excess liquid can make your bars soggy.
Get the Right Texture
For the perfect crust and topping, ensure your butter is at room temperature before mixing. Also, don’t overmix the batter once you add the flour. This step keeps your Christmas Cherry Bars from becoming too dense.
Baking Time Matters
Each oven behaves differently, so start checking your bars a few minutes before the recommended baking time. Ideal bars should be golden on the edges and firm in the center.
Experiment with Flavors
Feel free to add a dash of almond extract or even some lemon zest to enhance the cherry flavor. Both can give your bars a delightful twist!
For more expert baking tips, consider reading articles from sites like King Arthur Baking. Happy baking!
Serving Suggestions for Christmas Cherry Bars
When you whip up a batch of Christmas Cherry Bars, you want them to shine at your holiday gatherings. Here are some delightful serving suggestions to elevate your dessert game this season.
Presentation Matters
-
Platter Display: Serve your cherry bars on a vibrant platter with fresh mint leaves or seasonal berries for a pop of color. This simple touch can transform your dessert into a festive centerpiece.
-
Portion Control: Cut the bars into appealing bite-sized squares. Individual servings not only look inviting but also make it easier for guests to grab and indulge.
Pairing Ideas
To complement your Christmas Cherry Bars, consider these delicious pairings:
- Whipped Cream: A dollop of freshly whipped cream adds a rich creaminess that balances the tartness of the cherries.
- Hot Beverages: Serve with hot cocoa or spiced herbal tea to enhance the cozy vibe of your holiday gathering.
Customization Options
Feel free to adjust the recipe to suit your guests’ preferences! Consider:
- Nut Toppings: Sprinkle chopped pecans or almonds on top for a delicious crunch.
- Flavor Variations: Experiment with adding orange zest or slivers of dark chocolate to the batter for an exciting twist.
These Christmas Cherry Bars are sure to be a hit, and with these serving suggestions, you’ll create a memorable dessert experience! Looking for more ideas? Check out Food Network for additional inspiration.
Time Breakdown for Making Christmas Cherry Bars
Preparation time
To kick things off, you’ll need about 15-20 minutes for preparation. This includes gathering your ingredients, mixing the batter, and spreading your delicious cherry filling. It’s a quick and straightforward process, allowing you to savor the festive vibes without feeling rushed.
Baking time
Once your cherry-filled creation is ready, pop it in the oven and let it bake for 30-35 minutes. This is when the magic happens—your kitchen will fill with a mouthwatering aroma that will have everyone eagerly waiting for a taste of these Christmas cherry bars.
Total time
In total, you’re looking at about 45-55 minutes from start to finish. This makes it a perfect recipe to whip up during a busy holiday season. After all, who doesn’t want a scrumptious treat that doesn’t take hours to prepare? For more festive baking inspiration, check out resources like BBC Good Food for tips and tricks!
Nutritional Facts for Christmas Cherry Bars
Calories
When indulging in Christmas cherry bars, you might be curious about their caloric content. Each serving typically contains around 200-250 calories, making it a delightful treat without feeling overly indulgent. Perfect for sharing, right?
Sugars
Now, let’s talk about sweetness! These bars clock in at approximately 12-15 grams of sugar per serving. While a little sugar goes a long way in holiday recipes, consider pairing them with a cup of herbal tea or coffee to balance the sweetness.
Fiber
Lastly, don’t underestimate the importance of fiber. These festive bars provide about 1-2 grams of fiber per piece. Fiber aids digestion and keeps you feeling full longer, which is especially important during the holiday season when snacking seems like a must!
For more insights on healthy ingredients and festive baking, check out resources from the American Heart Association and Nutrition.gov to elevate your culinary adventures this holiday season.
FAQ about Christmas Cherry Bars
Can I make these bars ahead of time?
Absolutely! Christmas cherry bars are a perfect make-ahead treat. In fact, they often taste even better after resting for a day or two as the flavors meld together. Just prepare the bars as directed, let them cool completely, and then cut them into squares. Store them in an airtight container at room temperature for up to five days.
How do I store leftover Christmas Cherry Bars?
Storing your delicious Christmas cherry bars is simple. Just ensure they are completely cooled before placing them in an airtight container. They will stay fresh on your counter for about five days. If you want to preserve them for a longer period, consider freezing them! Individually wrap each bar in plastic wrap and then place them in a freezer-safe bag. They can last for up to three months. When you’re ready to enjoy them, just thaw them at room temperature or pop them in the microwave for a few seconds.
What can I substitute for dried cherries?
If you’re not a fan of dried cherries or can’t find them, don’t fret! You can easily substitute them with other dried fruits. Cranberries, raisins, or even dried apricots can work wonderfully in this recipe. For a fun twist, try using chopped nuts or chocolate chips for a different flavor profile. This versatility makes the Christmas cherry bars a delightful canvas for your creative culinary expressions.
For more ideas and alternatives, check out this dried fruit guide to expand your flavor horizons!
Conclusion on Christmas Cherry Bars
In summary, Christmas Cherry Bars are not just a delicious treat; they’re an invitation to create cherished holiday memories. Their vibrant, festive colors and delightful blend of flavors make them a perfect addition to any holiday spread. Whether you’re baking for family gatherings or cozy nights in, these bars will surely impress your guests.
Don’t hesitate to personalize your recipe by experimenting with different toppings or adding a touch of flair with icing. Remember, the joy of cooking comes not only from the outcome but also from the process itself. If you enjoyed this recipe, consider checking out other festive treats to complete your holiday menu. Happy baking!
PrintChristmas Cherry Bars: Indulgent Recipe for Festive Gatherings
Delight your guests with these festive Christmas Cherry Bars, a sweet treat perfect for any holiday gathering.
- Prep Time: 15 minutes
- Cook Time: 35 minutes
- Total Time: 50 minutes
- Yield: 12 bars 1x
- Category: Dessert
- Method: Baking
- Cuisine: American
- Diet: Vegetarian
Ingredients
- 1 cup cherry pie filling
- 1 cup all-purpose flour
- 1/2 cup unsalted butter, softened
- 1/2 cup granulated sugar
- 1 large egg
- 1 teaspoon vanilla extract
- 1/2 teaspoon baking powder
- 1/4 teaspoon salt
Instructions
- Preheat your oven to 350°F (175°C) and grease a 9×9 inch baking dish.
- In a large bowl, cream together the butter and sugar until light and fluffy.
- Add the egg and vanilla, mixing until combined.
- In a separate bowl, mix the flour, baking powder, and salt.
- Gradually add the dry ingredients to the wet mixture, stirring until just combined.
- Spread half of the batter into the prepared baking dish.
- Top with the cherry pie filling, then spoon the remaining batter over the cherries.
- Bake for 30-35 minutes or until golden brown. Allow to cool before cutting into bars.
Notes
- For an extra touch, sprinkle powdered sugar on top before serving.
- These bars can be served warm or chilled.
Nutrition
- Serving Size: 1 bar
- Calories: 200
- Sugar: 15g
- Sodium: 50mg
- Fat: 10g
- Saturated Fat: 6g
- Unsaturated Fat: 3g
- Trans Fat: 0g
- Carbohydrates: 25g
- Fiber: 1g
- Protein: 2g
- Cholesterol: 30mg
Keywords: Christmas Cherry Bars, holiday dessert, festive recipe