Introduction to Marble Cake
There’s something undeniably charming about marble cake—it’s a delightful fusion of flavors and colors that captures our hearts and taste buds. Whether you’re a seasoned baker or a novice seeking to impress, this cake offers the perfect blend of vanilla and chocolate that makes it a perennial favorite. But what really makes marble cake stand out in the baking world?
What Makes Marble Cake a Classic Favorite?
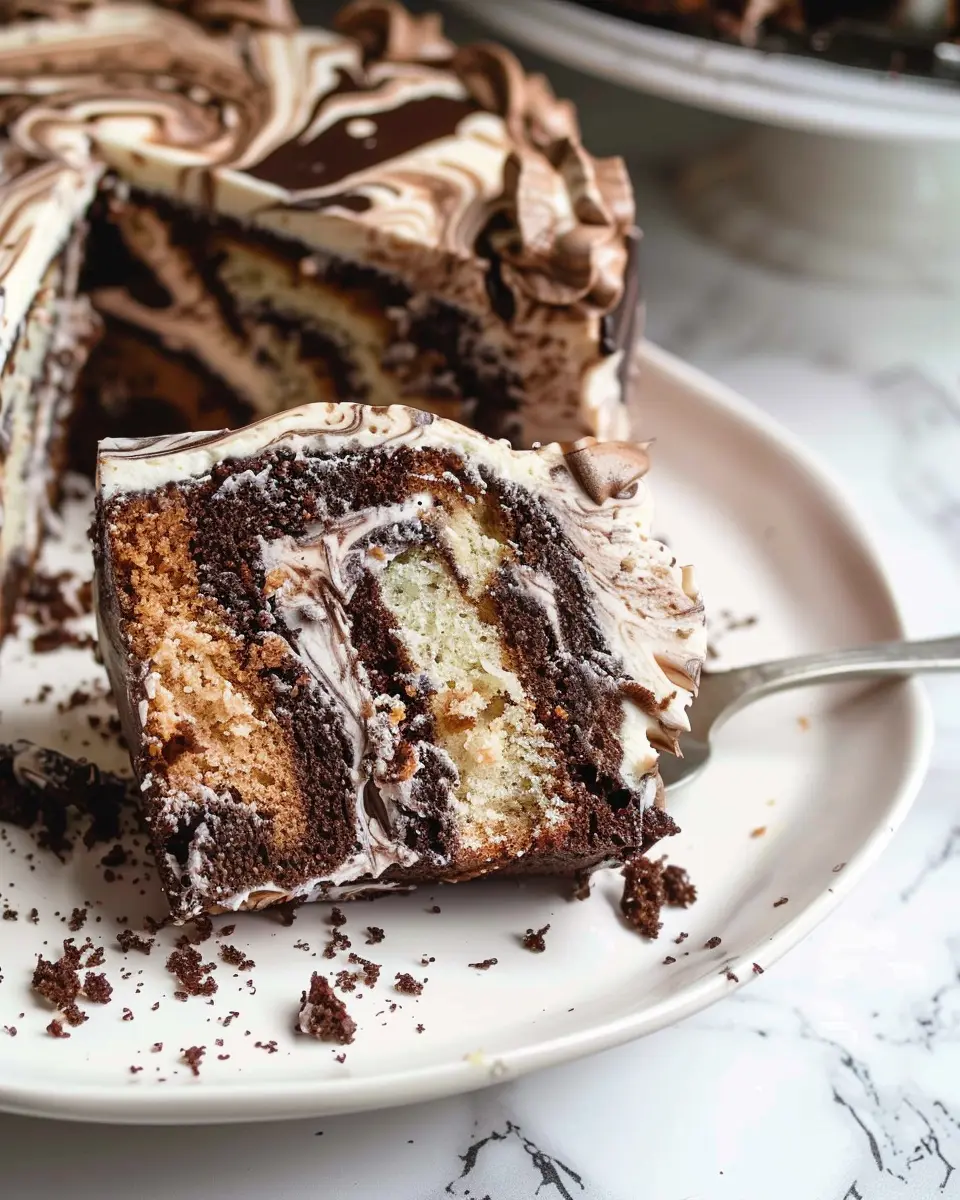
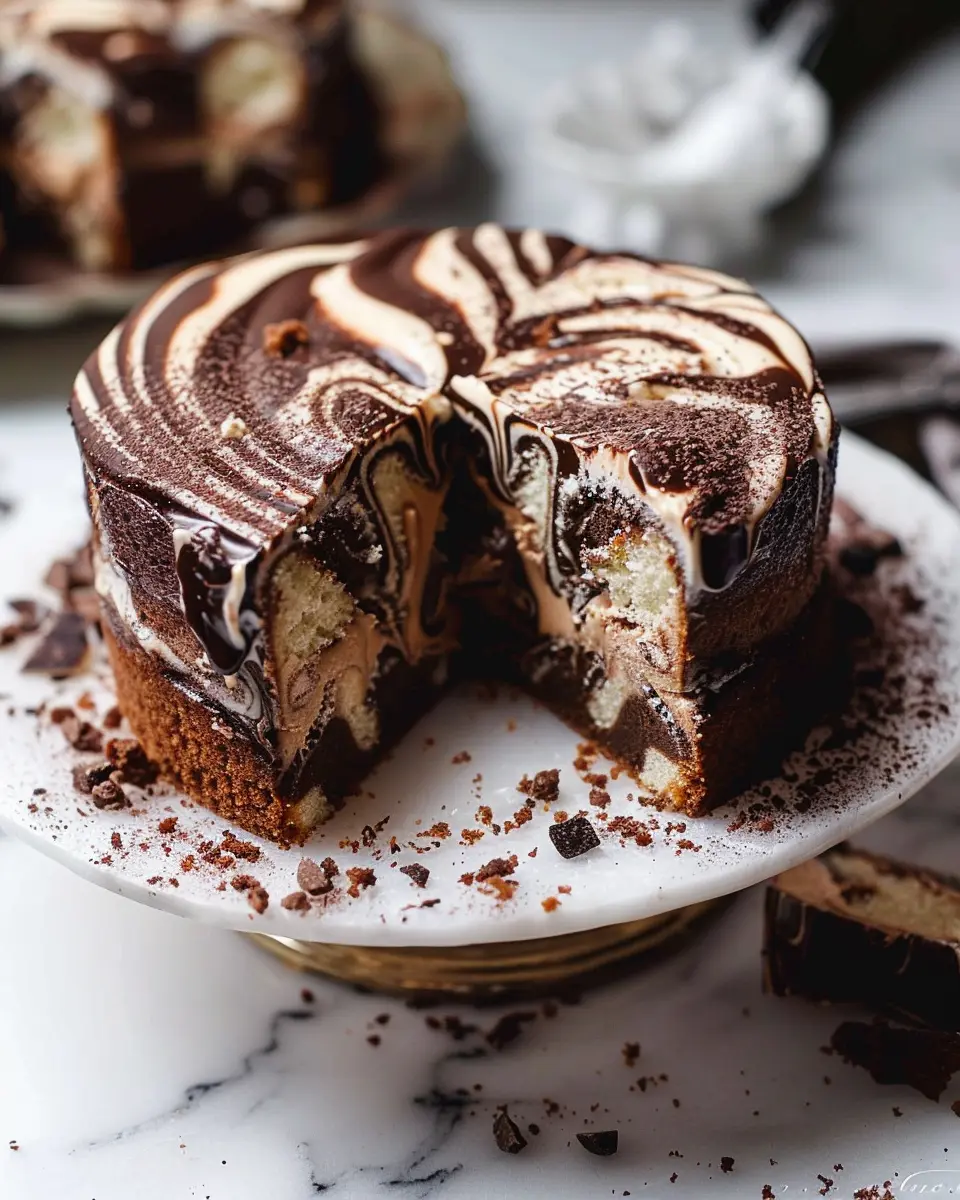
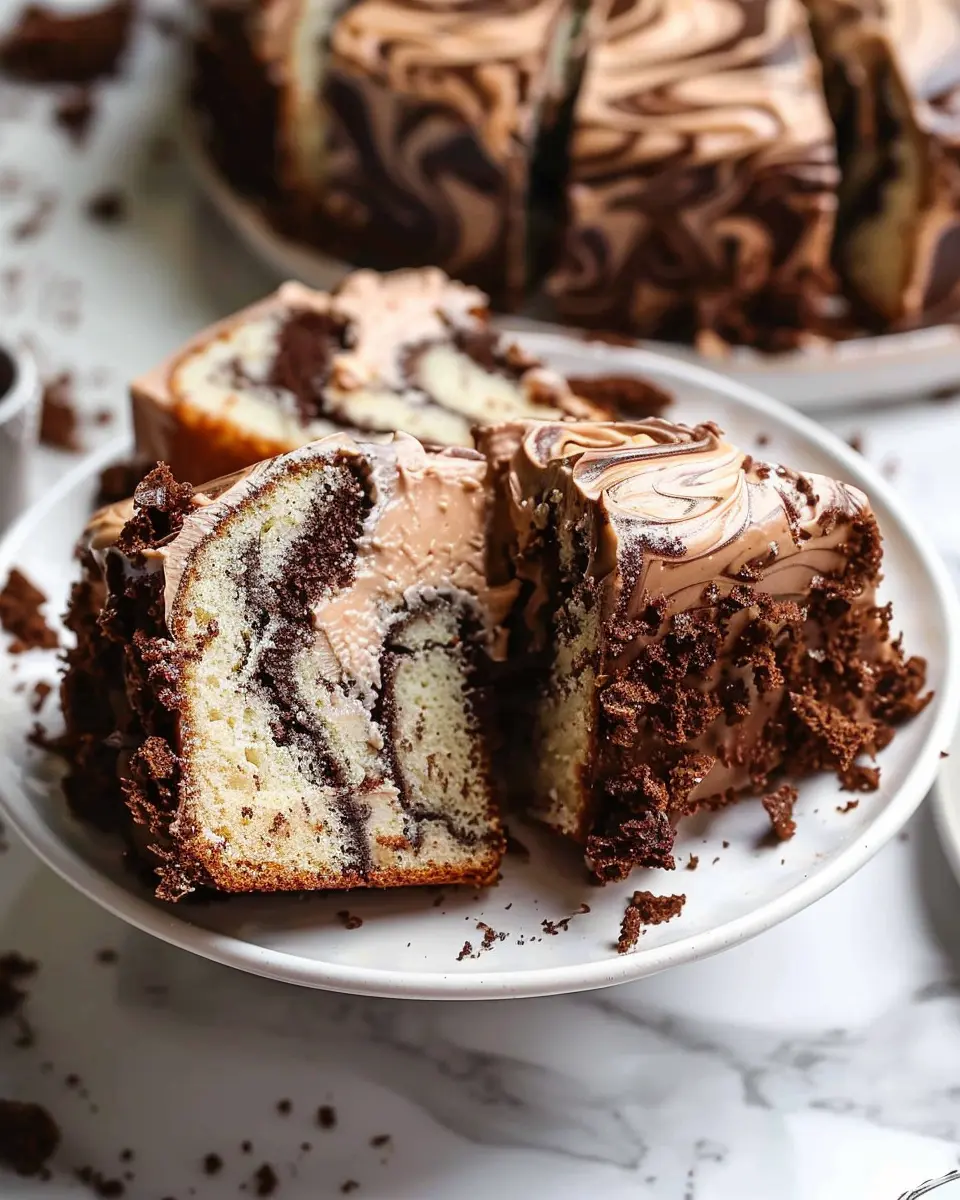
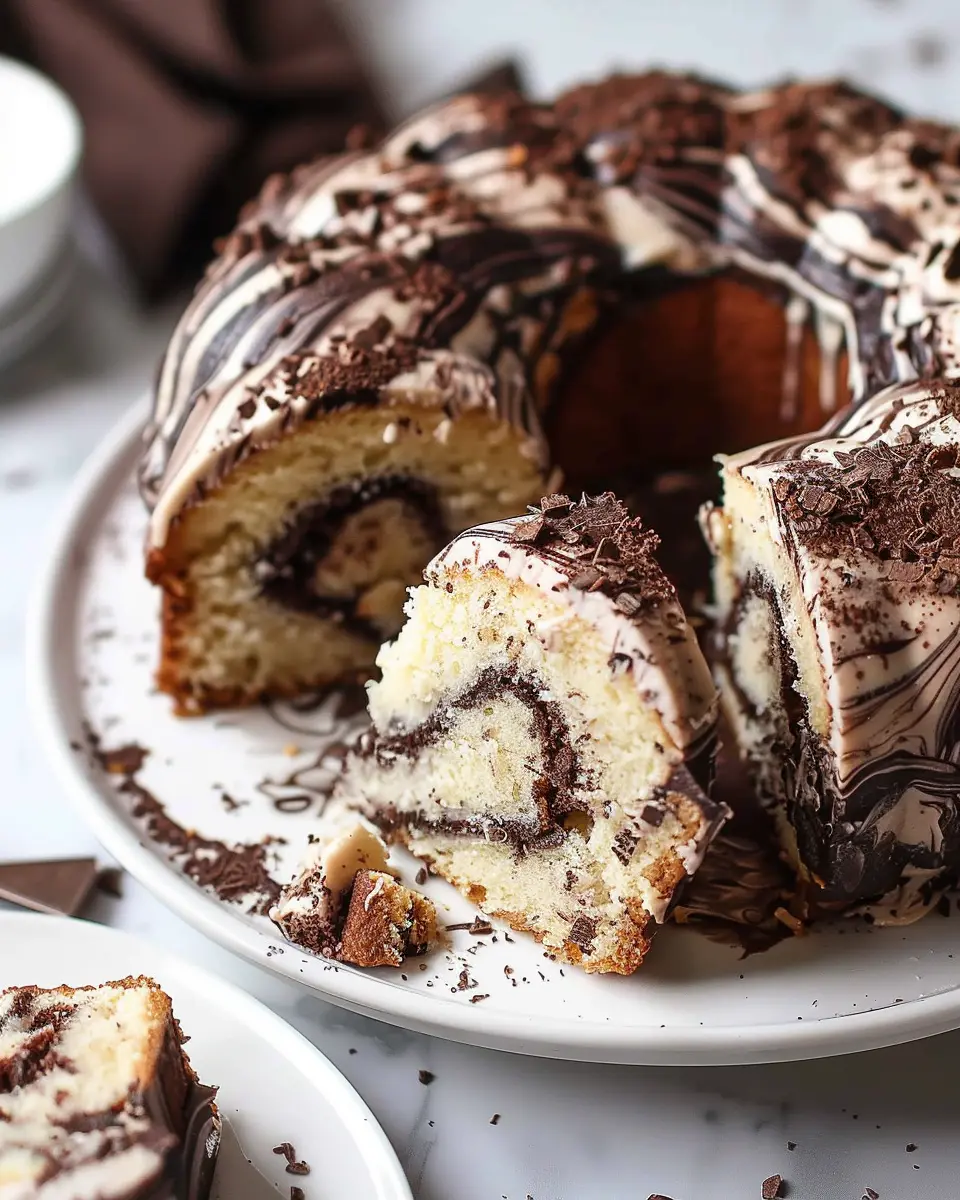
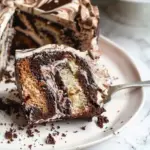
At its core, marble cake brings together two beloved flavors in a beautiful swirl that presents like art on a plate. Imagine lifting the knife to serve a slice and revealing the mesmerizing patterns—a simple yet satisfying visual that instantly elevates any gathering. This enchanting aesthetic appeals to many, making it a staple at celebrations such as birthdays and family gatherings.
Versatile for Any Occasion
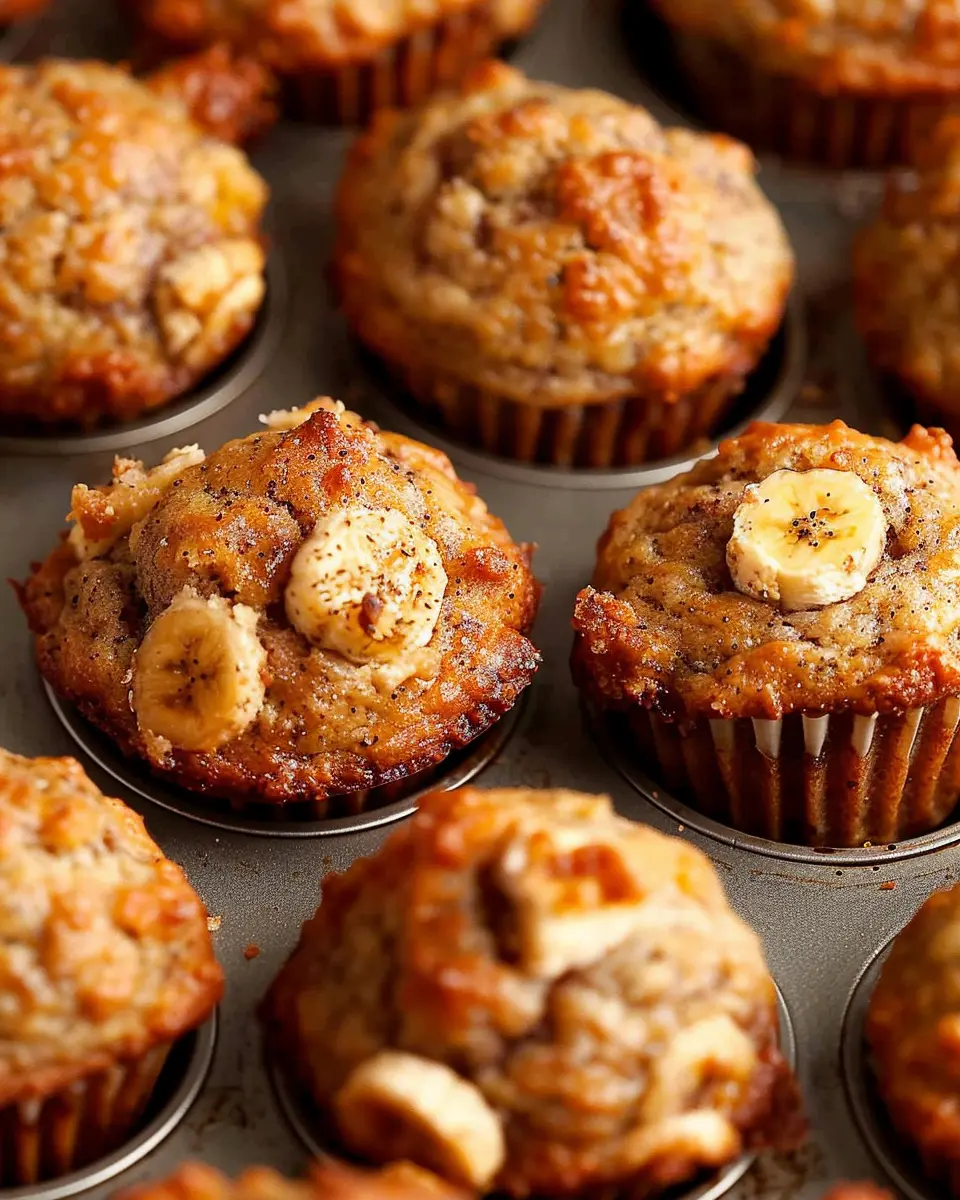
One of the best things about marble cake is its versatility. It can be dressed up with frosting for more formal events or served plain, allowing the rich flavors to shine through in casual settings. Want to add a twist? Consider trying different flavor combinations or even incorporating nuts for added texture. The possibilities are endless!
Gathering Around the Table
Baking is one of the few activities that genuinely brings people together. Imagine mixing the batter, chatting with loved ones, and the aroma wafting through your home—it encapsulates warmth and comfort. According to a study by the American Baking Association, home baking has seen a resurgence as people seek to connect through homemade goods. Marble cake is a perfect starting point; it invites both new bakers and experienced ones to share their tips, stories, and, of course, slices!
While you might find marble cake recipes scattered across blogs and cookbooks, there’s something especially rewarding about crafting your own version. Want to dive deeper? Check out some fantastic baking techniques at King Arthur Baking or America’s Test Kitchen for invaluable insights.
So, roll up those sleeves and prepare to indulge your creativity. Not only will you satisfy your sweet tooth, but you’ll also create delicious memories worth savoring!
Ingredients for Marble Cake
Creating a delightful marble cake starts with the right mix of ingredients. Here’s a breakdown to get you started!
Vanilla Cake Base Ingredients
To form the luscious base of your marble cake, you’ll need:
- 1 cup unsalted butter, softened
- 2 cups granulated sugar
- 4 large eggs
- 1 tablespoon vanilla extract
- 3 cups all-purpose flour
- 1 tablespoon baking powder
- 1 cup milk
This classic vanilla combination provides the perfect canvas for your marbling—trust me, it’s worth it!
Chocolate Marble Ingredients
Now, let’s add some rich flavors with the chocolate marble portion. Gather the following:
- 3/4 cup unsweetened cocoa powder
- 1 cup boiling water
- Additional sugar (about 1/2 cup) to taste
Mixing these elements gives your cake that iconic marble pattern and flavor. The contrast between the vanilla and chocolate will leave your guests wanting more!
Chocolate Buttercream Frosting Ingredients
To top off your cake gloriously, you’ll want a generous layer of chocolate buttercream. Here’s what you need:
- 1 cup unsalted butter, softened
- 3-4 cups powdered sugar
- 1/2 cup unsweetened cocoa powder
- 1/4 cup milk
- 1 teaspoon vanilla extract
This frosting has the perfect creamy texture that complements your marble cake beautifully.
By gathering these ingredients, you’ll be well on your way to creating a stunning and delicious dessert. Want to expand your baking skills? Check out these baking tips to elevate your recipes!
Preparing Marble Cake
Making a delicious marble cake can be a delightful experience, especially when you see that beautiful blend of chocolate and vanilla batters come together. Ready to bake? Let’s dive into the essential steps you’ll need to follow to create this mouthwatering treat!
Preheat the oven and prepare cake pans
First, let’s set the stage for our cake by preheating the oven to 350°F (177°C). This is crucial because starting with a well-heated oven ensures even cooking. While the oven warms up, grab two 9-inch round cake pans. Grease them well with butter or non-stick spray, and dust them lightly with flour. You can use parchment paper at the bottom of the pans for an easy release when you flip the cakes out—trust me, it makes life easier!
Mix the dry ingredients
In a medium bowl, combine your dry ingredients: 2 cups of all-purpose flour, 1½ teaspoons of baking powder, 1 teaspoon of baking soda, and a pinch of salt. Whisk them together until evenly mixed. This step is vital to ensure that your marble cake has a consistent texture, free of any lumps. You can find great tips for measuring flour correctly at the King Arthur Baking website.
Prepare the milk mixture
In a separate bowl, mix 1 cup of whole milk with 2 teaspoons of vanilla extract. This combination adds a lovely flavor to your cake and keeps it moist. Set this bowl aside while you work on the next steps.
Cream the butter, oil, and sugar
In a large mixing bowl, use an electric mixer to cream together ½ cup of softened butter, ½ cup of vegetable oil, and 1½ cups of granulated sugar until light and fluffy. This process usually takes about 3-4 minutes. The creamy texture you achieve here is a foundational element for a soft marble cake.
Combine the eggs and vanilla into the mixture
Add 3 large eggs, one at a time, to your butter mixture, blending each egg well before adding the next. Don’t forget to add an additional teaspoon of vanilla extract! The combination makes your cake even richer.
Alternate mixing in dry ingredients and milk
Now comes the fun part: combining your mixtures. Gradually add the dry ingredients to the butter-egg mixture, alternating with the milk mixture. Begin and end with the flour mixture. This method helps to avoid overmixing, which can make the cake dense.
Prepare the chocolate marble mixture
To make the chocolate part of your marble cake, take ½ cup of the cake batter and mix it with ½ cup of unsweetened cocoa powder. This will create a rich chocolate batter that contrasts beautifully with the vanilla base.
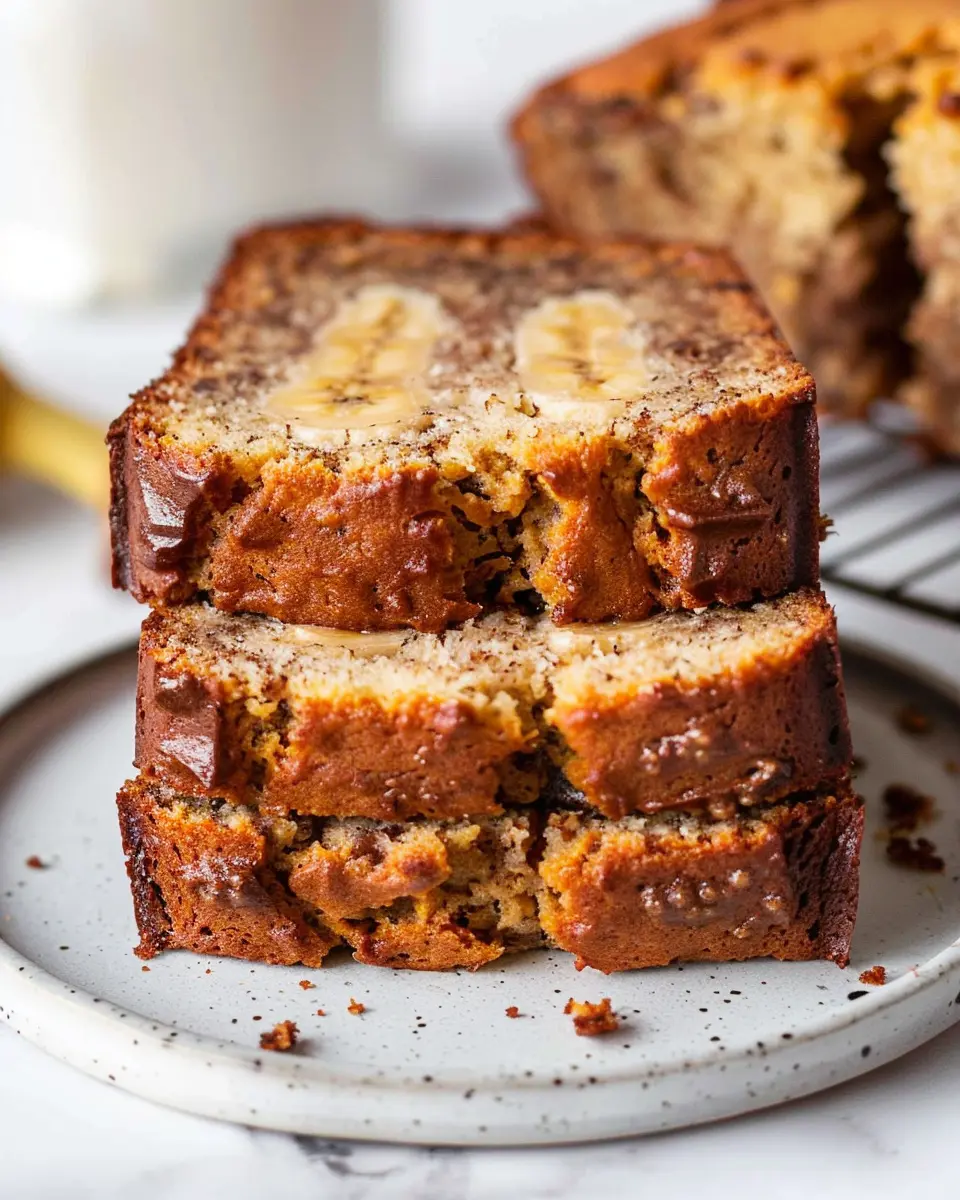
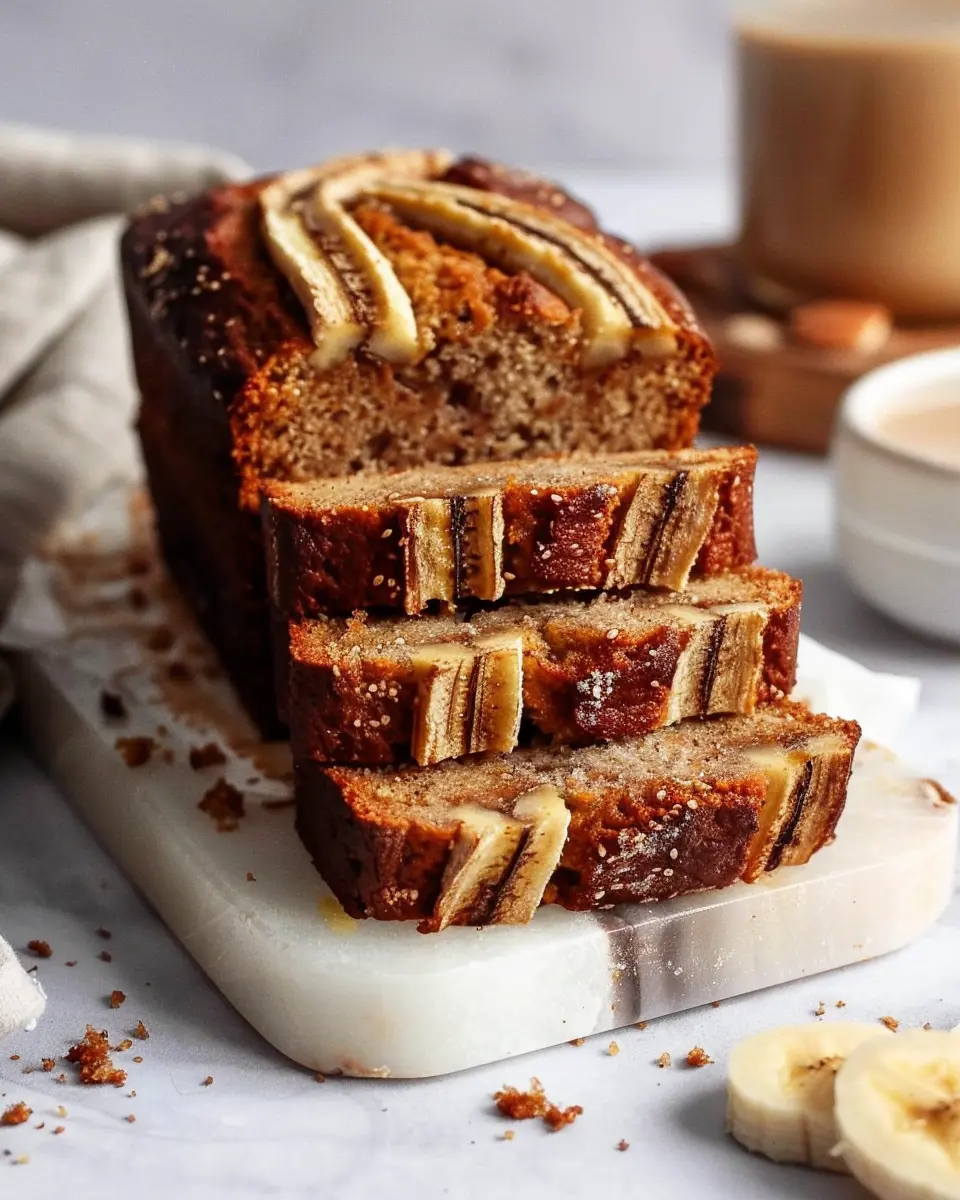
Create the marble effect in the batter
Spoon portions of both the vanilla and chocolate batters into the prepared pans, alternating with layers to create a marbled effect. Use a knife or a skewer to lightly swirl the batters together. Don’t overdo it! You want to see swirls, not a uniform color.
Bake the cakes
Place your pans in the oven and bake for 25-30 minutes, or until a toothpick inserted in the center comes out clean. The aroma will fill your kitchen, making it impossible to resist the anticipation!
Cool and prepare for frosting
Once baked, remove the cakes from the oven and let them cool in the pans for about 10 minutes before transferring them to a wire rack to cool completely. This cooling process is crucial for a perfect marble cake because it prevents the frosting from melting once applied.
Make the chocolate buttercream frosting
While your cakes cool, let’s whip up some chocolate buttercream frosting. In a bowl, cream together 1 cup of softened butter and 3-4 cups of powdered sugar. Gradually mix in ½ cup of cocoa powder and a splash of milk until you reach a smooth, spreadable consistency.
Assemble and frost the cake
Finally, place one cooled cake layer on a serving platter. Generously spread frosting on top and then place the second cake layer on top. Frost the top and sides of the marble cake to your heart’s content. For an extra touch, you can use a spatula or knife to create decorative swirls in the frosting.
Enjoy each slice of your beautifully marbled cake, and savor the compliments from your friends and family. Baking is not only about the end result; it’s also a journey of creativity and warmth in the kitchen!
Variations on Marble Cake
Marble cake is a delightful canvas, and its classic chocolate-vanilla combination is just the beginning! Let’s explore some exciting variations that can take your delicious creation to new heights.
Chocolate-Vanilla Variations
While the combination of chocolate and vanilla in marble cake is timeless, you can deepen those flavors by using different types of chocolate. Try incorporating dark chocolate for a richer taste, or white chocolate for a creamy, sweet contrast. Swirling Nutella or a homemade fudge sauce into the batter not only creates a stunning visual but also adds an irresistible flavor twist.
Fun Flavors to Experiment With
Don’t hesitate to get creative! Consider these fun variations to elevate your marble cake:
- Citrus Twist: Add a splash of orange or lemon zest to the batter for a refreshing zing.
- Almond Joy: Mix in almond extract and shredded coconut, paired with chocolate for a tropical vibe.
- Matcha Magic: Try adding matcha powder for a unique green tea flavor that contrasts beautifully with vanilla.
These flavors can provide unexpected yet delightful surprises at your next gathering!
Dietary-Friendly Options
Craving a marble cake but have dietary needs? No worries! Here are some alternatives:
- Gluten-Free: Substitute all-purpose flour with a gluten-free blend—it’ll still be just as delicious.
- Vegan: Replace eggs with applesauce or flaxseed meal and use plant-based milk. This preserves the moist texture while meeting vegan standards.
For more details on how to make gluten-free and vegan treats, check out Minimalist Baker. Whether you’re hosting a casual brunch or a festive celebration, these variations ensure everyone can enjoy a slice of marble cake!
Cooking Tips and Notes for Marble Cake
Ensure Room Temperature Ingredients
To achieve the perfect marble cake, start by using room temperature ingredients. This means letting your eggs, butter, and other dairy products sit out for about 30 minutes before you start baking. When ingredients are at room temperature, they blend more easily, creating a smooth batter that is essential for that fluffy texture we all love.
Measuring Ingredients Accurately
Accuracy is key in any baking venture, especially with a delightful treat like marble cake. Use a kitchen scale for precise measurements, or make sure to spoon and level your dry ingredients correctly. A little extra flour or sugar can throw off the texture, turning your cake into something you didn’t intend. For more tips on measuring, check out resources from King Arthur Baking.
Importance of Not Overmixing
While it’s tempting to mix until everything is perfectly combined, resist the urge! Overmixing can lead to a dense cake. Mix just until the ingredients are fully incorporated, especially once you’ve added the flour. This helps retain that light, airy quality that makes marble cakes so delightful. Think of your batter as a delicate dance—gentle movements lead to a better outcome!
Serving Suggestions for Marble Cake
Perfect Moments for Marble Cake
Marble cake is a versatile treat that fits seamlessly into various occasions. Whether you’re hosting a casual afternoon get-together or a more formal dinner party, this delightful dessert can steal the show. Imagine slices of marble cake served with coffee at a cozy book club or as the centerpiece of a birthday bash. It’s perfect for holiday celebrations, family reunions, or even a comforting dessert after a busy work week. The beautiful swirls are visually appealing and sure to impress your guests.
Delicious Pairing Ideas
To complement the rich flavors of your marble cake, consider these pairing suggestions:
- Fresh Berries: The tartness of strawberries or raspberries creates a lovely contrast.
- Whipped Cream: A dollop adds a light, creamy texture that enhances each bite.
- Ice Cream: Vanilla or chocolate ice cream makes for a delightful dessert experience.
- Hot Beverages: Serve with coffee, tea, or even a warm cocoa for a cozy vibe.
Your marble cake can be enjoyed in different ways—just think about how you’d like to enhance that lovely blend of flavors! Curious about other cake inspirations? Explore more on Serious Eats.
Time Breakdown for Marble Cake
Preparation time
Making a delightful marble cake doesn’t take long to prep! You’ll need about 20 minutes to gather your ingredients, measure everything out, and mix your batters. It’s a great time to put on some music or even catch up on a podcast while whipping everything together!
Baking time
Once your batter is ready, it’s time to let the oven do its magic! The baking time for this tasty marble cake is approximately 40-45 minutes. While it bakes, the delicious aroma will fill your kitchen, making the wait all the more delightful.
Total time
All in all, you’re looking at about 60-65 minutes from start to finish. So whether you’re treating yourself or entertaining friends, this cake is perfect for any occasion. Don’t forget to check out more tips on baking cakes at The Spruce Eats for even more inspiration!
Nutritional Facts for Marble Cake
Marble cake is a delightful treat, but how does it stack up nutritionally? Understanding the facts can help you indulge mindfully.
Calories per Slice
On average, a slice of marble cake contains around 350 calories. This can vary depending on the recipe and portion size. It’s a dessert that balances enjoyment with moderation, making it a good option for special occasions or a sweet treat after dinner.
Protein Content
In a typical slice of marble cake, you’ll find about 4 grams of protein. While this isn’t a substantial amount, every bit contributes to your daily intake, especially when paired with protein-rich beverages like milk or a smoothie.
Sugar and Fat Content
Marble cake often features 15-20 grams of sugar and around 10-15 grams of fat per slice. Choosing a recipe that uses whole ingredients, like natural sweeteners and healthier fats, can help you keep these numbers in check. It’s all about balance—enjoy a slice without guilt, and consider sharing.
For more tips on ingredients, check out excellent resources on nutrition basics. Enjoy your baking adventure and make those moments around the marble cake all the more memorable!
FAQs about Marble Cake
How can I achieve a better marble effect?
Creating a stunning marble cake involves some artful technique. To achieve that striking marbled appearance, start by pouring the chocolate batter and vanilla batter into the pan in alternating layers. Use a knife or a skewer to gently swirl the two batters together, but avoid overdoing it; you want clearly defined swirls, not a fully blended mixture. Remember, less is more here! For an even more dramatic look, try adding a bit of cocoa powder to your vanilla batter before combining the two—this can enhance the contrast and visual appeal of your dessert.
Can I freeze marble cake?
Absolutely! Freezing a marble cake is a great way to enjoy this treat at a later date without compromising its deliciousness. Simply wrap the cooled cake tightly in plastic wrap, followed by aluminum foil, to prevent freezer burn. It can stay fresh for up to three months. When you’re ready to enjoy, just let it thaw in the refrigerator overnight, and trust me, it will taste almost as fresh as the day you made it.
What’s the best way to store leftovers?
To keep your marble cake fresh after a delightful baking session, storing it correctly is key. Place any leftover slices in an airtight container at room temperature for about 2-3 days. If you’d like to extend its shelf life, consider refrigerating it, although it’s best enjoyed at room temperature to retain its moist texture.
For more tips on baking and storage, check out resources from The Kitchn or Serious Eats. They have fantastic insights into keeping your baked goods delicious!
Conclusion on Marble Cake
Recap of why marble cake is a must-try at home
Marble cake beautifully combines the rich flavors of vanilla and chocolate, making it a delightful treat for any occasion. Not only is it visually appealing with its swirled patterns, but it’s also quite simple to prepare, perfect for beginner bakers. Plus, the aroma that fills your kitchen is irresistible!
With its moist texture and delightful taste, marble cake can elevate any dessert table. Share it at family gatherings or enjoy it over coffee with friends. If you’re curious about how versatile this cake can be, check out amazing recipes at Taste of Home or Bon Appétit. So why not whip one up today? You’ll be glad you did!
PrintMarble Cake: The Best Indulgent Recipe for Home Bakers
This marble cake recipe is perfect for home bakers looking to indulge in a sweet treat that combines rich chocolate and vanilla flavors in every slice.
- Prep Time: 20 minutes
- Cook Time: 35 minutes
- Total Time: 55 minutes
- Yield: 1 cake 1x
- Category: Dessert
- Method: Baking
- Cuisine: American
- Diet: Vegetarian
Ingredients
- 2 cups all-purpose flour
- 1 ½ cups sugar
- ½ cup unsalted butter, softened
- 1 cup milk
- 3 large eggs
- 1 tablespoon baking powder
- 1 teaspoon vanilla extract
- ½ cup cocoa powder
- ½ teaspoon salt
Instructions
- Preheat the oven to 350°F (175°C).
- In a large bowl, cream together the butter and sugar until light and fluffy.
- Add the eggs one at a time, beating well after each addition.
- Stir in the vanilla extract.
- In another bowl, combine the flour, baking powder, and salt.
- Gradually add the dry ingredients to the wet mixture, alternating with the milk until well combined.
- Divide the batter in half. To one half, add cocoa powder and mix well.
- In a greased cake pan, alternate spoonfuls of vanilla and chocolate batter.
- Use a knife to swirl the batters together gently.
- Bake in the preheated oven for 30-35 minutes or until a toothpick inserted comes out clean.
- Allow to cool before serving.
Notes
- For extra flavor, consider adding chocolate chips or nuts.
- Make sure all ingredients are at room temperature for the best results.
Nutrition
- Serving Size: 1 slice
- Calories: 350
- Sugar: 25g
- Sodium: 200mg
- Fat: 15g
- Saturated Fat: 9g
- Unsaturated Fat: 5g
- Trans Fat: 0g
- Carbohydrates: 50g
- Fiber: 2g
- Protein: 6g
- Cholesterol: 80mg
Keywords: Marble Cake, cake recipe, baking, desserts