Introduction to Artisan Bread Recipe
Why homemade artisan bread is a game-changer
If you’ve ever walked into a bakery and been greeted by the warm, inviting aroma of freshly baked bread, you know it’s a sensory experience like no other. Now, imagine being able to recreate that magic right in your own kitchen with a simple artisan bread recipe. Making your own artisan bread isn’t just about enjoying delicious loaves; it’s about discovering a rewarding process that connects you to ancient traditions and cultivates creativity in your culinary skills.
So why is homemade artisan bread such a game-changer? First off, consider the ingredients. When you bake at home, you have full control over what goes into your bread. You can opt for high-quality, organic flours and skip unnecessary preservatives. This means you’re not only enjoying a fresher product but also making healthier choices for you and your loved ones. Plus, making your own bread can be more cost-effective than purchasing gourmet loaves from the store.
Another exciting aspect is the flexibility and personalization that comes with baking your own bread. Do you have a penchant for flavors like herbs, nuts, or seeds? Feel free to experiment and make the bread of your dreams! Whether it’s adding a sprinkle of rosemary or incorporating some toasted sunflower seeds, the possibilities are endless. Plus, nothing quite beats the satisfaction of pulling a perfectly golden, crusty loaf from your oven, knowing that you crafted it with your own two hands.
For those new to baking, don’t worry—it’s simpler than you think! All you need is time, patience, and a willingness to learn. Resources like the King Arthur Baking Company offer invaluable tips and expert advice to guide you along the way. You might even find yourself becoming a part of the vibrant online baking community, sharing your triumphs and learning through others’ experiences.
So, why not dive in and give this artisan bread recipe a try? You might just find yourself hooked on the delightful blend of science and art that bread-making offers, transforming your kitchen into a haven of warmth and flavor.
Ingredients for Artisan Bread
Simple staples for delicious results
Creating a delightful artisan bread recipe doesn’t require a dizzying array of ingredients. Instead, you’ll need a few simple staples that come together magic-like! Here’s what you’ll need:
-
Flour: High-quality all-purpose flour is your best friend, but you can also experiment with bread flour for that extra gluten goodness. Did you know that the protein content in flour can make a significant difference in texture? King Arthur Baking has an excellent resource on flour types and their uses.
-
Water: Always opt for filtered water. The temperature matters too; lukewarm water helps activate the yeast better.
-
Salt: Essential for flavor and strengthening gluten—don’t skip this! A good sea salt or kosher salt works wonderfully.
-
Yeast: Active dry yeast or instant yeast—either works. Just check the expiration date to ensure it’s fresh and ready to help your bread rise.
-
Optional Add-ins: Consider incorporating herbs, seeds, or cheese. They can turn a basic loaf into something special!
These foundational ingredients are not only easy to find but also ensure your artisan bread is both tasty and satisfying. What’s your favorite addition?
Preparing Artisan Bread
Nothing quite matches the satisfaction of pulling a fresh loaf of artisan bread from the oven, its crust golden and the aroma enveloping your kitchen. Making your own artisan bread is not just about the end product; it’s about enjoying every step of the process. So, let’s dive in and explore how to prepare this delightful recipe!
Gather your ingredients
First things first: you’ll need to gather all of your ingredients. For a basic artisan bread recipe, here’s what you’ll need:
- 4 cups of all-purpose flour (plus extra for dusting)
- 1 ½ teaspoons of salt
- ½ teaspoon of instant yeast
- 1 ½ cups of warm water
Make sure your water is warm but not hot, as this can affect the yeast activation. You may find it helpful to set out your ingredients ahead of time, as a little organization goes a long way in the kitchen. Read more about ingredient selection at The Kitchn.
Mix the dry ingredients together
In a large mixing bowl, combine your dry ingredients: the flour, salt, and yeast. It’s essential to whisk them thoroughly to ensure that the yeast and salt are evenly distributed. This step is crucial since it impacts how well your bread will rise. Properly mixing the dry ingredients helps achieve a uniform texture in your loaf.
Add warm water and form the dough
Once your dry ingredients are mixed, pour in the warm water. Grab a wooden spoon or your hands, and stir until a shaggy dough forms. You don’t need to knead it just yet! The key here is to combine everything without overworking it. The dough will be relatively wet, which is entirely normal for artisan bread. There’s something wonderfully instinctive about kneading by hand, so don’t be shy about getting your hands in there!
Let the dough rise
Cover the bowl with a damp kitchen towel or plastic wrap. Let it rest in a warm place for 12 to 18 hours. Yes, you read that right! This long rise is what gives artisan bread its unique flavor and texture. During this time, gluten develops, and the flavor develops in such a way that it beats any store-bought loaf.
Shape your loaf
After your dough has risen beautifully, it’s time to shape your loaf. Sprinkle a clean work surface with some flour and gently transfer your dough to it. You’ll want to lightly fold the dough over itself a few times without knocking all the air out. Finally, shape it into a round or oval loaf, depending on your preference. Let it rest again for about 30 minutes; this helps to relax the gluten, making it easier to handle.
Preheat your oven and prepare for baking
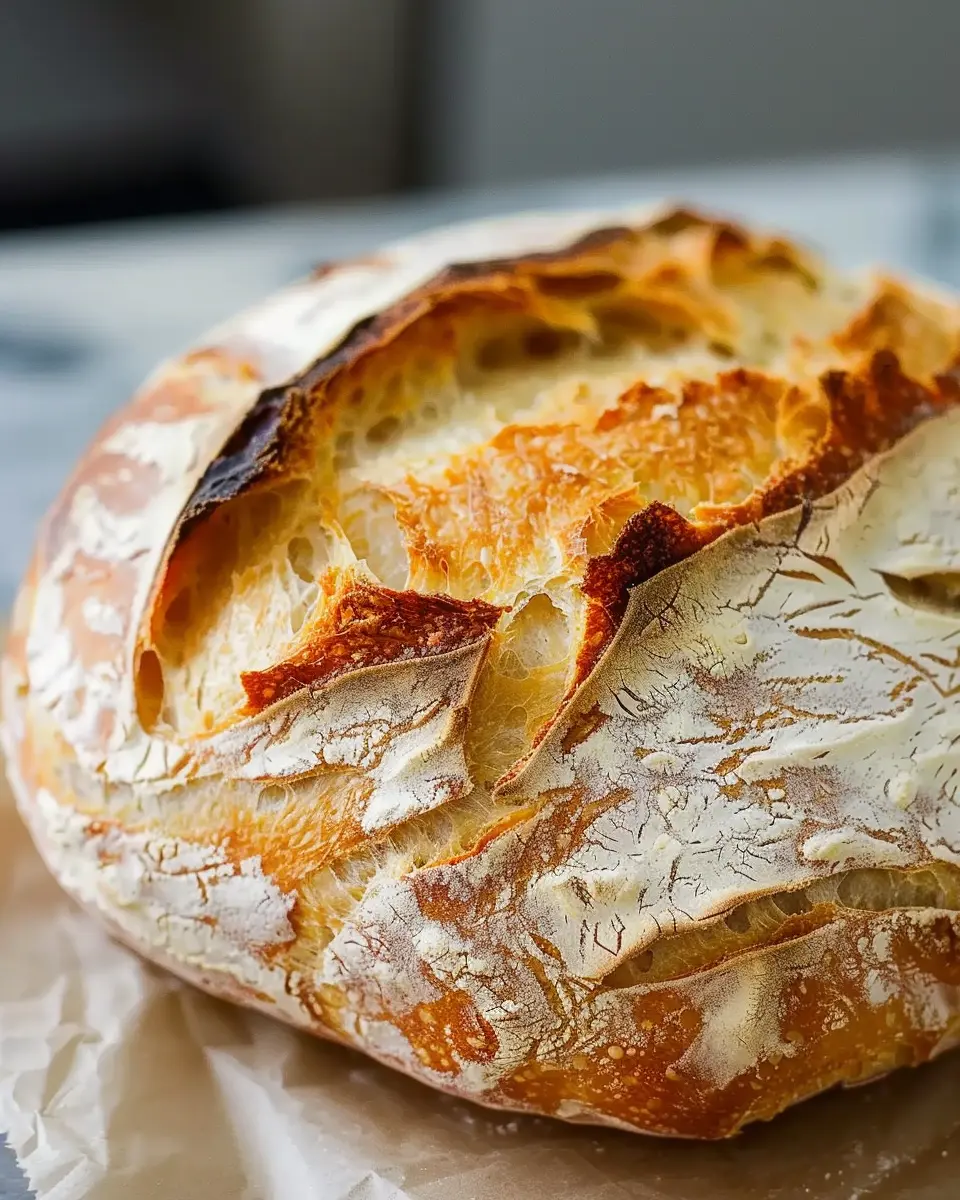
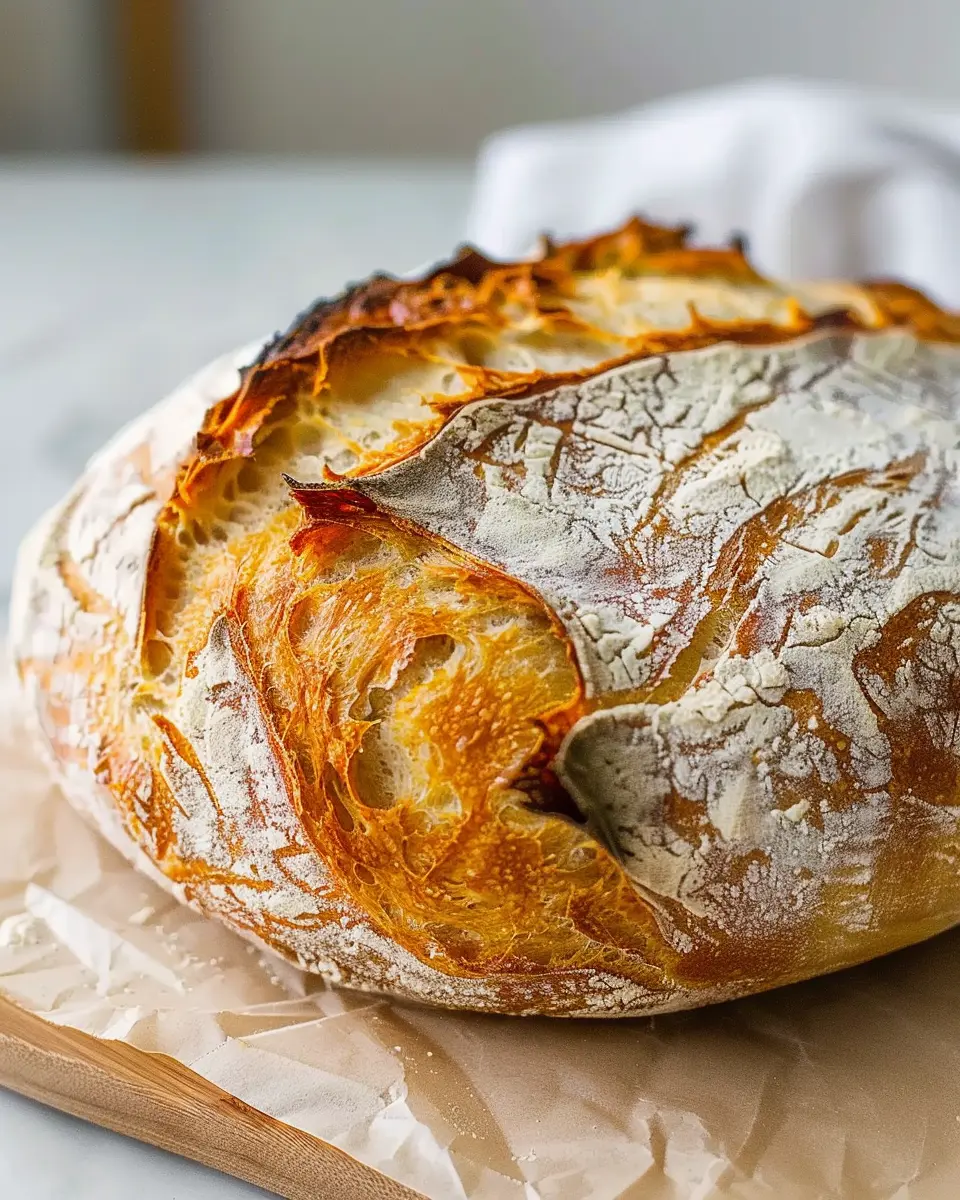
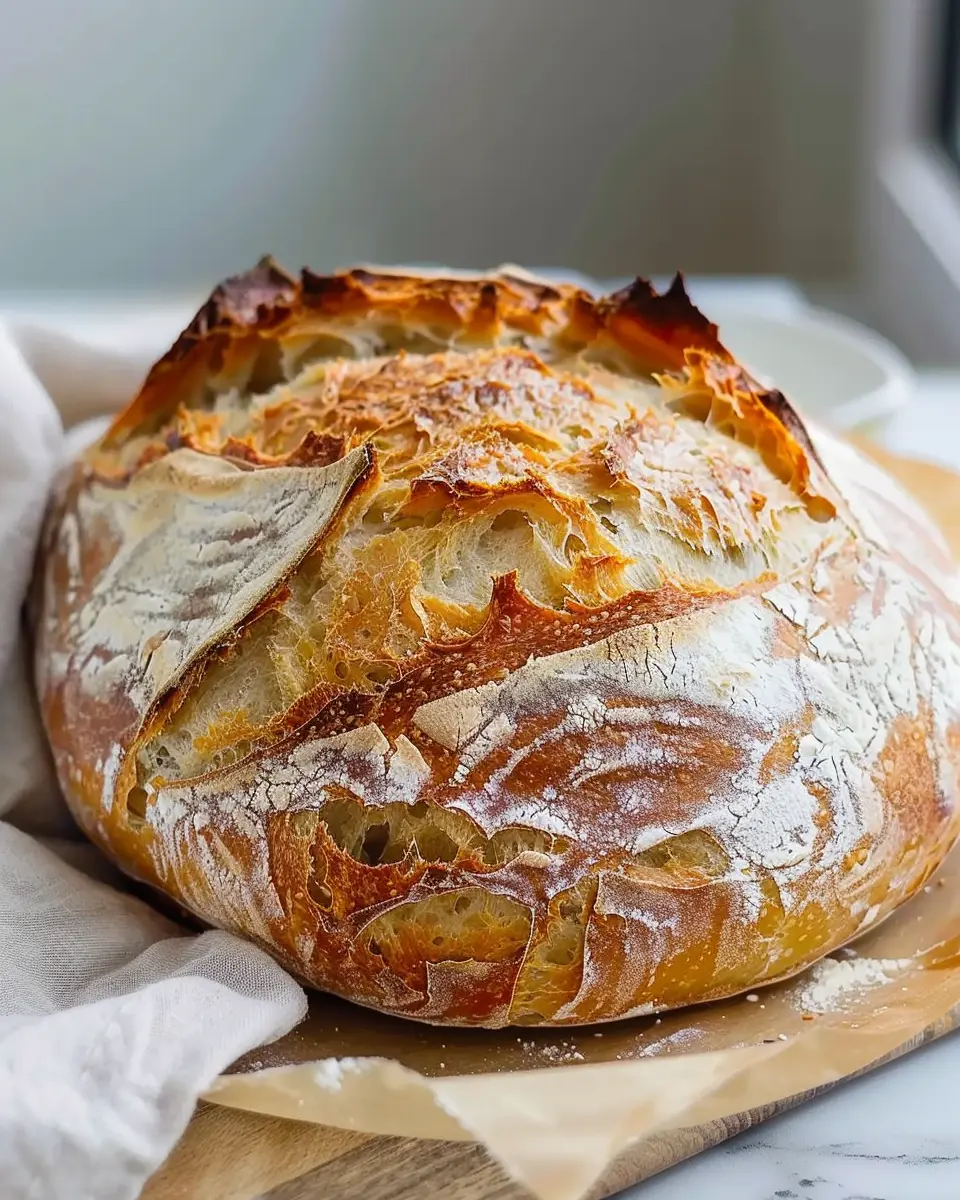
While your loaf is doing its final rise, it’s the perfect time to preheat your oven to 450°F (230°C). Also, place a Dutch oven (with its lid) inside the oven to heat up. Baking in a preheated Dutch oven is part of what creates that perfectly crisp crust.
Create steam and bake
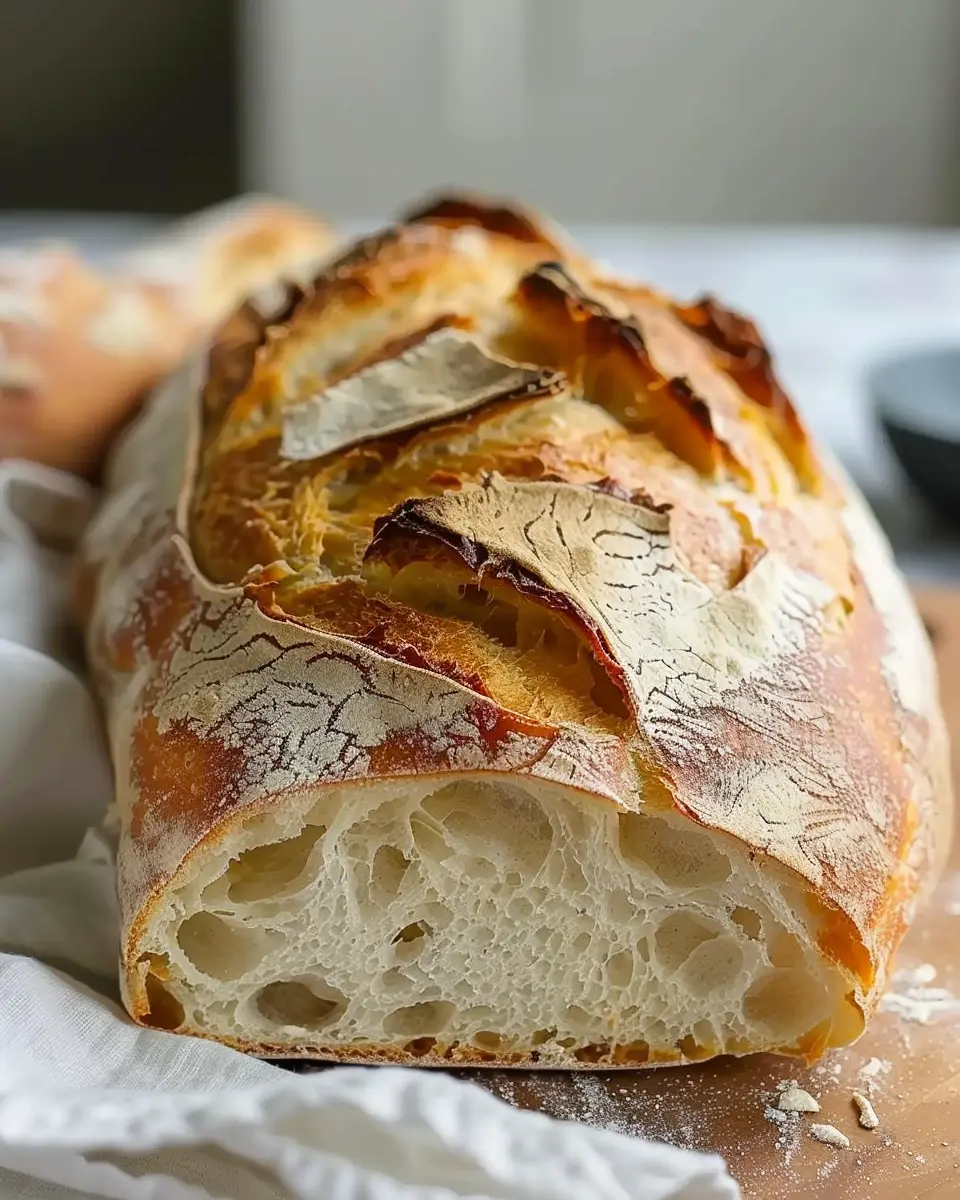
Here comes the fun part! Carefully remove the hot Dutch oven and place your loaf inside, covering it with the lid. This traps steam, helping to create a crusty exterior. Bake it covered for about 30 minutes, then remove the lid and allow it to bake for an additional 15 to 20 minutes until it’s golden brown. The transformation is nothing short of magical.
Cool before slicing
Finally, once your loaf is done baking, remove it from the oven and let it cool on a wire rack. While it might be tempting to slice into it right away, giving it about 30 minutes to cool allows the steam to escape and the texture to set. Trust us, the first slice will be worth the wait!
With this artisan bread recipe, you’ve not only created a delicious loaf but also experienced the joy of baking. Enjoy with your favorite spreads, pair it with a hearty soup, or simply savor it on its own. Happy baking!
Variations on Artisan Bread
Creating your own artisan bread is an exciting culinary adventure, but the fun doesn’t stop with the base recipe. Let’s explore delightful variations that elevate this staple into a signature creation.
Adding Herbs, Seeds, and Spices
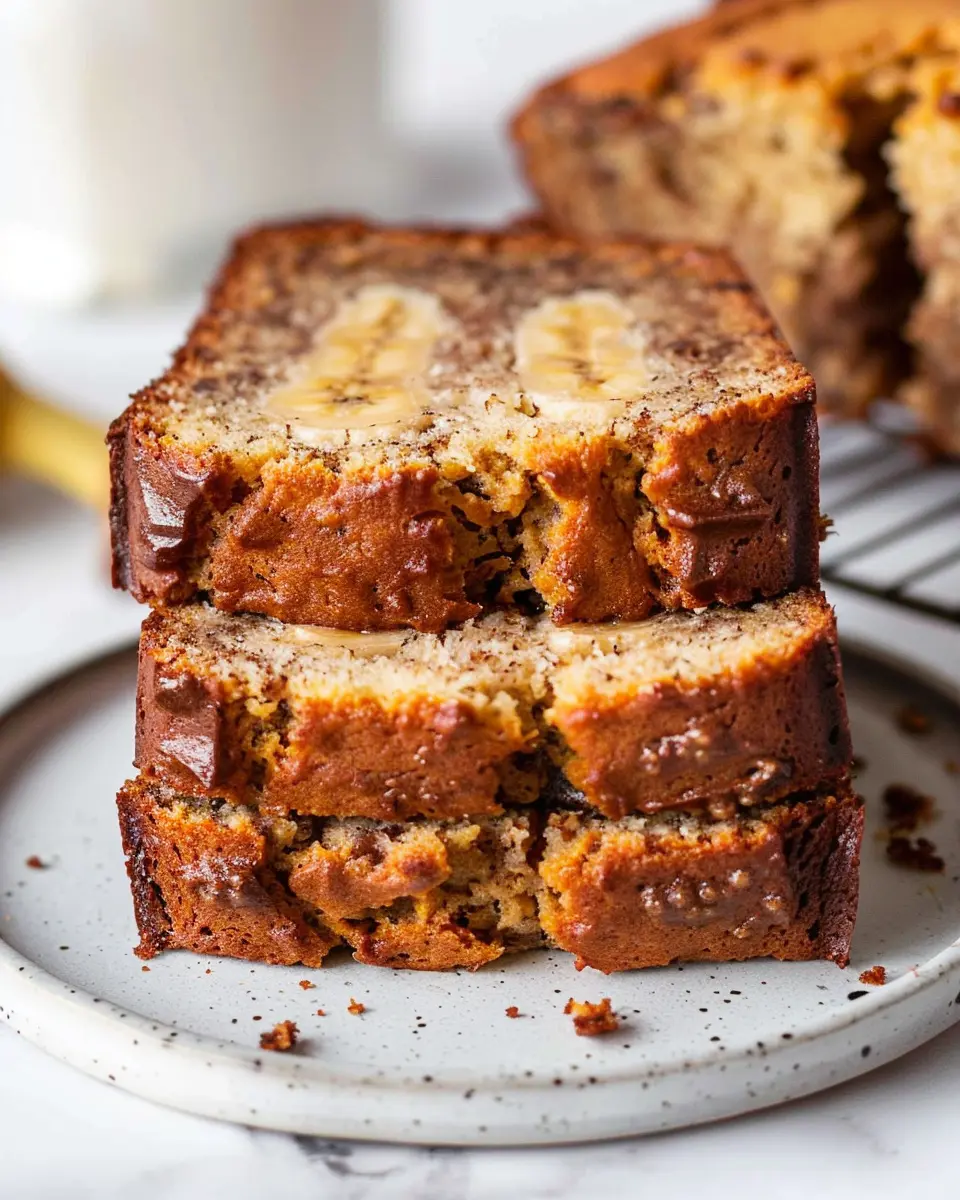
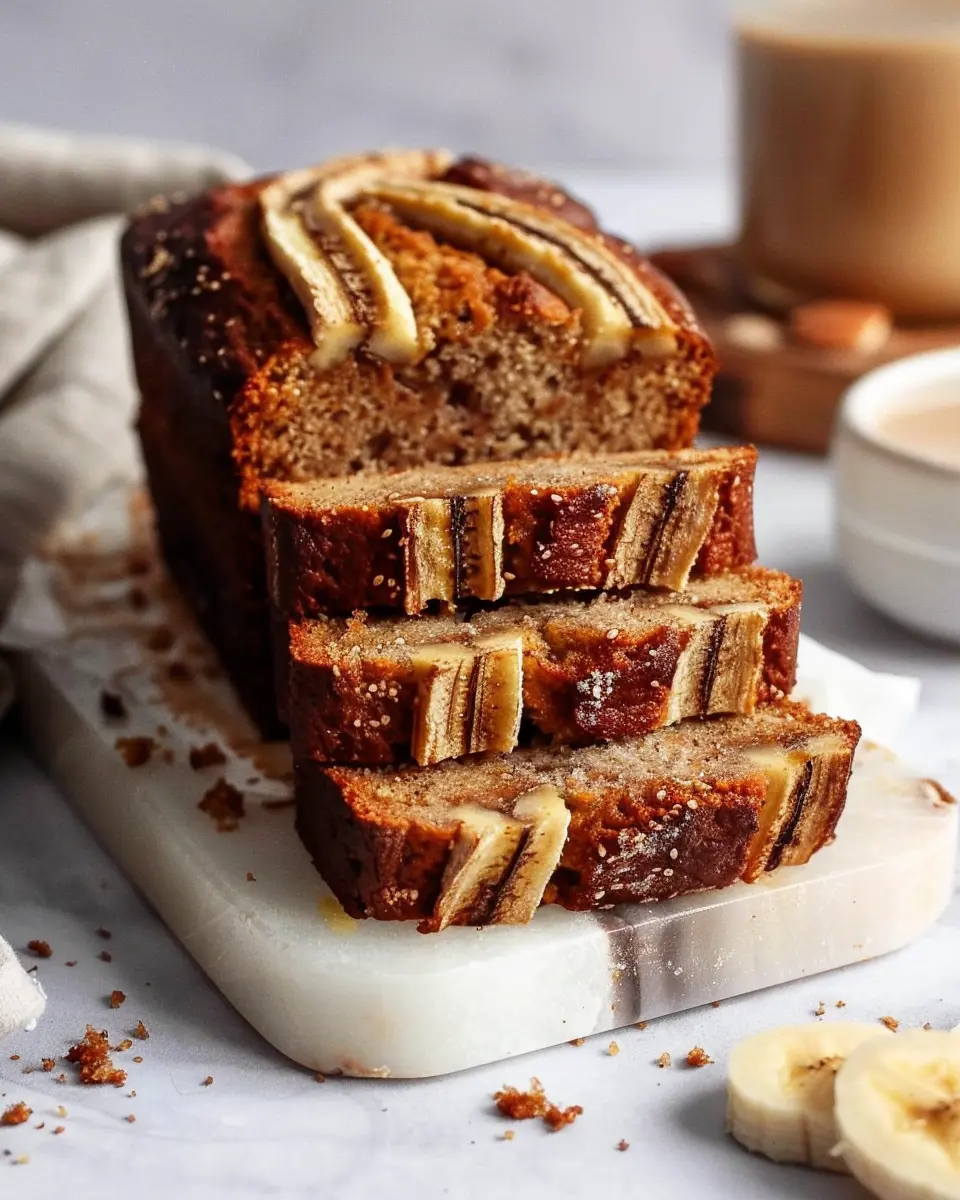
Enhancing your artisan bread recipe with herbs, seeds, and spices can transform it into something truly special. Try infusing your dough with fresh rosemary, thyme, or basil for an aromatic experience. A sprinkle of sunflower seeds, chia seeds, or even pumpkin seeds adds texture and nutritional value.
For a dash of warmth, consider mixing in spices like cumin or smoked paprika. These ingredients don’t just change the flavor profile; they also invite unique health benefits. According to the American Heart Association, herbs and spices can help reduce sodium intake while adding delicious flavors that keep your taste buds engaged.
Incorporating Cheese and Olives
If you’re a cheese lover, why not mix in some crumbled feta or shredded mozzarella? This variation adds a delightful creaminess that pairs beautifully with a rustic loaf. Additionally, incorporating kalamata olives or green olives can create a savory balance, perfect for serving at social gatherings or enjoying with your favorite dips.
Think about how these added flavors might pair with a hearty soup or a fresh salad. The right combination can turn a simple dinner into a gourmet experience. Alton Brown, a culinary expert, often emphasizes how such thoughtful additions can elevate even the most basic recipes.
Experimenting with these variations will not only satisfy your culinary creativity but also impress your friends and family. So, why not take your artisan bread recipe to the next level?
Cooking Tips and Notes for Artisan Bread
Best Practices for Dough Handling
When working with your artisan bread recipe, remember that handling the dough gently is crucial. Overworking it can lead to tough bread instead of the light, airy texture we’re aiming for. Here are some handy tips:
- Always use a well-floured surface when kneading. This provides a non-stick environment for your dough.
- Avoid using too much flour. A little stickiness is normal and helps with overall hydration, which results in a better crumb.
- Give your dough time to rest. This helps the gluten relax, making it easier to shape.
If you’re curious about the science behind dough handling, check out this resource on gluten development.
Importance of Steam During Baking
Creating steam in your oven is a game changer for achieving that perfect crust. When baking your artisan bread, consider these methods:
- Use a Dutch oven: Preheat it with the lid on, and your bread will create its own steam when it hits the hot pan.
- Add water to a baking pan: Pour a cup of water into a hot pan at the bottom of your oven to generate steam.
- Spritz with water: A little spray during the first few minutes can also boost moisture.
Why is steam so important? It allows the crust to expand before it sets, leading to a beautifully airy loaf. For more baking tips, check out this guide on steam baking.
By keeping these tips in mind, you’re well on your way to mastering your artisan bread. Enjoy the process, and happy baking!
Serving Suggestions for Artisan Bread
Pairing with spreads and dips
When it comes to artisan bread, the right spreads and dips can elevate your culinary experience. Consider serving your warm slices with:
- Homemade hummus: A perfect blend of creamy and tangy, great for spreading on toasted bread.
- Herbed cream cheese: Whip up a batch with fresh herbs for a delightful taste.
- Avocado smash: This trendy spread is not just delicious but also packed with nutrients.
Adding a touch of seasoning like sea salt or chili flakes can take these spreads to the next level.
Utilizing bread in meals
Think beyond the standard sandwich! Use your artisan bread recipe to create scrumptious meals:
- Bruschetta: Top toasted slices with diced tomatoes, basil, and olive oil for an easy appetizer.
- Bread bowls: Hollow out a loaf for serving warm soups or creamy dips—perfect for cozy gatherings.
- Stuffing: Tear leftover bread into chunks for a rich, flavorful stuffing during the holidays.
Don’t hesitate to experiment and find what you love! For more ideas, check out The Kitchn for creative ways to enjoy your artisan bread.
Time Breakdown for Artisan Bread
When you embark on this artisan bread recipe, it’s essential to know how long each step will take. This breakdown helps you manage your time effectively, ensuring a smooth baking experience.
Preparation Time
Getting started with your artisan bread takes about 30 minutes. This includes mixing your ingredients and developing that magical dough that will rise to impressive heights.
Rising Time
The dough needs time to do its thing. You’ll want to give it approximately 4 to 6 hours to rise. This can be done in a warm space, or you can let it rise overnight in the fridge for extra flavor.
Baking Time
Once your dough has risen beautifully, the baking process itself will take around 30 to 40 minutes. Keep an eye on it until it achieves that golden, crusty perfection.
Total Time
All in all, expect to dedicate roughly 5 to 7 hours from start to finish. However, with rising time being largely inactive, you can easily squeeze in other activities while your bread is working its magic. For tips on perfecting your baking technique, check out resources like the King Arthur Baking Company. Happy baking!
Nutritional Facts for Artisan Bread
When enjoying your freshly baked artisan bread, it’s good to know the nutritional benefits it brings to your table. Here’s a quick rundown of the key nutritional facts:
Calories
A slice of artisan bread typically contains around 80–100 calories. This makes it a great option for a satisfying snack or as a base for your favorite toppings without feeling guilty.
Protein
You’ll find that artisan bread offers about 3–5 grams of protein per slice. While not as protein-dense as meat, it still contributes to your daily intake, especially when paired with protein-rich spreads or toppings.
Carbohydrates
Carbohydrates are the star in artisan bread, delivering about 15–20 grams per slice. These complex carbs provide energy, making it perfect for a morning meal or a pre-workout snack. If you’re looking to learn more about the nutritional benefits of bread, check out resources from the Whole Grains Council for detailed insights.
Incorporating this artisan bread recipe into your meals can be a delightful way to enjoy not just flavor, but nutrition as well. Consider topping it with avocado or turkey bacon for an added health boost!
FAQs about Artisan Bread
How do I store homemade artisan bread?
Storing your homemade artisan bread properly is key to keeping it fresh. Ideally, let your loaf cool completely on a wire rack. Then, wrap it in a clean kitchen towel to protect its crust while allowing air circulation. If you plan on enjoying it over several days, consider placing it in a paper bag. For longer storage, slice your bread and freeze it in an airtight container; simply toast slices straight from the freezer when you’re ready to enjoy.
Can I make this artisan bread recipe gluten-free?
Absolutely! You can adapt your artisan bread recipe to be gluten-free. Begin by substituting traditional wheat flour with a high-quality gluten-free flour blend that includes xanthan gum, which helps mimic the elasticity found in wheat. Keep in mind, gluten-free dough can behave differently, so don’t be surprised if it feels stickier. Each brand varies, so experimentation might be necessary.
What if my dough doesn’t rise properly?
If your dough isn’t rising as expected, there are a couple of troubleshooting steps to consider. First, check your yeast. Ensure it’s fresh and active; you can proof it by mixing it with warm water and a bit of sugar—if it bubbles after a few minutes, it’s good to go! Also, the temperature in your kitchen influences bread-making. A warm, draft-free environment is optimal for the rise. If all else fails, don’t be discouraged—dough can still be shaped and baked, resulting in a denser, yet tasty, loaf.
If you have more questions, feel free to reach out or explore expert resources on baking. Happy baking!
Conclusion on Artisan Bread
The joy of baking bread at home
There’s something deeply satisfying about pulling a fresh loaf of artisan bread from your oven. The warm aroma fills your kitchen, wrapping you in a comforting embrace. Baking at home not only connects you to the age-old practice of bread-making, but it also allows you to customize your flavors and enjoy the fruits of your labor.
Using this artisan bread recipe, you’ll unlock the secret to creating a crunchy crust and soft, airy center. Imagine sharing slices with loved ones, spreading butter or your favorite toppings, and crafting delightful sandwiches with Turkey Bacon or Chicken Ham. The experience can become a cherished ritual, fostering a love for homemade goodness. So why not give it a try? Embrace the simplicity and joy of baking bread; your taste buds will thank you! For more tips on improving your bread-making skills, check out King Arthur Baking and BBC Good Food.
PrintArtisan Bread Recipe: Easy Tips for Perfect Homemade Loaves
Learn how to make artisan bread at home with this easy recipe. Get tips for perfecting your loaves and enjoy the delicious taste of homemade bread.
- Prep Time: 20 minutes
- Cook Time: 30 minutes
- Total Time: 2 hours 50 minutes
- Yield: 1 loaf 1x
- Category: Breads
- Method: Baking
- Cuisine: American
- Diet: Vegetarian
Ingredients
- 3 cups all-purpose flour
- 1 teaspoon salt
- 1 teaspoon sugar
- 1 tablespoon active dry yeast
- 1 1/4 cups warm water
Instructions
- In a large bowl, mix together the flour, salt, sugar, and yeast.
- Gradually add the warm water and mix until a shaggy dough forms.
- Knead the dough on a floured surface for about 10 minutes until smooth.
- Place the dough in a greased bowl, cover, and let rise for 1-2 hours until doubled in size.
- Punch down the dough and shape it into a loaf.
- Let it rise again for 30-45 minutes.
- Bake in a preheated oven at 450°F for 25-30 minutes until golden brown.
Notes
- For better flavor, let the dough rest in the refrigerator overnight.
- Experiment with different types of flour for unique flavors.
Nutrition
- Serving Size: 1 slice
- Calories: 150
- Sugar: 0.5g
- Sodium: 300mg
- Fat: 1g
- Saturated Fat: 0g
- Unsaturated Fat: 0.5g
- Trans Fat: 0g
- Carbohydrates: 30g
- Fiber: 1g
- Protein: 5g
- Cholesterol: 0mg
Keywords: Artisan Bread Recipe, homemade bread, easy bread recipe