Introduction to Artisan Bread Recipe
Why Make Artisan Bread at Home?
Have you ever walked into a bakery and been captivated by the aroma of freshly baked bread? Making your own artisan bread at home can provide that same wonderful experience, and it’s simpler than you might think! The joy of kneading dough while watching it transform into a beautiful loaf is incredibly rewarding. Plus, baking can be a great stress relief, a therapeutic escape after a long day.
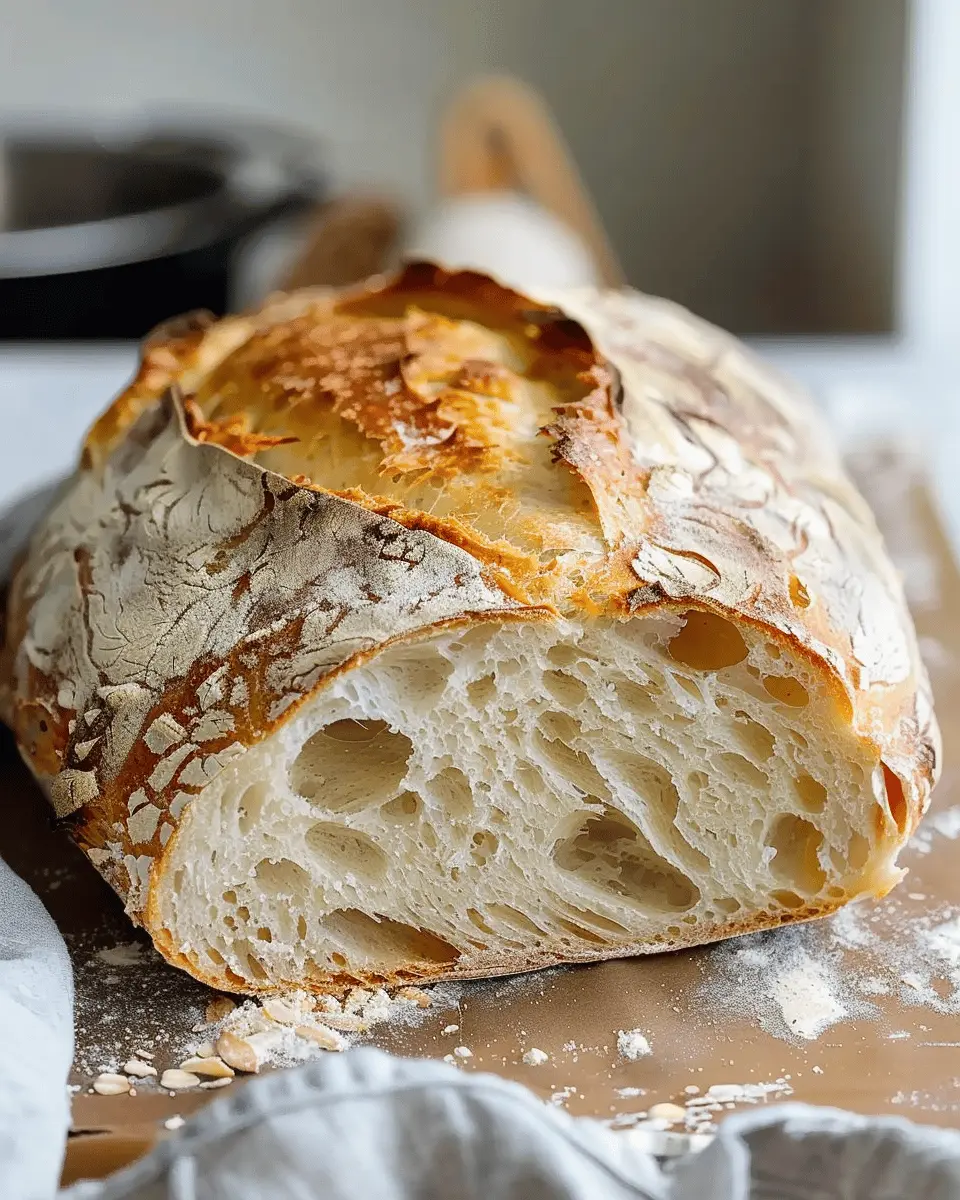
Just imagine the satisfaction of slicing into a crusty loaf, where the crust crackles beneath your knife and the interior is soft and warm. That joy is only enhanced when you realize you crafted it yourself. So, why not dive into the world of artisan bread and make it a delicious weekend project?
The Benefits of Homemade Bread Over Store-Bought
Opting for a homemade artisan bread recipe comes with numerous advantages that can elevate your mealtime experience:
-
Quality Ingredients: When you bake at home, you have full control over what goes into your bread. You can choose organic flours, high-quality grains, and even experiment with ingredients like nuts or herbs to create something truly unique.
-
Freshness: There’s nothing quite like the feeling of tearing into a loaf that’s still warm from the oven. Homemade bread tastes better and retains nutrients better than many store-bought alternatives, which can sit on shelves for weeks.
-
Customization: You can tailor your bread to meet your dietary needs or preferences. Whether you’re avoiding preservatives, gluten, or looking for a specific flavor profile, the possibilities are endless.
-
Cost-Effective: While some artisanal loaves at bakeries can be pricey, making your own can save you money in the long run. Flour, water, and yeast are relatively inexpensive compared to frequent bakery purchases.
Experimenting with an artisan bread recipe lets you embrace culinary creativity while reaping these benefits. For more inspiration on baking techniques and tips, explore the King Arthur Baking resources.
Embrace the art of bread making; it’s both a delicious and fulfilling endeavor!
Ingredients for Artisan Bread
Essential ingredients for the perfect loaf
To craft a truly divine artisan bread recipe, you’ll need some key ingredients that create a lovely texture and flavor. These essentials are:
- Flour: Opt for high-quality bread flour; it has more protein and will give your bread the right structure. You can also experiment with whole wheat or rye for a twist.
- Water: Use filtered water at room temperature for yeast activation. The right hydration level can shape your bread’s crumb.
- Yeast: Both active dry yeast or instant yeast work well. Just make sure your yeast is fresh to ensure a good rise.
- Salt: This not only enhances flavor but also strengthens gluten structure. A good sea salt or kosher salt is perfect.
For more insights on choosing the right flour, check out King Arthur Baking.
Optional ingredients for added flavor
Now, while the basics create the foundation, there’s so much room for creativity! Adding a few optional ingredients can elevate your cake from good to spectacular:
- Olive Oil: A splash of high-quality olive oil adds richness and moisture.
- Herbs and Spices: Fresh herbs like rosemary or thyme can bring a lovely aroma. Don’t shy away from spices like crushed garlic or even sun-dried tomatoes for something different.
- Seeds and Nuts: Incorporate pumpkin seeds, walnuts, or sunflower seeds for crunch and nutrition.
Feel free to play around with these options to personalize your bread! The beauty of making your own artisan bread lies in the endless combinations and flavors you can experiment with.
Above all, enjoy the process!
Step-by-step Preparation of Artisan Bread
There’s something truly magical about baking your own artisan bread. The delicious aroma wafting through your kitchen and that satisfying crunch of a perfect crust can elevate any meal into something extraordinary. Let’s dive into the step-by-step preparation of this delightful artisan bread recipe. Whether you’re a novice or someone who’s baked before, these steps will guide you toward a loaf that will impress even the pickiest bread enthusiasts.
Gather your ingredients
The first step in your artisan bread journey is to gather all the necessary ingredients. Fresh, high-quality components make all the difference. Here’s what you’ll need:
- 4 cups of all-purpose flour (plus extra for dusting)
- 2 teaspoons of salt (preferably kosher)
- 1 teaspoon of instant yeast
- 2 cups of warm water (about 110°F/43°C)
Having everything in place not only makes the process smoother but also keeps the baking experience enjoyable and stress-free.
Mix the dry components
In a large mixing bowl, combine the flour, salt, and yeast. Using a whisk or a fork, make sure to mix them thoroughly so that the yeast is evenly distributed. This step is crucial because it helps the dough rise uniformly. When you mix the dry ingredients well, you’re setting the foundation for a beautifully airy loaf.
Combine with warm water
Now it’s time to bring everything together! Gradually pour in the warm water while stirring gently with a wooden spoon or spatula. You’ll want to mix until there are no dry pockets left. The dough will be quite sticky, but that’s perfectly fine! Stickiness is a hallmark of excellent artisan bread. Cover your bowl with a clean kitchen towel, and let’s give that dough some time to blossom.
Let the dough rise
This is where the magic really begins. Set your dough aside in a warm, cozy spot to rise for about 12 to 18 hours (yes, you read that right). This slow fermentation process not only develops flavor but also allows for gluten formation, resulting in that signature chewy texture we all love about artisan bread. You can also find tips on achieving the perfect rise in resources like King Arthur Baking.
Shape the loaf
After your dough has risen beautifully and become puffy, it’s time to shape it. Dust your work surface with a bit of flour, and gently turn the dough out onto it. With floured hands, gently stretch and fold the dough into a round shape. Remember, you want to handle it gently to preserve those lovely air bubbles that have formed during rising. Once shaped, place it seam-side down onto a piece of parchment paper.
Prepare for baking
Preheat your oven to 450°F (232°C) with a Dutch oven (or an oven-safe pot) inside. This creates an ideal baking environment, producing steam to help develop that glorious crust. While your oven heats up, cover the dough with a towel and let it rest for about 30 minutes. It will puff up a little more during this time, getting ready for the final stretch.
Bake to perfection
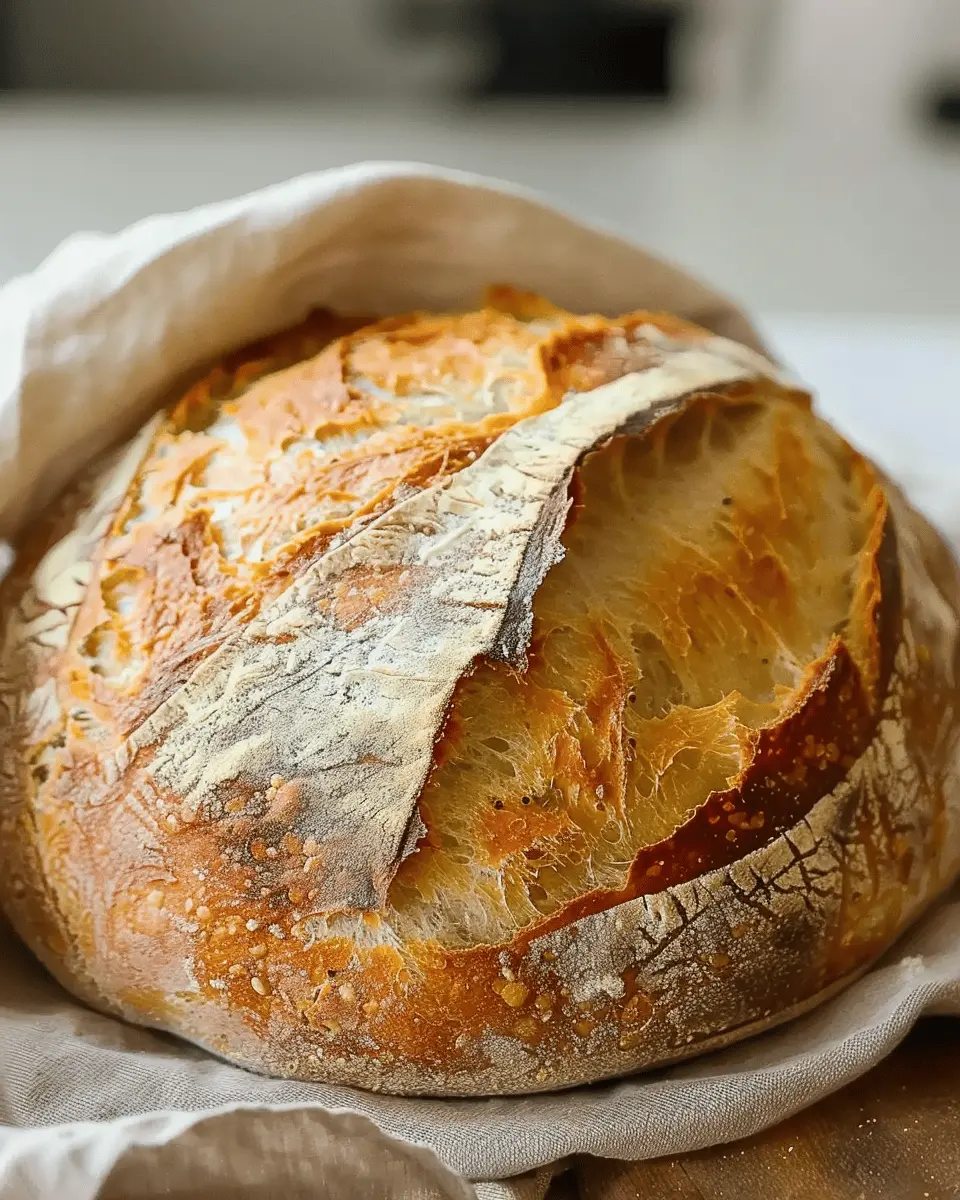
Carefully remove your heated Dutch oven from the oven and lift the parchment paper with the dough into the pot. Cover with the lid and return it to the oven. Bake for 30 minutes with the lid on to trap steam, then uncover and bake for an additional 15 minutes for that golden crust. Keep an eye on it! The crust should be deep brown and sound hollow when tapped. Once done, let it cool completely on a wire rack before slicing into that beautiful loaf.
Baking your own artisan bread is not just about the end product; it’s an enjoyable process filled with anticipation, love, and perhaps a little flour on your hands. And trust me, there’s nothing quite like indulging in a fresh slice of bread with your favorite spread or alongside a hearty soup. Enjoy your baking adventure!

Variations on Artisan Bread
Crafting the perfect loaf is just the beginning! Once you master the artisan bread recipe, the fun really starts with experimenting. Below are some delightful variations to consider.
Adding Herbs and Spices
Infuse your bread with lively flavors by incorporating dried herbs or spices into the dough. Think about:
- Rosemary and Sea Salt: This classic combination adds a fragrant aroma that pairs beautifully with olive oil for dipping.
- Italian Seasoning: A blend of oregano, basil, and thyme offers a Mediterranean twist that complements tomato-based dishes perfectly.
- Cinnamon: For a sweet touch, mix in ground cinnamon for breakfast or brunch delights.
This culinary creativity not only enhances flavor but can also elevate the overall baking experience!
Incorporating Nuts and Seeds
Adding nuts and seeds not only contributes texture but boosts nutritional value as well. Consider these options:
- Walnuts or Pecans: These add a lovely crunch and nutty flavor that can transform your bread into a gourmet experience.
- Flaxseeds or Chia Seeds: These tiny powerhouses are rich in omega-3 fatty acids and can add a delightful crunch.
- Sunflower Seeds: Mix these in for a bit of protein and a lovely visual appeal.
Not only do they enhance flavor, but they can transform your artisan bread recipe into a wholesome powerhouse.
Cheese and Olive Variations
For a savory treat, try incorporating cheese and olives into your dough. This combination creates an indulgent flavor profile that is hard to resist. Some favorites include:
- Feta and Kalamata Olives: Bright and salty, this combo brings Mediterranean vibes right to your table.
- Cheddar and Green Olives: Sharp cheddar balances well with the brininess of green olives, creating a delightful taste adventure.
Crafting these variations can make your artisan bread ideal for any occasion, from casual dinners to festive gatherings.
For more creativity, check out King Arthur Baking or America’s Test Kitchen for inspiration and tips on ingredient pairings!
Cooking Tips and Notes for Artisan Bread
Rest Time and Flavor Development
To elevate your artisan bread recipe, prioritize the rest time. Allowing your dough to rise slowly enhances its flavor and texture—think of it as a bonding experience for the ingredients! Ideally, give it a minimum of 12 hours in the fridge; this slow fermentation really develops those complex flavors. As the yeast works its magic, it creates a tangy depth that elevates each bite.
Tips for Achieving a Crusty Loaf
Craving that crusty exterior? Here’s what you can do:
- Use steam: Place a pan filled with water in the oven during preheating. The resulting steam will contribute to that beautiful crust.
- High hydration: A wetter dough results in more open crumb and crust. Don’t be afraid to get your hands a little sticky!
- Bake at high temperatures: Your oven should be blazing hot—around 450°F (232°C) works wonders.
Just remember, practice makes perfect! Embrace the process, and soon you’ll master your own artisan bread recipe. For more tips on baking techniques, check out this expert advice on baking different bread styles.
Serving Suggestions for Artisan Bread
Enjoying Bread with Different Spreads
One of the best things about your freshly baked artisan bread is the sheer joy of pairing it with a variety of spreads. Whether you’re enjoying a slice for breakfast or as a snack, consider these delicious options:
- Avocado Smash: Creamy avocado mixed with lime juice and salt makes for a zesty topping that’s simple and satisfying.
- Herbed Cream Cheese: Blend your favorite herbs into cream cheese for a rich, flavorful spread.
- Hummus: This protein-packed dip isn’t just for veggies—slather it on your bread for a tasty, healthy snack.
- Nut Butters: Satisfy your sweet tooth with peanut or almond butter, topped with banana slices for extra nutrition.
Not only do these combinations elevate your snack game, but they also add an exciting twist to your artisan bread recipe creations.
Creative Uses for Leftover Bread
If you find yourself with leftover slices of your artisan bread, don’t fret! There are countless ways to repurpose it creatively:
- Croutons: Toss bread cubes with olive oil and seasoning, then bake them until crispy—perfect for salads!
- Bread Pudding: Transform stale bread into a delightful dessert with a mix of eggs, milk, sugar, and spices.
- Panini: Use your leftover slices to whip up a delicious panini, layering in turkey bacon or chicken ham and cheese.
Finding innovative ways to use leftover bread not only reduces waste but also sparks your culinary creativity. For more tips on bread usage, consider checking out resources like BBC Good Food.
Time Breakdown for Artisan Bread
Preparation time
Getting started on your artisan bread recipe is a breeze! You’ll spend about 20-30 minutes gathering ingredients and mixing them together to create that perfect dough. It’s a great way to unwind after a stressful day—just think of it as a mini baking meditation.
Rising time
Now comes the fun part: letting that dough rise. You’ll want to give it a solid 2-3 hours (or even overnight) to develop those amazing flavors. This step can’t be rushed, but it’s also the perfect time to catch up on your favorite show or tackle that laundry pile.
Baking time
Finally, we have the baking part, which will take about 30-40 minutes. As the bread transforms in the oven, the delightful aroma will fill your kitchen, making it hard to resist peeking!
For more tips on baking homemade bread, check out expert insights on King Arthur Baking. Enjoy your baking journey!
Nutritional Facts for Artisan Bread
Calories per slice
When you indulge in a slice of artisan bread, you’re looking at about 70 to 80 calories per slice. This can vary based on the ingredients and methods used in your own artisan bread recipe.
Key nutritional components
Artisan bread isn’t just a treat; it also packs several key nutrients:
- Carbohydrates: Essential for energy, a slice typically offers around 15 grams.
- Protein: With about 2 grams per slice, it contributes to your daily intake.
- Vitamins & Minerals: Depending on the flour type, you might get iron, magnesium, and B vitamins.
Ultimately, it’s a wholesome choice for your meals. For more insights on baking and nutrition, feel free to explore resources like the Whole Grains Council or USDA Nutrition, which provide excellent information about ingredients and their health benefits. Remember, balance is key — enjoy your artisan bread alongside a variety of nutritious foods!
FAQs about Artisan Bread
How do I store homemade artisan bread?
Storing your delicious homemade artisan bread doesn’t have to be complicated. Ideally, you want to keep it fresh and avoid staleness. Here are some suggestions:
- Room Temperature: Place your bread in a paper bag or a bread box. Avoid plastic bags, as they trap moisture and can make the crust soft.
- Slicing: If you’ve sliced your bread, store it in a cloth bag or wrap it in a clean kitchen towel to maintain its crustiness.
This guide from the Bread Sift community offers further tips on storage.
Can I freeze artisan bread?
Absolutely! Freezing is a fantastic option if you’re not going to finish your artisan bread in a few days. Wrap your loaf tightly in plastic wrap, followed by aluminum foil to prevent freezer burn. When you’re ready to enjoy it again, simply let it thaw at room temperature. For optimal flavor, try to consume it within three months.
What’s the best way to reheat leftover bread?
Reheating artisan bread can breathe life back into it. Here’s a quick method:
- Oven Method: Preheat your oven to 350°F (175°C). Place the bread directly on the oven rack or on a baking sheet for about 10-15 minutes. This will refresh the crust and restore its delightful texture.
If you want to know more about the science behind bread reheating, check out this informative article on Cooking Science.
By following these storage and reheating tips, you’ll ensure that every slice of your homemade artisan bread is as delightful as the day you baked it!
Conclusion on Artisan Bread Recipe
The joy of baking and enjoying your creation
Baking your own bread, especially with this artisan bread recipe, is a rewarding experience. The delightful aroma filling your kitchen as the bread rises is hard to beat. And when that first warm slice comes out of the oven, slathered with butter, it’s simply divine.
Not only do you get to savor the fresh flavors, but you also gain a sense of accomplishment. Sharing your homemade bread with friends or family can spark joy in others, turning an everyday meal into a gourmet experience. So, roll up your sleeves, embrace the process, and enjoy every moment of your baking adventure! For more tips on enhancing your bread-making skills, check out resources like the Bread Bakers Guild of America.
PrintArtisan Bread Recipe: The Best Homemade Loaf You’ll Ever Bake

Learn how to make an exquisite artisan bread loaf that is crispy on the outside and soft on the inside. This recipe is perfect for any home baker looking to impress!
- Prep Time: 15 minutes
- Cook Time: 45 minutes
- Total Time: 12 hours 60 minutes
- Yield: 1 loaf 1x
- Category: Bread
- Method: Baking
- Cuisine: French
- Diet: Vegetarian
Ingredients
- 3 cups all-purpose flour
- 1 1/4 teaspoons salt
- 1/2 teaspoon instant yeast
- 1 1/2 cups warm water
Instructions
- In a large bowl, mix together flour, salt, and yeast.
- Add warm water and stir until a shaggy dough forms.
- Cover the bowl with plastic wrap and let it rise for 12-18 hours at room temperature.
- After rising, turn the dough out onto a floured surface and shape it into a ball.
- Place the dough on parchment paper and let it rest for 30 minutes.
- Preheat the oven to 450°F (232°C) with a Dutch oven inside.
- Carefully place the dough in the hot Dutch oven and cover with the lid.
- Bake for 30 minutes, then remove the lid and bake for an additional 15 minutes until golden brown.
- Let the bread cool on a wire rack before slicing.
Notes
- For a better flavor, consider using a mix of different flours.
- Let the dough rest longer for a chewier texture.
Nutrition
- Serving Size: 1 slice
- Calories: 200
- Sugar: 0.5 grams
- Sodium: 350 mg
- Fat: 0.5 grams
- Saturated Fat: 0 grams
- Unsaturated Fat: 0 grams
- Trans Fat: 0 grams
- Carbohydrates: 42 grams
- Fiber: 2 grams
- Protein: 6 grams
- Cholesterol: 0 mg
Keywords: Artisan Bread Recipe, Homemade Bread, Baking, Bread Recipe